About Me

My photo
I'm a retired primary school teacher, who started paper crafting in 2008, when I had a fancy to make my own Christmas cards. Since then, I have tried all sorts of techniques and styles - and I kind of like them all. I have been lucky enough to be on blog teams and large design teams and to do a bit of freelance demonstrating - and I love the challenge of working with different products. My crafting style is very varied - from junk journaling and art journaling, bookbinding and journal making, to quilting and patchwork - and of course I still make cards. This variety keeps me interested - and my crafty stash growing!! I'm always seeking inspiration for new projects.
Showing posts with label #ribbon. Show all posts

Tuesday, 9 June 2020

B is for .....

So, we're into the second week of our A or B theme challenge at Use Your Craft Stash. While you can use any technique, colour, card fold, product starting with A and/or B, I chose mostly A for my first inspiration last week, so have gone with the B's this week.

I have a Brown and Beige Baby themed, Bendy front card with a Bear and Buttons, and a Box with a Bow for it to go in. 


For the base of the card, I used Crafter's Companion A3 Double Sided Printed card - Elegance. And for the box, I used Decadance.  Beccy's Place has instructions for this in her Card Fold Tutorials section. I didn't use her measurements, as I wanted it larger. So I started with a piece 15" x 8", and scored at 5" and 10". The higher bendy part is about 4" in height, and the smaller one is about 2".


I cut the edges with Crafter's Companion Die'sire Edge'able Rococo die. I have it in two sizes - from being on the DT back then - and one of the sizes was exclusive to whichever channel they were on at that time - but I can' remember which.  Whatever, this is the smaller of the two dies.


To create the Bendy front, the two sides then fold over and fix using tabs and slots. I backed this with Brown card, and added a piece of card to create a stand at the back. 

The Baby themed topper with the Bear, is an old Kanban one. I added Brown Buttons, and a Bow.


For the Box, I used the Big Score and a sheet of the A3 printed card, this time from the Decadance pack, with more Brown card and some Beige Centura Pearl from the Pastels pack. I embossed this with Spellbinders double sided A4 embossing folder called Dainty Dots. I finished it with a bow.

Remember, you have until Sunday afternoon to share your creations with us at Use Your Craft Stash.

Take care, and stay safe,

Cxxx

Thursday, 9 April 2020

April 8th #2

Yesterday, I shared the first of my three cards for my April 8th family birthdays - my grandson's first birthday card!

Today I am sharing my niece's card- who was sweet 16. A very difficult time for her, as she is one of that group for whom her GCSE's will never be sat, and who will be hoping that the work she has done in her mocks and her coursework will get her the grades she wants. 


This is a 7x7 card using Hunkydory Pick and Mix - Girl Boss topper. It's pink - which is a colour she is rather partial too - and I like the message on there too.

The background is a combination of silver mirror card, some very old Create and Craft Textured Card (which isn't texture - just looks it), Crafter's Companion Matt Black card, and the pink is from Hunkydory's Floral Delight Card Block.

The letters are cut using Crafter's Companion Kinetic Alphabet, and the numbers using Diamond Press Block Alpha.  And as ever, it's all finished with ribbons and pearls.

Take care and stay safe,
Cxxxx

Monday, 6 April 2020

Easter at Use Your Craft Stash

As many crafters know, we all build up a huge stash of things as we race to get the newest dies, paints, stamps, inks etc etc And we're all bad at using up our stash.  So, over at Use Your Craft Stash, our aim is to get people to do just that - use your craft stash. We have no prizes on offer, but will be setting a weekly theme. And this week is Easter.

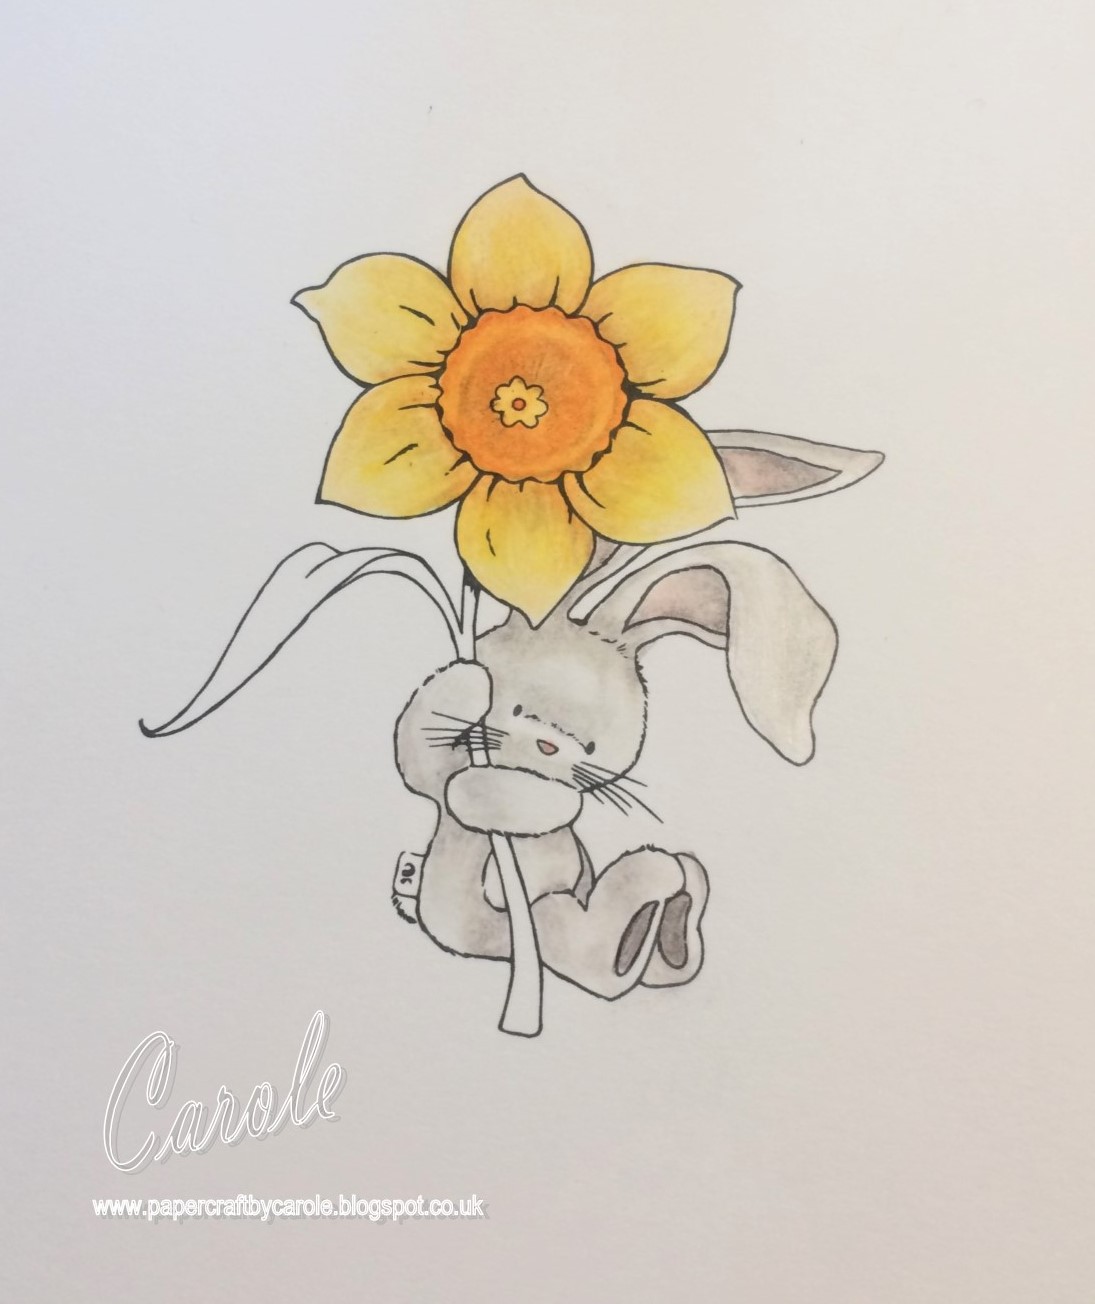
Now, I don't make Easter cards, so had to rack my brains to think what I had in my stash that would be suitable. And then it came to me - Bebunni!!  So, I had a look through and decided that Brighten My Day from Bebunni Floral would be a perfect choice. 

If you have seen my post from a few days ago, you will know I have a list of things in my stash that I want to get out and play with, and this seemed like the perfect time. So, instead of reaching for my watercolours, or my alcohol pens, I went for my Spectrum Noir ColourBlend Pencils.


As you can see, I have all the sets of pencils, along with the blending solution and paper stumps. I decided to restrict myself to just one set - the Essentials.

I started by colouring Bebunni, with White, Smoke, Taupe, Pewter, Black and Peach. 


And the Daffodil was coloured with Linen, Eggshell, Canary, Pumpkin, Nectarine and Pewter.


For the leaf I used Pistachio, Sage, Jade, Taupe and Black. I really like the blending solution to help get rid of the hard lines.


I decided that I needed to ground Bebunni, and used Smoke, Taupe, Pewter and Black. I then gathered all the papers - Core-dinations Brights Yellow and Green card, Papermania Yellow patterned paper (this has to be well over 10 years old), and I think the green stripe is also DoCrafts/Papermania. The Easter "words" card is another old one - and I really cannot remember where this came from.  I then dug out my XCut Egg des - these are the two smallest sizes, along with the paper strips that were for the Crafter's Companion Quilling dies.  


I also dug out some old embossing folders to add texture to the eggs. These are from Crafter's Companion - Verity Rose collection - Flutterby, Cupcake and Destiny.


And then I inked them with Mustard Seed and Lucky clover Distress Oxides.


The mats and layers were cut using another very old workhorse from my stash - Spellbinders Grand Scalloped Squares and Grand Squares, and also the Rectangles.


Even the ribbon has been around a while. You used to get packs with (I think) 4 ribbons wrapped around a piece of card. Not sure what make they were - but both of these were from packs like that. And of course, I used my trusty bow maker from Tattered Lace!! 

If you have craft stash to use, come and join us on FB at Use Your Craft Stash. You don't have to take part in the weekly themes if you don't want to, but get some inspiration and share your makes using your stash.  We look forward to seeing you.

In the meantime, take care and stay safe. 
Cxxx


Sunday, 29 March 2020

A little something to pass the time.


Today being Sunday, I decided to do something just for me and because I can. Back at Christmas time, I was buying a few bits and pieces and picked this up this little MDF Craft Room Door Hanger from The Wooden Shape Company. It measures roughly 19cm by 8.5cm. It's one of those things that has been rattling around in my stash, just waiting for me to have some time. I have done a step by step for anyone who is interested or really has nothing better to do - but feel free to skip it. This is the finished product:

This is how it came - the hanger and all the pieces. As you can see, I didn't use all the embellishments.
I then had a trawl around to see what I could decorate it with, and decided to go with some Imagination Crafts Rice Paper, left over from another project, and some Starlight Paints.


First step was to gesso both sides of the hanger before applying the rice paper using Imagination Crafts Decoupage Plus Satin.


I used lots of little scraps of leftover rice paper to cover the back in a similar way.


It took me ages to find a layout I liked - and even then didn't follow it completely when I assembled it. And I only used some of the colours of paint that I got out - and a couple of the Imagination Crafts Art Stamps.


I used the stamps with Distress Oxide, building up some layers with Antique Linen, Tea Dye and Vintage Photo.


More texture was added using Imagination Crafts Baby Bubbles Stencil and Shabby Chic Texture Paste in Linen. When this was dry, I went over with more Vintage Photo Distress Oxide.


The MDF embellishments were painted with Topaz, Antique Gold, Clotted Cream and Salmon Starlight paints and attached with hot glue. I finished it off - as I always seem to do - with some flat backed pearls and ribbon.


Stay safe and take care,
Cxxx

Saturday, 28 March 2020

A week ago...

A week ago, things began to change. I was scrambling to get to grips with how we were going to deal with setting school "work" from home, and watching the new avidly for any updates. A week on, and things are starting to settle into this new and bizarre reality. I have had good days and bad days. I have planned and prepared for my class out there in cyberspace. And I have tried - not always successfully - to switch off from work and from the news, having gone from watching all day every day, to switching it on now and then. I still don't feel in any sort of routine, and I had so many creative things planned for the week - but in the end, I didn't really feel like doing them.

And then, last Sunday was Mothering Sunday. Like a huge part of the population, neither of us could see our Mums, although I had popped in to see mine and drop things off on the Thursday.

Then in the whirlwind of the week, I forgot to share the cards I made. So, here they are.
This one was for my Mum, using Hunkdory Sending you Love - A Gift for you - topper and backing card. 
And this one was for my mother-in-law - using the same Hundory topper and card set.

Am hoping next week will settle more into a routine - and I will be able to do some more creative things.
Stay safe,
Cxxxx

Saturday, 21 March 2020

Something to celebrate in these uncertain times!!

Hello all.  Wow - so much has changed in the world since my last post. As a primary school teacher. the last week or so has been incredibly stressful and busy as we anticipated the shutdown and scrambled to sort physical resources and on-line access. On Friday at 3.15pm, I waved goodbye to my class (albeit only 2/3 were in) and I don't know if I will see them as a group in my classroom again. My colleagues are now prepping for the work that will still continue for those children who will still be coming into the building. Although it is no longer teaching per se, they will still be ensuring, as ever, the all-round well being of those children through the remote learning activities set by their individual teachers, through PE sessions and creative arts and DT. It makes me really sad that I won't be there, as I am classed in the vulnerable group. I held out until Friday, but finally admitted that it was time to socially distance. 

It makes me sad that I cannot be there physically, and I have shed a few tears at the prospect of being at home. It doesn't mean I am now on holiday, as I will be in daily contact with my class, setting and checking on-line work, trying to answer any questions, and remotely encouraging all the other creative and physically-active activities - and generally just encouraging them to be their best selves. This is an unprecedented time. 

We have encouraged parents to set a timetable where possible, to help the children keep in a routine. And I have had to heed that too. I have set aside time in the day for work, for exercise (running, cycling and dog walking while I can), gardening (my poor neglected garden will not know what has hit it) and of course for crafting. Hopefully I will be as disciplined as the children!!

Amongst all that chaos, it was my brother-in-law and sister-in-law's wedding anniversary - something positive and definitely worth celebrating. And thankfully the card was already made. So, here it is:


The topper and background card is Hunkydory - A Purrfect Anniversary, with silver mirror card and cream linen card. I used twill ribbon - not my usual as I'd say 95% of my ribbon stash is satin - and some little pearl hearts.

I am sure, now that I will have more time, I will be back sooner rather than later.
Take care of yourselves.
Cxxx

Friday, 2 November 2018

Paris Tag

So today's the day. Sue will be on your screens at 6pm for the launch of the Imagination Crafts Parisian Hochanda One Day Special. Today's share is an MDF tag.
For this, I used Rich Gold and Green Starlights with White Gesso to cover the tag, then added rice paper to the bottom left corner. I then masked off the scissors in the stencil, to leave the flowers, and used a combination of Gold and Malahit Relief Pastes. For the flowers, I rubbed French Lavender (Purple) Alchemy Wax over the relief paste. 

The little Paris and France circles are Magi Cutz covered with paint and wax. Lots of ribbon to finish off!! 

Don't forget to tune in to see Sue with lots more samples from the DT and loads of demos!

Take care,
Cxxx

Wednesday, 31 October 2018

Pack your case!!

... although you really won't get much in this little one!  I've got a thing for little boxes and cases - and have had this (and a few more like it) in my stash for a while. Friday is the day when Sue is back on your screens for the One Day Special on Hochanda at 6pm. 


The case itself needed a couple of layers of gesso before I could start, so the pattern didn't show through the paint and rice paper. Once that was dry, I covered the whole thing with Clotted Cream Starlight paints. Then most of it was covered with rice paper. 


I added a bit of texture with Malahit Relief Paste and Sage Shabby Chic Relief Paste through a stencil. Inca Gold and Peridot (Green) Alchemy wax were used sparingly to add more colour around the edges.

The tag is made from rice paper stuck onto card, and the little "buttons" are from the same piece of card, sprayed with red and cut with a punch.

I will be back tomorrow with another sample to share with you.

Cxxxx

Monday, 10 September 2018

Catching Up!

Afternoon. Am on a catch up to blog the backlog of cards I have not shared. So, I have a quick post today. 

This card is made from a Hunkydory topper and card collection - can't for the life of me remember the name at the minute. 

I've used a ribbon and sparkler for embellishment - and cut the letters using Crafter's Companion Essentials Only Word Alphabet dies. 

As I said, short and sweet today!!

Hopefully back fairly soon!!
Cxxx

Wednesday, 11 July 2018

Applique House

Here is the third in my set of sewn applique card. They are for a group of friends - seven in total - so four more will appear through the rest of the year!!

This one uses Crafter's Companion Cottage Applique die set, with lots of little scraps from my box. This was ironed onto a piece of calico, then quilted onto patterned and plain cotton. 
The frame is cut with Spellbinders Grand Scalloped Squares from a 12x12 sheet of DCWV Luxury Cardstock Stack. It's finished off with flat back pearls, paper roses, and printed and satin ribbon.
Cxxx 

Monday, 9 July 2018

A Pink Thank You

It's getting to the time of year when lots of people are looking to say thank you to teachers and other school staff. I was asked to make a couple of thank you cards - this is the first of them.

The base is a 7x7 scalloped card blank. I started by adding a piece of pink paper (I think from Kanban Love and Marriage paper pad), and softened it by adding a piece of the printed acetate from Sara Signature Flutterby collection. The outer pink frame (cut with Spellbinders Grand Squares) and the inner pink mat are from a very old Create and Craft Textured Card pad.  
The patterned papers are from pads bought at The Works. I then used Crafter's Companion 5x5 Country Garden Create a Card, to cut the decorative mat from Centura Pearl Snow White card. For the coloured parts, I re-cut the die with pink papers and fussy cut the pieces out. 

The sentiment is Crafter's Companion Classique Only Words, and the circle mount is the centre of Crafter's Companion 6x6 Aurora Create a Card die. I finished off with paper roses from The Range, and organza ribbon. 

Back soon (hopefully)
Cxxx

Sunday, 8 July 2018

50th Birthday Teacup

It was my lovely sister-in-law's 50th birthday recently, and I made her this card for the big day. The card is 8" x 8", and I used a topper and backing card from Create & Craft's - Birthday Celebrations Pack. Both were mounted onto red card for an extra "pop". The numbers are cut with Crafter's Companion 1" dies, and the name with Essentials Alphabet dies. 
I added a massive bow made of red organza and a co-ordinating pinky satin, topped with a Hobby House Sparkler. A very simple - but hopefully very effective - card.

Cxxx

Friday, 8 June 2018

Just Playing!

You may have noticed that the fabulous Imagination Crafts has joined Crafter's Companion with their amazing range of mixed media products. I've been a bit lacking in motivation recently, so it's taken me a while to have a play. 

I treated myself to a selection of goodies and for this project I used
Rice papers - 399 and 403
Magi-Bond Decoupage glue
Fabric decoupage glue
Starlight Paints - Heather, Clotted Cream,Topaz
Starlight Wax - Dark Orchid
Stencil - A4 - Crosshatch Elements
Magi-Cutz - Moroccan Trellis

I also used:
Crafter's Companion Watercolour card
Crafter's Companion Essentials Flowers for All Occasions 3 & 4
A mirror frame (bought loads of these years ago from Ikea)
Pebeo White Gesso
Wooden Butterflies, old buttons, ribbon, lace and pearls from my stash
Art Basics Heavy Body gel
I started by mixing Heather with white gesso and covering the complete frame. I then layed out the the rice papers to decide where they would go, and used water to help me tear them. 
 The rice paper was stuck down with Magi Bond decoupage glue.
Next, I stuck down a load of old buttons - the sort you wouldn't really want to use on anything special. Because I wanted them to stick really well, I used Heavy Body Gel - this stuff is amazing at sticking - but don't expect to ever remove it afterwards!!  
Dark Orchid Starlight wax mixed with a bit of water was sponged through the Crosshatch Elements stencil on the bottom left corner, and also over the buttons.
As I wanted quite pastel colours in the background, I mixed all three Starlight paints with with gesso.
The Clotted Cream mix was painted over the buttons. 
This was also dabbed over the other parts of the frame. The brush I was using is very old and clumpy and formed just the right kind of texture to dab on. I repeated this with some of the two colours. 
It was also used to base coat the two wooden butterflies. 
And to paint onto watercolour card to cut the flowers.  I also used Clotted Cream directly over the Topaz/gesso mix.
As ever, I managed to forget to photograph a lot of stages towards the end. So, I adhered a piece of white lace down the right hand side, and a piece of white organza ribbon across the bottom - both with the fabric decoupage glue. The gesso mix of paints was dabbed over them.
Next, pieces of the magi cut were covered with Dark Orchid Starlight Wax, and the butterflies were painted directly with the Starlights. I also dabbed the Starlights over the buttons. Dark Orchid was also used to edge the mirror. Finally the flowers were cut out, arranged and a small pearl placed in the centre.

There are a few things I would change - but overall I'm pretty happy for a first play with a big range of products.

Off to think about what to do next with all these goodies!! 
Cxxx