My place to share my makes, thoughts and general musings!! Mostly on crafting things - but occasionally on others!!
About Me
- Papercraft By Carole
- I'm a retired primary school teacher, who started paper crafting in 2008, when I had a fancy to make my own Christmas cards. Since then, I have tried all sorts of techniques and styles - and I kind of like them all. I have been lucky enough to be on blog teams and large design teams and to do a bit of freelance demonstrating - and I love the challenge of working with different products. My crafting style is very varied - from junk journaling and art journaling, bookbinding and journal making, to quilting and patchwork - and of course I still make cards. This variety keeps me interested - and my crafty stash growing!! I'm always seeking inspiration for new projects.
Showing posts with label #card. Show all posts
Wednesday, 22 July 2020
Sunday, 28 June 2020
E is for Extremely Tricky!
So, we're at the start of another 2 week challenge. And of course we are now at E/F. Same as before - you can make anything you want and use anything you want from your stash - providing at least one thing starts with an E or an F.
I like to take each letter individually and see what I can dig out from my stash, but I have to admit that E was a tricky letter for me. That said, I finally found my inspiration and managed to create my project for this week's inspiration - and Easel card with an Envelobox.
One of the things I found most tricky was trying to find colours. Originally, I was against using Emerald, but in the end I dug through my ink pad collection to see if I could find any inspiration for colours starting with E. And this is what I found - Emerald and Elderberry - Green and Purple - and I actually quite liked it. To be fair, I didn't use the ink pads (except for the sentiment) but it gave me a starting point.
I really wanted to use my e-Brush - an airbrush brought out by Craftwell about 5 years ago that works with Spectrum Noir pens. So I then had to colour match with my pens. I used JG3 (Emerald/Green) and LV2 (Elderberry/Purple). While I was looking through, I also picked out a couple of lighter colours to go with them - LG1 (a pale green) and CR2 (a light pink).
I had a piece of Mylar into which I cut a circle (easier to do if you have multimedia type dies). I used scrap paper to mask off the area around. I started with the LG1 and sprayed the bottom part of the circle, and then CR2 to do the top.
I then used a stencil over the top. This one is a mini stencil by Imagination Crafts that was in a Crafter's Inspiration Magazine. It's a double so I wasn't too worried about it being coloured by the ink. And to be fair, it will still work in the same way. So, over the top of the circle and stencil, I sprayed JG3 and LV2.
I also airbrushed a piece of card using the lighter colours to use as a background.
This topper was then used on an easel card. This was cut using Crafter's Companion Circle Easel card die set. The purple mat was Embossed with an old embossing folder from Crafter's Companion - Embossalcious Everday 6x6 Floral Frenzy. The green fancy mat was cut from Core'dinations using the dies that came with the Easel card set.
For the envelobox, I followed the instructions for a 5.5" x 5.5" card, so started with a 9" square, and scored at G and levels 1 and 2 on each side.
I decorated the top of the box in the same way as the easel card. I also added some extra mats and layers, and (although not a lot shows) I found a piece of card in my old demo stash that was inked in the right colours (quite by accident) - I am presuming it would have been with Spectrum Noir Harmony Water Reactive Ink in Plum Pudding and Holly Leaf. I used an Edge'able (Jardin) to cut in either side. it just peeks out below the circle.
So there it is - my Emerald and Elderberry circle Easel card with Envelobox, with E-Brushed topper, Embossing and Edge'ables - and a few pearls for Embellishments!!
Happy crafting!
Cxxx
Birthday Tea
It was my lovely sister-in-law's birthday a few days ago. I made her this card using Hunkydory Pick and Mix - A Tea-licious Day.
Behind the topper, I used Crafter's Companion 5x5 Tea Party Create a Card, cut in pale blye card. The other matts and layers are matt gold card, pink dots from Sara Signature Little Angel, and some pink Core'dinations. The flower is Sara Signature English Country Garden Lazy Daisy and Grand Floral.
I also dug out some Card Candy, and added a few pearls.
Will be back in the next couple of days with the new challenge over at Use Your Craft Stash.
Happy crafting!
Cxxxx
Labels:
#birthday,
#blue,
#cake,
#card,
#ccgemini,
#crafterscompanion,
#crafting,
#diecutting,
#flowers,
#papercraftbycarole,
#pink,
#roses,
#sarasignature,
#teatime
Monday, 25 May 2020
Anything Goes Again
We've decided to stick with the Anything Goes theme again this week. I did have a big plan about what I was going to do - and then I ran out of time. So, instead, I dug into my draw where I have kept all those bits I kept from past demo days (and just couldn't throw away), and made up a few cards.
These ones are made using Crafter's Companion Easel cards - in this case, the heart and the "square". I have also tried to use older dies that I had for making DT cards and probably never saw the light of day again - and in one case, a piece of card I didn't want to throw out.
So, the first heart is cut from Kraft Card, and I used some cream patterned card that I printed from a Crafter's Companion download (I think). If I recall correctly, the designs were originally made in A3 card, but then brought out in digital form. I used CC Stitched Edge Heart dies, with dies from Sara Signature Vintage Tea Party. The flowers are Hobby House and the sentiment I think is from Sara Signature Flutterby.
The second heart easel, is also cut from Kraft Card, with some Pink Core'dinations. The patterned overlay - cut with the decorative dies that come with the Easel Card - is CC Shabby Chic A3 card. The roses are the cheap ones you can get from The Range, and the little heart is embossed with a mini folder that came with the Diamond Press Starter Kit. I use the same sentiment as above.
The third heart easel is cut from black card, and the patterned is another CC download. The little hearts are CC Stitched Edge dies, and the shoe is from the Catitudes collection. The sentiment is CC Essentials Only Words.
And finally, the "square" easel is cut from Centura Pearl - but I managed to use it the wrong way round. The pink patterned card is Hunkydory - left from a topper set, and so is the actual topper. It's one of those Hunkydory ones where they print the design on the corner of the A4 cardstock. I rarely use them with the toppers - but then struggle to think how to use them!! I may have solved that one now. The butterflies come with the Easel Card die set, and I used a CC Stitche Square for the stopper.
I have loads more of these Easel card bases already cut - so will undoubtedly be making more in the not too distant future.
Take care, and stay safe,
Cxxxx
Labels:
#card,
#crafterscompanion,
#easelcard,
#hearts,
#papercraftbycarole,
#sarasignature,
#shoes
Wednesday, 20 May 2020
Baby Cards
Last week, I shared a baby card with you, that I had made for our new Great Nephew. Today, I have the other two cards - one was sent to my in-laws (Great Grandparents) and the other to my brother-in-law and sister-in-law (Grandparents).
This one is using Hunkdory Special Moments - Bundle of Joy topper. I used silver mirror card and the paper is from an old Kanban paper pad. The words are from Crafter's Companion Essentials Only Words collection.
This one is Kanban Bundle of Joy Topper, with co-ordinating paper from the same Kanban paper pad as above. More silver mirror card and the dies are from same collection.
Take care,
Cxxx
Labels:
#baby,
#babyboy,
#card,
#Hunkydory,
#kanban,
#newbaby,
#papercraftbycarole
Saturday, 16 May 2020
New Baby
Good morning!! Today I have the first of three baby cards to share. We have a new baby in the family - my nephew and his girlfriend have had a second baby boy. The first card is the one I sent to them. The other two, which I will share in the next couple of days, were for the grandparents and great grandparents.
So, Fletcher was born on Monday and I had to wait until the cards were received before posting.
This is an 8x8 card using Hunkydory Pick and Mix Little Effalumps. The background is made up of matt gold mirror card, the blue stars is from a Hunkydory card pack and the pale blue and yellow are from an old Kanban Pad. The white Centura Pearl is embossed with an old Crafter's Companion Embossalicious Everyday folder called Clouds. The balloons are cut with Crafter's Companion Essentials Balloons, and the clouds are from the Sara Signature Little Angel collection. Lettering is cut with Diamond Press Alpha letters. The little star decorations are the waste from cutting the balloons.
We are looking forward to the day we can meet our great nephew - and also see our grandchildren again. Hopefully in the not too distant future.
Take care and stay safe,
Cxxx
Thursday, 9 April 2020
April 8th #2
Yesterday, I shared the first of my three cards for my April 8th family birthdays - my grandson's first birthday card!
Today I am sharing my niece's card- who was sweet 16. A very difficult time for her, as she is one of that group for whom her GCSE's will never be sat, and who will be hoping that the work she has done in her mocks and her coursework will get her the grades she wants.
This is a 7x7 card using Hunkydory Pick and Mix - Girl Boss topper. It's pink - which is a colour she is rather partial too - and I like the message on there too.
The background is a combination of silver mirror card, some very old Create and Craft Textured Card (which isn't texture - just looks it), Crafter's Companion Matt Black card, and the pink is from Hunkydory's Floral Delight Card Block.
The letters are cut using Crafter's Companion Kinetic Alphabet, and the numbers using Diamond Press Block Alpha. And as ever, it's all finished with ribbons and pearls.
Take care and stay safe,
Cxxxx
Labels:
#believe,
#birthday,
#bows,
#card,
#dream,
#girlpower,
#Hunkydory,
#papercraftbycarole,
#pink,
#ribbon,
#sweetsixteen
Wednesday, 8 April 2020
A very different time.
In one of the strangest years ever, we have come to one of the busiest days for birthdays in my calendar - 3 of them. And I am going to share them over three posts - because I can - and because it gives me something to do. For all three of them, it's most definitely a different day to the one that they expected or had planned.
So my first share is for my grandson, Arlo, who is one today! We will not all be meeting up this weekend as originally planned for a big party - but that will happen once this is all over. We will hopefully get to "chat" later.
You may - or may not - know that there is a film with a dinosaur called Arlo - and Arlo has lots of dinosaur themed things. So his card had to be the same.
This is an 8x8 card base, and the topper is Hunkdory Pick and Mix - Dinotopia. I have used gold mirror card, yellow Core'dinations and the blue paper is from an old Papermania pack. To cut the shapes, I used Spellbinders Grand Squares, Grand Scalloped Squares and Circles, with some Crafter's Companion Stitched Edge circles.
The 1 is cut using a really old Crafter's Companion 3" number die, and the letters using Diamond Press Block Alpha. And it's all finished off with some twine and flat backed pearls.
Enjoy today the best you can - wherever you are, and whatever you are doing. Stay safe.
Cxxx
Labels:
#birthday,
#card,
#diamondpress,
#diecutting,
#dinosaur,
#firstbirthday,
#papercraftbycarole
Sunday, 16 February 2020
Bright and Cheerful Valentine
A couple of days late, but have finally got round to sharing the Valentine Card made for my other half. Was in a bold mood when I made it - hence the lime green with the red - very striking!! Not really sure what my OH made of it - he's always far too polite to say!!
The red card us from Papermill - always my absolute favourite red card and I always have a supply in my stash. The lime green is Centura Pearl Trends, and the patterned paper is from an old Works paper pad.
The decorative part is cut from an old Crafter's Companion A6 Create a Card die called Adore, the waste of which created the red heart embellishments, and the fancy red heart. The other large hearts are Crafter's Companion Stitched Edge heart dies, which the "I love you" and the string of green hearts are Diamond Press dies.
Take care,
Cxxx
Labels:
#card,
#centurapearl,
#crafterscompanion,
#hearts,
#love,
#papercraftbycarole,
#papermill,
#valentine
Saturday, 1 February 2020
Not a football in sight!!
After my last post about football card, I thought I should do something different for my stepson's birthday - even though he's partial to a bit of football.
It's not the best of photos as I was in a bit of a hurry when I took it, but I wanted to show that the topper extends off the top of the card. The topper is from Create and Craft's Birthday Celebrations - a really old "Get the Nation Crafting" set, with silver mirror card, and orange, black and a textured cream card from my stash. I used some little black pearls to emphasise the corners. It was all mounted onto a plain white 6x6 card blank.
Take care,
Cxxx
Labels:
#birthday,
#card,
#craft,
#papercraftbycarole
Sunday, 5 January 2020
The start of something ......
A new decade is upon us, and the last year of the previous one saw lots of change for me with my crafting. I stepped down from my Design Team and Demo work with Crafter's Companion, and took on more in the realms of the teaching day job. It all became very busy and I lost track of crafting just for me (and this blog), and I was just keeping on top of cards for family and friends.
That said, I thoroughly enjoyed making my Christmas Cards with my absolute favourite product from the past couple of years - my Foilpress. But that is all past and it's time to get back to where I was before DT's and Demonstrations made crafting feel harder and more pressurised that it needed to be.
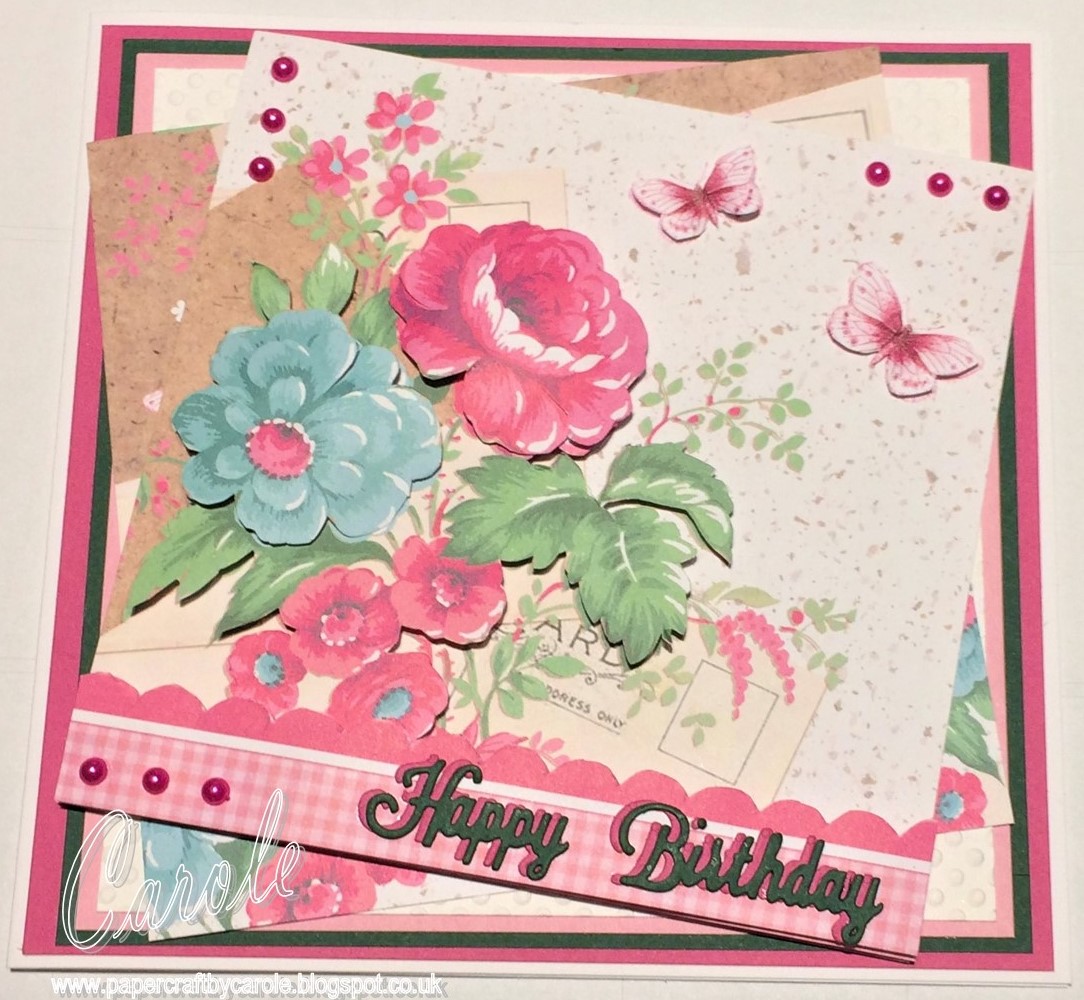
So, here is my first card of the year - and indeed the decade - a birthday card for my Mother-In-Law made using Hunkydory's Square Little Book of Florabunda. There's nothing quite like a bit of fussy cutting to create your own decoupage!!
I love the colours of this topper - and reflected that in the mats and layers - and the sentiment (Crafter's Companion Essentials Sentiment Dies).
Will hopefully not leave it a whole year this time, before posting again.
Take care,
Cxxxx
Labels:
#beautiful,
#birthday,
#card,
#ccgemini,
#craft,
#crafterscompanion,
#decoupage,
#flowers,
#fussycutting,
#Hunkydory
Thursday, 29 November 2018
Rice Paper Card
It's almost time to settle down to watch MJ on Hochanda with the launch of the Vintage Imagination Crafts One Day Special.
This is a really simple card made by gluing rice paper to card, matting and layering and and adding to a card blank. The beautiful rice papers do all the work!! All I added was some ribbon as a finishing touch.
Looking forward to seeing all the amazing samples and demos on the show!
Cxxxx
Labels:
#card,
#imaginationcrafts,
#papercraftbycarole,
#ricepaper
Saturday, 3 November 2018
Paris Cards
Two more show today for Sue with the gorgeous Parisian themed One Day Special - 1pm and 5pm. As well as canvases, I made a couple of cards for the shows.
For the first one, I used Starlights (mixed with a little glycerin) on my Gel Plate withe the Damask Stencil to create the two background pieces. On one of those pieces, I added rice paper. And the front topper was also made using rice paper. The white background at the very back is from running the stencil through the Gemini.
The second card is the one Sue showed on the first show on Friday - using Transparent paste through the stencil to create an embossed effect, then rubbing Alchemy Wax over the top.
I will hopefully be back before the last chance show with the rest of my samples.
Cxxx
Friday, 28 September 2018
Silver Wedding
Over the summer, it was my sister and brother-in-law's silver wedding anniversary! I made them this boxed card using Kanban Love and Marriage toppers.
Purple is my sister's colour (I know - I had to wear the bridesmaid's dress!) so most of the cards I make for her are purple. The base of the card is made using one of the Crafter's Companion A3 double sided card packs - can't remember what the name of the pack is though.
I used the Kanban topper (perfect colour), and cut circles of purple, lilac, white and silver card using my Spellbinders Grand Decorative Circles 1. All finished off with a big bow!
I also made a matching box!!
That's all for now. Back soon(ish).
Cxxx
Monday, 10 September 2018
Catching Up!
Afternoon. Am on a catch up to blog the backlog of cards I have not shared. So, I have a quick post today.
This card is made from a Hunkydory topper and card collection - can't for the life of me remember the name at the minute.
I've used a ribbon and sparkler for embellishment - and cut the letters using Crafter's Companion Essentials Only Word Alphabet dies.
As I said, short and sweet today!!
Hopefully back fairly soon!!
Cxxx
Cxxx
Labels:
#birthday,
#card,
#ccgemini,
#crafterscompanion,
#Hunkydory,
#papercraftbycarole,
#ribbon
Monday, 23 July 2018
A Little Blue
More playing with Imagination Crafts products - and an outing for my Gel Press - to create this blue card.
The list of the things I've used is:
Sheena White Stamping Card
Core'dinations Card - Blue
6x6 Gel Press
7x7 Mega Mount (Clarity Stamp)
Imagination Crafts:
Starlight Paints - Heather, Mint, Clotted Cream, Mediterranean Sky
Starlight Wax - Dark Orchid
Stencil - 6x6 - Grungy Ledger
Rice Paper 198
Art Stamps - Distress Set 1
Magi Bond Decoupage Glue
I started by painting Heather, Mint and Clotted Cream Starlight paints onto Sheena White Stamping Card.
I spritzed over with water and smoothed the paint out.
This was then run through my Gemini with the Grungy Ledger stencil,
And Dark Orchid Starlight Wax applied over the top with a bit of cut and dry.
The next step was to apply the paint to the gel plate. This time I used Mediterranean Sky instead of the Mint.
I got a bit carried away with the paint and put too much down, so had to work in off onto some paper.
Once I had it at a reasonable level, I then used the script stamp to remove the paint from the plate.
I then pressed this onto another piece of Stamping Card, and used it to cut a frame (as ever I managed to miss out a few steps!!
I edged the stencilled piece with more Dark Orchid wax, and mounted it onto the card (made from more stamping card.
I cut more frames out of stamping card and blue Core'dinations card, and mounted them over the stencilled piece.
The image is a cut from the Rice Paper, and attached to the card using Magi Bond decoupage glue. It was then mounted on blue and white card. The whole things was finished with a bow.
Back with more later.
Cxxx
Subscribe to:
Posts (Atom)