About Me

My photo
I'm a retired primary school teacher, who started paper crafting in 2008, when I had a fancy to make my own Christmas cards. Since then, I have tried all sorts of techniques and styles - and I kind of like them all. I have been lucky enough to be on blog teams and large design teams and to do a bit of freelance demonstrating - and I love the challenge of working with different products. My crafting style is very varied - from junk journaling and art journaling, bookbinding and journal making, to quilting and patchwork - and of course I still make cards. This variety keeps me interested - and my crafty stash growing!! I'm always seeking inspiration for new projects.

Monday 23 February 2015

Crafty Cardmakers and More - Challenge 133 - Stripes

Good afternoon. It's been a while since I posted - but I am hoping that things will settle down now, and I will get myself back into more of a routine.

Well, here's the Crafty Cardmaker's Challenge for the fortnight. Leslie has chosen the theme 'Stripes' - so, dig out all those great striped papers in your stash - and get crafting. 

I chose to use one of the Card Frames from Crafter's Companion Sugar and Spice CD, that had stripes as part of the frame. I teamed it up with two of the co-ordinating striped papers - also from the CD. All was printed onto CC Light Printable Card. I printed the frame twice so that I could cut the circular image out and give it some height.
I scored a piece of Papermill Ocean Blue card at 12cm using my Big Score board, and folded it to create my base card. I covered the large, inside part of the card with one of the papers, and the smaller front part with the other, having first wrapped some pink ribbon round them. A smaller piece of one of the papers, and the Card Frame were mounted onto more of the Ocean Blue card. 

I printed the card frame a second time, and then cut the circular image out to layer on top. The flowers are Dovecraft, and I topped them with buttons and pearls. A pink ribbon bow, and some more pearls finished the card. 

Don't forget to pop over to the Crafty Cardmaker's Blog to check out all the inspiration from the rest of the Design Team. 

Cxx

Saturday 14 February 2015

My Wonderful Valentine!!

My wonderful Valentine - otherwise know as my husband - has been an absolute gem over the past few weeks. I love him to bits - and this is the card I made for him.
It's 8x8, and I used the gorgeous blue/green papers from Do Crafts Valentine Collection download. The sentiments are from the Love Sentiments download.  I added a couple of wooden buttons and some hessian strips. Not much else to say really.

I would like to enter this into:
Deep Ocean Challenges - Love is All Around

Cxx

Wednesday 11 February 2015

A Bag of Thelwell Goodness!!

So, this is the last of my Thelwell samples. Quick and easy to make. 
I used a 12x12 piece of paper to make the bag. 
Fold the paper in half diagonally.
With the fold at the bottom, fold the bottom right corner up and across.
Do the same with the left.
 Now fold the top layer down.
Turn the bag over, and do the same on the other side.
Once I'd made the bag, I decorated the front and back with papers, and one of the shaped toppers, before punching the holes for the ribbon with my Big Bite.
So, there's one more day of the 4 Day Deal. Fiona will be back at 1pm and 5pm tomorrow. Be sure to tune in!!

Cxx

Trophy in a box!!

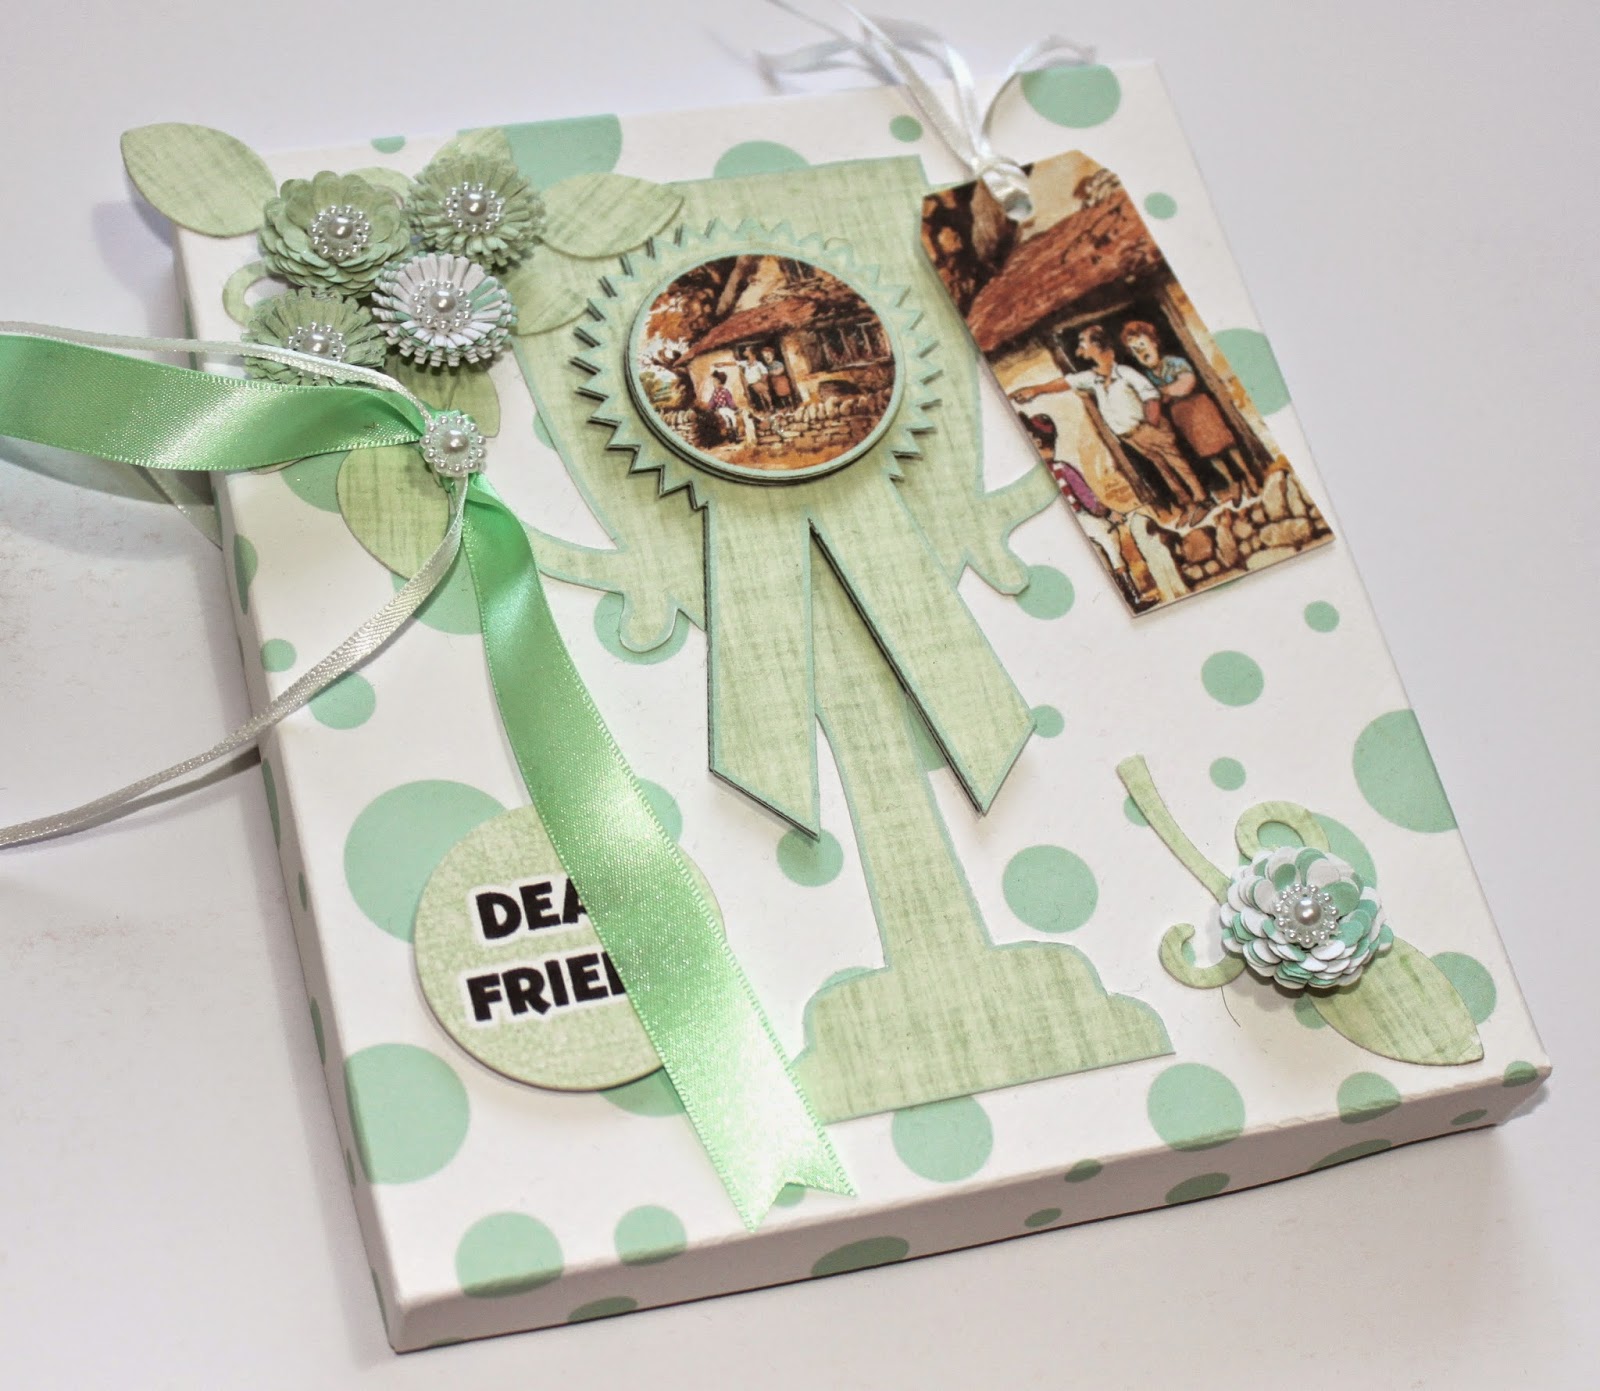
This morning I have another of the trophy cards to share with you. And for good measure, I made a matching box for this one!!
I used watercolour card to print the Trophy card on - and then printed one of the matching papers on the other side. I printed the front of the card several times so that I could decoupage it, and also use it on the box too.
To decorate and embellish the card, I used one of the tags and sentiments from the CD, and cut several flowers using Die'sire Small Fringed and Itsy Bitsy Quilling Flowers. I also used Leaf 2, with some ribbons and pearl flowers.

For the box, I measured the finished card, and added a little extra for wriggle room in the box, then 1/2" each of the four sides for the depth of the box. I printed the papers onto more Watercolour card and then cut two pieces according to the measurements.
This was scored with my Big Score board, and then decorated in a similar way to the card itself.

Don't forget to tune in at 11am to see Fiona with the fab 4 day deal!! I'll be back later with my last project.
Take care,
Cxxx


Tuesday 10 February 2015

Thelwell Teardrop Card

Well, what a day!! I don't know whether I an coming or going! But I found a little time to pop back again with a Thelwell card this time. I was looking for a different card shape or fold to do - and came across the idea of a Teardrop tri-fold card via Beccy's Place 
I printed one of the papers from the CD onto the back of a piece of Centura Pearl Hint of Gold, then printed Beccy's template onto paper, and used this to draw the shape onto the card. 
I then used more papers from the CD to matt and layer, with one of the Shaped Toppers and lots of Die'sire Essentials Flowers for All Occasions. The sentiment is also from the CD.
Will be back tomorrow with my last couple of samples. 
Cxxx

What day is it ...???

Yesterday my perpetual calendar sat on the front of the display table during the shows - and I loved the fact that it was open on the 9th February. Sara even showed it off during the second of the shows!!  This project was not originally one I planned to do. I had sorted all the others and had been contemplating a few ideas for my last. And then I had this bizarre dream about making a Thelwell perpetual calendar!! I never dream about crafting - or get inspiration that way - so this was a bit weird for me. And I just couldn't shake the idea off!! So, I decided to go with it. And this is the result!! 
For the base of the calendar I used a piece of A3 Centura Pearl Hint of Silver (29.7cm x 42cm). It needs to be scored at 2cm, 18cm, 34cm and 38cm . This folds to make the base (the 2cm piece is the place where you stick it together).

I used the Die'sire 3" number dies to cut the numbers - 1,2 and 3 for the first part, and 0 to 9 for the second. This was all cut from Centura Pearl Hint of Silver, printed with one of the papers from the CD. 
 Each number was edged with Frayed Burlap before being mounted on more Centura Pearl - each piece was 8.5 cm x 6.5 cm. This in turn was mounted onto a piece of the printed Centura Pearl  - 14.8 cm x 9 cm.

I created the month cards on the computer - each one is 11.5 cm x 7.5 cm. I printed off some different papers from the CD, then printed these cards over the top.  The pictures are from the Toppers section of the CD - and were added to the month cards. These, in turn were mounted onto more printed Centura Pearl.

Using the same papers as for the month cards, I cut lots of flowers using Die'sire Essential Flowers for All Occasions, and used these to decorate all of the pieces.

Finally, I used my Zutter Bind It All to punch the holes and bind each of the sets of cards to the top of the base. 

Am looking forward to seeing if it says the correct date on the shows today!! 

Cxxx

Monday 9 February 2015

Crafty Cardmakers and More - Challenge 132 - Love, Love, Love

Afternoon - and I'm back again. This time it's for a new challenge over at Crafty Cardmakers and More. And the theme for the fortnight is Love, Love, Love. Any love themed creations will be great - love, Valentine's, wedding, engagment, anniversary....
I have used two downloads from Do Crafts - Love Sentiments, and Valentine's Collection.
I kept it really simple using two of the Valentine's papers, along with Kraft card, in three blocks. The sentiment is mounted on more of one of the papers, and Kraft card. 

I used a piece of organza ribbon, and three layered burlap flowers with a little heart pearl. 

Remember, you have two weeks to get crafting, and add your project over at Crafty Cardmakers and More.  

Allsorts Challenge Blog - Love is All Around
Crafts 4 Eternity - #212 With Love
Aud Sentiments - Valentine or Love Sentiment

Cxxxx

Today's the day.....

.... for the launch of Crafter's Companion new Thelwell CDs and Papercrafting Kit. Today I have another card for you. This one is a twisted easel card made with one of the Card Companions from the CD printed onto Neenah Solar White card. I love the warm orange colours of this one.
I printed the papers onto Satin Finish Paper, and used CC Kraft card for some matting and layering. The butterflies are from one of the embellishment sheets, and I sprayed them with Pearl Diamond Spray and Sparkle.

Make sure to tune in over the next few days, to see all the great demos and fab samples from Sara, Leann, Fiona and the rest of the team.

I'll be back later with a new challenge from Crafty Cardmakers & More.
Cxxxx

Sunday 8 February 2015

Thelwell Trophy Card

This evening's Thelwell card is one of the special Trophy shaped cards from the CD. I printed out the card onto Centura Pearl Hint of Gold - and then a co-ordinating paper on the back. 
I then printed the card again, so that I could make the trophy more 3 dimensional. I added the bow and trophy from the Embellishments section - and the sentiment from the Sentiments section.

A sparkler and some ribbon completed the card!!

Will be back tomorrow with another sneak peek - and don't forget to tune in to Create and Craft at 8am in the morning to see the launch with Sara!!

Cxxx

Day 3 - Thelwell Sneak Peeks!

Good morning! Only one more day until Thelwell arrives on your screens!! This morning  I have a different kind of project to share. On the CD there is a selection of A4 decoupage sets. This is one of the six designs - and as much as I tried, the photo really doesn't show the depth that can be achieved. For each design there are 6 layers including the base. 
I have put the decoupage into a 12x12 box frame (from The Range), mounted onto CC Matt Black Card, and a piece of orange 12x12 Core'dinations card. To frame the picture, I cut more black card with Die'sire Lace Border 4, and wrapped it with light peach satin ribbon. 

The leaf decoration was cut with Die'sire Leaf 2. Some were embossed with Embossalicious 8x8 Rose Garden, and others with A4 Delicate Floral - all were sprayed with Pearl Diamond Spray and Sparkle. I added some directly onto the decoupage image, and others onto the corners of the frame - with a few buttons.

Still lots more ideas to come from the team - so keep your eyes peeled!!
Cxxx

Saturday 7 February 2015

Another Thelwell Sneak Peek

Morning. Thought I ought to share this one today as Sara kindly posted it on her Facebook page yesterday. 
This makes use of one of the Frame cards from CD1, which I have incorporated into a drawer box easel card. The instructions for making the drawer box part are all here on the Crafter's Companion website courtesy of the lovely Donna Attwood from the Design Team. The only difference is the measurements of the pieces of card - the scoring and construction is exactly as Donna has described.

You will need: 2 pieces of card 21.5cm x 20.25cm, and one piece 21cm x 23.75cm. You can get each of these from a piece of A4 - so you need 3 pieces of A4 card for the drawer box. I printed the paper to match the frame onto watercolour card, and then on the other side of each, I printed one of the Design Set papers. 
You will need another piece of card to make the easel and support the Frame card. I printed onto more watercolour card and cut a 13.5cm strip down the length of the card. This is wide enough for the frame, but not quite long enough - but as it is on top of the box, that can be hidden. Measure and score the strip of card at 16.25cm. That 16.25cm section then needs scoring roughly in half. This becomes the part that sticks on the back of the Frame and folds up/down. The other part is stuck to the top of the box, and is then covered by another piece of card to disguise the fact that it is too short!! 

I decorated the box and Frame card with more papers, embellishments and bows from the CD. The rosette I made by concertina folding a strip of Core'dinations card. 
I have to say that I really enjoyed making this - definitely made easier with the instructions from Donna!!

Keep your eyes peeled for more sneak peeks from the Design Team over the weekend.

Back soon,
Cxxx

Friday 6 February 2015

Sneak Peek - Thelwell - Launching Monday!!

Morning!! Some of you have already been doing some detective work, and realised there is a new Crafter's Companion CD launching on Monday 9th February on Create and Craft!! It will be the 4 Day Deal, and Sara, Leann and Fiona will all be on over the four days!! Sara is kicking everything off on Monday, then Leann will be there for the 9am and 4pm shows on Tuesday. Fiona then takes over for the rest of the shows!!
There are 2 CD's - one is the usual papercrafting CD that you expect from CC - with all the papers, toppers etc. The second CD has a great mix of digi stamps, Spectrum Noir Companions and Cartoons. And it's all using the artwork of incredible Norman Thelwell. There will also be a Papercrafting Kit. 

My first project to share is this 8x8 card. This is made using one of the Card Companions from the CD along with some of the matching and coordinating papers. 
The flower embellishments are a combination of Die'sire Quilling Dies Large and Small Fringed Flowers. These are sat on flowers from one of the Embellishment sheets, and circles cut with Essentials Circles dies. 

The base card is made from A3 Centura Pearl Hint of Silver. I used more of this card with Die'sire Decadence Create-a-Card, to cut out two corner embellishments for a little more interest. 

Keep your eyes peeled for more sneak peeks from the Design Team, but if you can't wait then pop over to the gallery or check out the Crafter's Companion page.

For those of you who pop in here regularly, you may have noticed my new look to the blog. I felt the need for a new, fresher look - hopefully you'll like it too. If you are a new visitor, then, if you would like to keep up to date with my ramblings, then please feel free to follow me. There are lots of ways you can do this - directly following the blog, using Bloglovin', Pinterest or by email - all of which you can do from the side bar here. I also have a Facebook page, if that's your preference too. It's called Papercraft By Carole

I'll be back over the next few days with more sneak peeks of my Thelwell projects!!
Take care,
Cxxx

Thursday 5 February 2015

The Mirror Crack'd - Mixed Media Challenge 6 - Journal Cover

Afternoon! It's challenge time again at The Mirror Crack'd. For our sixth challenge, we would like to see your mixed media journal or album cover. We are really excited to be sponsored by Woodware - who are offering £12 to spend with your favourite Woodware stockist - either in store or on line. Their design team are also playing along with this challenge, so be sure to check out their blog, along with all the inspiration on The Mirror Crack'd

I started with a blank Kraft covered album. The inside pages are black, along with the binder and ribbon tie. Can't remember where I got it from - could have been The Range or maybe Hobbycraft. 
I had already chosen a piece of 8x8 paper from the Craftwork Cards Cottage Garden pad, and used Pebeo Deco Matt Acrylic Paints to create colours that would tone in with that. I used Bermuda, Greengold, Antique Pink, Garnet Red, Burnt Umber, Grey and White - in various quantities and mixes.
Having used mini pegs to keep the ribbon out of the way, I painted the outside edge of the album with white, and then used a stencil brush to add the other colours. I did the same with a piece of canvas. This canvas comes on a roll from The Range.
The piece of canvas was then glued onto the front of the album cover. Having cut the paper to the size I wanted, I inked the edges of the paper with Weathered Wood DI. I also embossed the edge with Do Crafts Papermania Little Cake Shoppe Border Embossing Folder, and inked over the top.  
I then found this  gorgeous black bobbly trim in my stash and wrapped that round the bottom, before mounting it on black card and attaching to the album.
Using That Special Touch Polka Dot Stencil, I added silver texture paste (Lidl) in the corners areas. For the embellishments I used white UTEE with my Melt Pot and a Martha Stewart silicone mould (part of the Antique Keys pack), and then rubbed some Creative Expressions Patina gilding wax over the top. The black flourishes are Spellbinders Floral Flourish, and the leaves are Spellbinders Foliage. 
Lots of different ribbons and lace were tied through the ring binding, and I added Creative Expressions black pearl hat pins and some pink paper roses. The butterfly is a magnet - and is removable!! And because I was thinking this could be used for an art journal, I used this sentiment from Crafter's Companion Nature Sentimentals set. It sums up how I am sometimes with art stuff - and I need to do less thinking and planning - and just play and let it happen!!

I would like to enter this into:
City Crafter Challenge Blog - Lace and Roses
Deep Ocean Challenge Blog - Lace and Pearls

Take care
Cxxxx

Tuesday 3 February 2015

Crafter's Companion February Challenge - Sparkle!!

Hello - back again today with my inspiration for Crafter's Companion's February Challenge. This was just calling out for something from Scruffy Little Cat!
The image is from the CD, along with the papers and sentiment. I then raided my stash of glitter card. I haven't used glitter card for ages!! I love the sparkle - but have to admit to not liking the "mess" that you get with glitter in any form!! I also found several sparkly ribbons - gold, red and gold ric-rac. 

The flowers are made using one of the papers and the template from the CD, sprayed with CC Gold Spray and Sparkle. And three Hobby House Sparklers finish it off. I did paint her eyeshadow with Luminart Ice Silks, but it doesn't show up on the photo.

Remember that you don't need to use CC products to enter!! So dig out all your sparkly stuff and really go for it. You can enter your project on the FB page

Happy crafting!!
Cxxx