About Me

My photo
I'm a retired primary school teacher, who started paper crafting in 2008, when I had a fancy to make my own Christmas cards. Since then, I have tried all sorts of techniques and styles - and I kind of like them all. I have been lucky enough to be on blog teams and large design teams and to do a bit of freelance demonstrating - and I love the challenge of working with different products. My crafting style is very varied - from junk journaling and art journaling, bookbinding and journal making, to quilting and patchwork - and of course I still make cards. This variety keeps me interested - and my crafty stash growing!! I'm always seeking inspiration for new projects.
Showing posts with label #embossing. Show all posts

Sunday, 4 December 2022

Crafter's Companion - Botanical Garden Cut & Emboss Folder

Two projects today using the Botanical Garden Cut & Emboss folder from Crafter's Companion. One is a card, and the other a box.

For the card, I inked the folder with Bundled Sage Distress Oxide, and then cut it out from pale green card. The brick effect through the aperture is created using AALL & Create Stencil #38 Cracked Walls 2, and Antique Linen Distress Oxide onto cream card. The flowers are using Elizabeth Craft Designs 1638 Garden Notes Crocus.

For the aperture box, I used Centura Pearl Snow White Hint of Gold card, with Elizabeth Craft Designs 1590 Garden Notes Grecian Windflower.

Click on the image to see the video demo, and please feel free to follow me here on my blog, or on FaceBookTwitterInstagram or Pinterest.

And I now have a YouTube channel where I hope to add my video content to in the future. Would love it if you could subscribe. 

Thank you for popping by and happy crafting, 

Cxxxx

Sunday, 28 June 2020

E is for Extremely Tricky!

So, we're at the start of another 2 week challenge. And of course we are now at E/F. Same as before - you can make anything you want and use anything you want from your stash - providing at least one thing starts with an E or an F.

I like to take each letter individually and see what I can dig out from my stash, but I have to admit that E was a tricky letter for me. That said, I finally found my inspiration and managed to create my project for this week's inspiration - and Easel card with an Envelobox.


One of the things I found most tricky was trying to find colours. Originally, I was against using Emerald, but in the end I dug through my ink pad collection to see if I could find any inspiration for colours starting with E. And this is what I found - Emerald and Elderberry - Green and Purple - and I actually quite liked it. To be fair, I didn't use the ink pads (except for the sentiment) but it gave me a starting point.


I really wanted to use my e-Brush - an airbrush brought out by Craftwell about 5 years ago that works with Spectrum Noir pens. So I then had to colour match with my pens. I used JG3 (Emerald/Green) and LV2 (Elderberry/Purple). While I was looking through, I also picked out a couple of lighter colours to go with them - LG1 (a pale green) and CR2 (a light pink).

I had a piece of Mylar into which I cut a circle (easier to do if you have multimedia type dies). I used scrap paper to mask off the area around. I started with the LG1 and sprayed the bottom part of the circle, and then CR2 to do the top.


I then used a stencil over the top. This one is a mini stencil by Imagination Crafts that was in a Crafter's Inspiration Magazine. It's a double so I wasn't too worried about it being coloured by the ink. And to be fair, it will still work in the same way. So, over the top of the circle and stencil, I sprayed JG3 and LV2.


And the result was really quite lovely. 


I also airbrushed a piece of card using the lighter colours to use as a background.


This topper was then used on an easel card. This was cut using Crafter's Companion Circle Easel card die set. The purple mat was Embossed with an old embossing folder from Crafter's Companion - Embossalcious Everday 6x6 Floral Frenzy. The green fancy mat was cut from Core'dinations using the dies that came with the Easel card set.


For the envelobox, I followed the instructions for a 5.5" x 5.5" card, so started with a 9" square, and scored at G and levels 1 and 2 on each side.


I decorated the top of the box in the same way as the easel card. I also added some extra mats and layers, and (although not a lot shows) I found a piece of card in my old demo stash that was inked in the right colours (quite by accident) - I am presuming it would have been with Spectrum Noir Harmony Water Reactive Ink in Plum Pudding and Holly Leaf. I used an Edge'able (Jardin) to cut in either side. it just peeks out below the circle.


So there it is - my Emerald and Elderberry circle Easel card with Envelobox, with E-Brushed topper,  Embossing and Edge'ables - and a few pearls for Embellishments!!


Happy crafting!
Cxxx

Tuesday, 9 June 2020

B is for .....

So, we're into the second week of our A or B theme challenge at Use Your Craft Stash. While you can use any technique, colour, card fold, product starting with A and/or B, I chose mostly A for my first inspiration last week, so have gone with the B's this week.

I have a Brown and Beige Baby themed, Bendy front card with a Bear and Buttons, and a Box with a Bow for it to go in. 


For the base of the card, I used Crafter's Companion A3 Double Sided Printed card - Elegance. And for the box, I used Decadance.  Beccy's Place has instructions for this in her Card Fold Tutorials section. I didn't use her measurements, as I wanted it larger. So I started with a piece 15" x 8", and scored at 5" and 10". The higher bendy part is about 4" in height, and the smaller one is about 2".


I cut the edges with Crafter's Companion Die'sire Edge'able Rococo die. I have it in two sizes - from being on the DT back then - and one of the sizes was exclusive to whichever channel they were on at that time - but I can' remember which.  Whatever, this is the smaller of the two dies.


To create the Bendy front, the two sides then fold over and fix using tabs and slots. I backed this with Brown card, and added a piece of card to create a stand at the back. 

The Baby themed topper with the Bear, is an old Kanban one. I added Brown Buttons, and a Bow.


For the Box, I used the Big Score and a sheet of the A3 printed card, this time from the Decadance pack, with more Brown card and some Beige Centura Pearl from the Pastels pack. I embossed this with Spellbinders double sided A4 embossing folder called Dainty Dots. I finished it with a bow.

Remember, you have until Sunday afternoon to share your creations with us at Use Your Craft Stash.

Take care, and stay safe,

Cxxx

Saturday, 16 May 2020

New Baby

Good morning!! Today I have the first of three baby cards to share. We have a new baby in the family - my nephew and his girlfriend have had a second baby boy. The first card is the one I sent to them. The other two, which I will share in the next couple of days, were for the grandparents and great grandparents.


So, Fletcher was born on Monday and I had to wait until the cards were received before posting. 

This is an 8x8 card using Hunkydory Pick and Mix Little Effalumps.  The background is made up of matt gold mirror card, the blue stars is from a Hunkydory card pack and the pale blue and yellow are from an old Kanban Pad. The white Centura Pearl is embossed with an old Crafter's Companion Embossalicious Everyday folder called Clouds. The balloons are cut with Crafter's Companion Essentials Balloons, and the clouds are from the Sara Signature Little Angel collection.  Lettering is cut with Diamond Press Alpha letters. The little star decorations are the waste from cutting the balloons.

We are looking forward to the day we can meet our great nephew - and also see our grandchildren again. Hopefully in the not too distant future.

Take care and stay safe,
Cxxx

Monday, 4 May 2020

Circles and Furry Things

Morning. It's another new week. I've just kind of bumbled through this past one, with plenty of baking and tidying keeping me occupied in the not so nice weather.

And a new week means a new challenge over at Use Your Craft Stash. This week it's Furry Critters and/or circles. So any animal with fur or just use circles - whichever is easier. And of course, we would love to see any type of craft within the theme. 


I chose to use this Darkroom Door Eclectic Stamp called Sitting Dog. It was a gift from a good crafty friend of mine, and I'm ashamed to say that I've never used it before.  And to stamp it, I dug out another piece of stash which wasn't even out of the bag - this Crafter's Companion Stamping Mat.  I stamped the image using Gathered Twigs Distress Ink onto Neenah Classic Crest Card.


I marked out the circle I would be cutting out, so as I didn't bother colouring too big an area. I used water to move the Distresss Ink and added a little more detail by going back in with the ink on a brush. The tongue was coloured with Watermelon Aqua Pencil (Crafter's Companion) from the Florals tin.


The background was created using Charcoal Brown Aqua Pencil from the Essentials Tin, and Tumbled Glass Distress Ink. To keep with the theme, I mounted it onto circles of card - all from my scraps box.  The large piece of brown card at the back has an aperture cut into it (where you can see the white) and was embossed using Crafter's Companion Textures Distress 8x8 folder.


We look forward to seeing what you come up with this week. 

Take care,
Cxxx

Monday, 6 April 2020

Easter at Use Your Craft Stash

As many crafters know, we all build up a huge stash of things as we race to get the newest dies, paints, stamps, inks etc etc And we're all bad at using up our stash.  So, over at Use Your Craft Stash, our aim is to get people to do just that - use your craft stash. We have no prizes on offer, but will be setting a weekly theme. And this week is Easter.

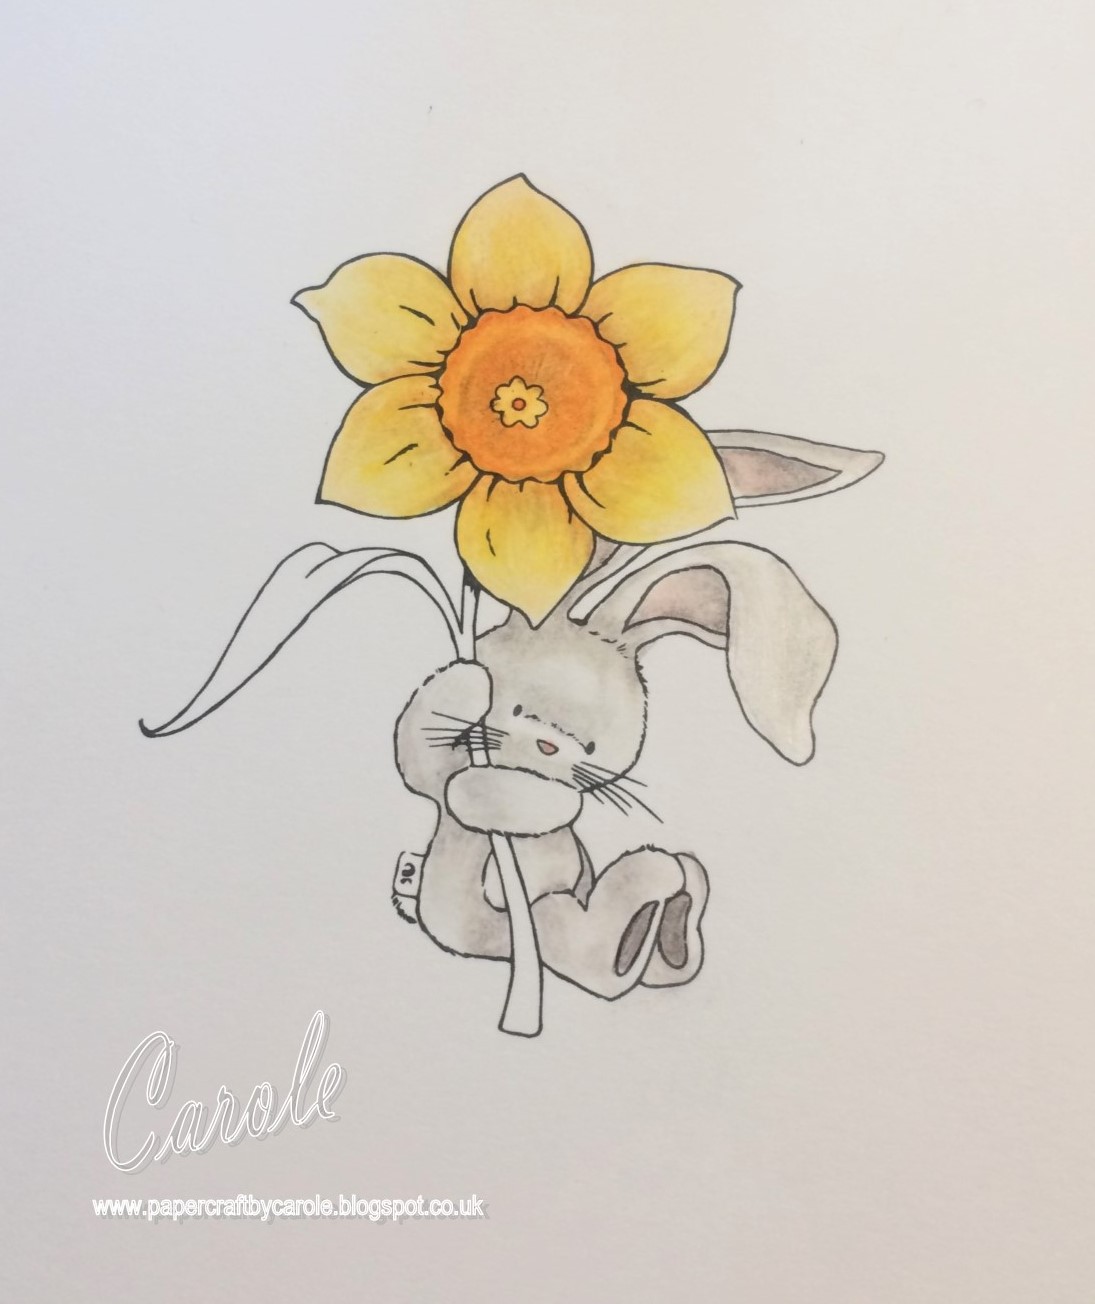
Now, I don't make Easter cards, so had to rack my brains to think what I had in my stash that would be suitable. And then it came to me - Bebunni!!  So, I had a look through and decided that Brighten My Day from Bebunni Floral would be a perfect choice. 

If you have seen my post from a few days ago, you will know I have a list of things in my stash that I want to get out and play with, and this seemed like the perfect time. So, instead of reaching for my watercolours, or my alcohol pens, I went for my Spectrum Noir ColourBlend Pencils.


As you can see, I have all the sets of pencils, along with the blending solution and paper stumps. I decided to restrict myself to just one set - the Essentials.

I started by colouring Bebunni, with White, Smoke, Taupe, Pewter, Black and Peach. 


And the Daffodil was coloured with Linen, Eggshell, Canary, Pumpkin, Nectarine and Pewter.


For the leaf I used Pistachio, Sage, Jade, Taupe and Black. I really like the blending solution to help get rid of the hard lines.


I decided that I needed to ground Bebunni, and used Smoke, Taupe, Pewter and Black. I then gathered all the papers - Core-dinations Brights Yellow and Green card, Papermania Yellow patterned paper (this has to be well over 10 years old), and I think the green stripe is also DoCrafts/Papermania. The Easter "words" card is another old one - and I really cannot remember where this came from.  I then dug out my XCut Egg des - these are the two smallest sizes, along with the paper strips that were for the Crafter's Companion Quilling dies.  


I also dug out some old embossing folders to add texture to the eggs. These are from Crafter's Companion - Verity Rose collection - Flutterby, Cupcake and Destiny.


And then I inked them with Mustard Seed and Lucky clover Distress Oxides.


The mats and layers were cut using another very old workhorse from my stash - Spellbinders Grand Scalloped Squares and Grand Squares, and also the Rectangles.


Even the ribbon has been around a while. You used to get packs with (I think) 4 ribbons wrapped around a piece of card. Not sure what make they were - but both of these were from packs like that. And of course, I used my trusty bow maker from Tattered Lace!! 

If you have craft stash to use, come and join us on FB at Use Your Craft Stash. You don't have to take part in the weekly themes if you don't want to, but get some inspiration and share your makes using your stash.  We look forward to seeing you.

In the meantime, take care and stay safe. 
Cxxx


Saturday, 15 December 2018

Believe Canvas

Well, blogging seems to go in fits and starts these days. The day job is keeping me really busy, but have the time, energy and inclination to blog!
This canvas combines Imagination Crafts goodies with one of the gorgeous Christmas 3D embossing folders from Crafter's Companion.

I started with White Gesso on the canvas and added Blue Starlights over it whilst wet. Next, I die cut some snowflakes - with a really old Crafter's Companion die set, and stuck those in the corners. I went over these with more gesso.

I then used Imagination Crafts Snoflake Swirl stencil firstly with Blue Starlight to creat a drop shadow, and then with Midnight Blue Sparkle Medium.

The after painting a piece of white card with Pearl Starlight Paint, I embossed it with Crafter's Companion Believe 3D Embossing Folder. Over the top of this, I applied Cobalt and Japanese Jade Alchemy Waxes. 

I finished off with a few little clear gems.
Cxxxx

Saturday, 3 November 2018

Paris Cards

Two more show today for Sue with the gorgeous Parisian themed One Day Special - 1pm and 5pm. As well as canvases, I made a couple of cards for the shows.
For the first one, I used Starlights (mixed with a little glycerin) on my Gel Plate withe the Damask Stencil to create the two background pieces. On one of those pieces, I added rice paper. And the front topper was also made using rice paper. The white background at the very back is from running the stencil through the Gemini.
The second card is the one Sue showed on the first show on Friday - using Transparent paste through the stencil to create an embossed effect, then rubbing Alchemy Wax over the top.

I will hopefully be back before the last chance show with the rest of my samples. 
Cxxx

Sunday, 22 April 2018

Birthday Card

This card was made for my stepson's girlfriend. The topper is Hunkydory Scrumptious Cakes - and the striped card came with the topper.
The white card is Centura Pearl Snow White Hint of Gold, embossed with Crafter's Companion A4 Delicate Floral embossing folder. The letters are cut with Crafter's Companion Essentials Alphabet.

Cxxx

Sunday, 29 October 2017

Framed Rose Picture

The 3D folders are back today with lots more inspiration from Debbie. And don't forget there are some amazing stamps and dies to go with them. 
I used one of the stamps from the Beautiful Bouquet stamp set coloured with Fired Brick and Walnut Stain Distress Ink, and cut out into a fram with the Parisian Mirror Die. In the background, I used the Textured Swirls embossing folder, with more of the Walnut Stain and Fired Brick. The butterfly is from the Take Flight die set, and the swirl at the bottom from the Floral Delight die set.

Debbie will be back with more shows at 4pm and 7pm today. 

Friday, 27 October 2017

Simple and Elegant

Did you catch the 10am show with the new 3D embossing folders, dies and stamps? During that show Matt really liked this sample - showing how simple you can keep it, yet how elegant and effective it can be. 
This is the French Lace folder embossed onto Sheena White Stamping Card. I then painted over the design with Old Paper and Spun Sugar Distress Inks. To highlight the embossed detail, I put some ink on my finger and went over the top. The lace edges are painted with Spectrum Noir Clear Overlay Glitter Sparkle Pen. I stamped the sentiment using Spanish Moss Versafine.  

Tune in again at 4pm for more inspiration.
Take care,
Cxxx

New 3D Folders

Morning. Not long until the launch of the gorgeous new 3D embossing folders, with complementing dies and stamps. 

Here's another of my makes - one of those mirror frames from Ikea, painted with a mix of Pebeo White Gesso and Pebeo Deco Matt Sepia. 
I used the Kraft card with the Textured Swirls embossing folder. The pieces near the corner were painted with the Gesso and Sepia mix before embossing, and the center one, it was dry brushed over after embossing. Both were inked over with Walnut Stain Distress Oxide - as was the frame itself. 

I also used the Rose Vine, Take Flight and Floral Delight Dies, adding texture to the base, and as embellishments over the top.

Enjoy the shows.
Cxxx

Thursday, 26 October 2017

New 3D Embossing Folders

Afternoon. It's been a busy few weeks with loads going on here with alterations to the house, demo days and of course working on samples for the fab new 3D embossing folders from Crafter's Companion - part of the 12th Birthday Celebrations.
There are 6 folders in the collection - with some great co-ordinating dies and stamps. On this gift bag I used the Rose Bouquet embossing folder, and coloured it with Antique Linen, Fired Brick and Frayed Burlap Distress Oxides. I used the Rose Vine die to cut the corner embellishments, and the Beautiful Bouquet Stamps set for the tag. 

Be sure to tune in to Hochanda tomorrow at 10am to see the launch.

Take care,
Cxxxx