About Me

My photo
I'm a retired primary school teacher, who started paper crafting in 2008, when I had a fancy to make my own Christmas cards. Since then, I have tried all sorts of techniques and styles - and I kind of like them all. I have been lucky enough to be on blog teams and large design teams and to do a bit of freelance demonstrating - and I love the challenge of working with different products. My crafting style is very varied - from junk journaling and art journaling, bookbinding and journal making, to quilting and patchwork - and of course I still make cards. This variety keeps me interested - and my crafty stash growing!! I'm always seeking inspiration for new projects.
Showing posts with label #easelcard. Show all posts

Sunday, 18 December 2022

Circle Easel Cards

I shared some Christmas Pudding cards a few days ago where I used some old circle easel cards. 

Here are three more cards that I used them to create. All of the background papers are from the 2019 Hunkydory Blockbuster magazine, teamed up with card from my stash, and Centura Pearl Snow White Hint of Silver. For all of them, the sentiment is Creative Expressions Festive Collection Deco Sentiments.

This first one uses some 12x12 blue card - possibly Bazzil, and Crafter's Companion Create-a-card Cut In Dies - Sparkling Bauble. These dies are really old - they launched in July 2016, and I remember creating samples for TV using them.

This one has some 6x6 Core'dinations Card, with the Ornate Snowflake Create-a-card Cut In dies.

And the final one uses some Crafter's Companion Linen card with the Shine Bright Create-a-card die set.

Please feel free to follow me here on my blog, or over on my other social media accounts. They are all under Papercraft By Carole (usually @pcbcarole).

InstagramFacebookPinterestTwitter - and my new YouTube channel where I would love it if you would subscribe. 

Thank you for popping by and happy crafting, 

Cxxxx

Wednesday, 14 December 2022

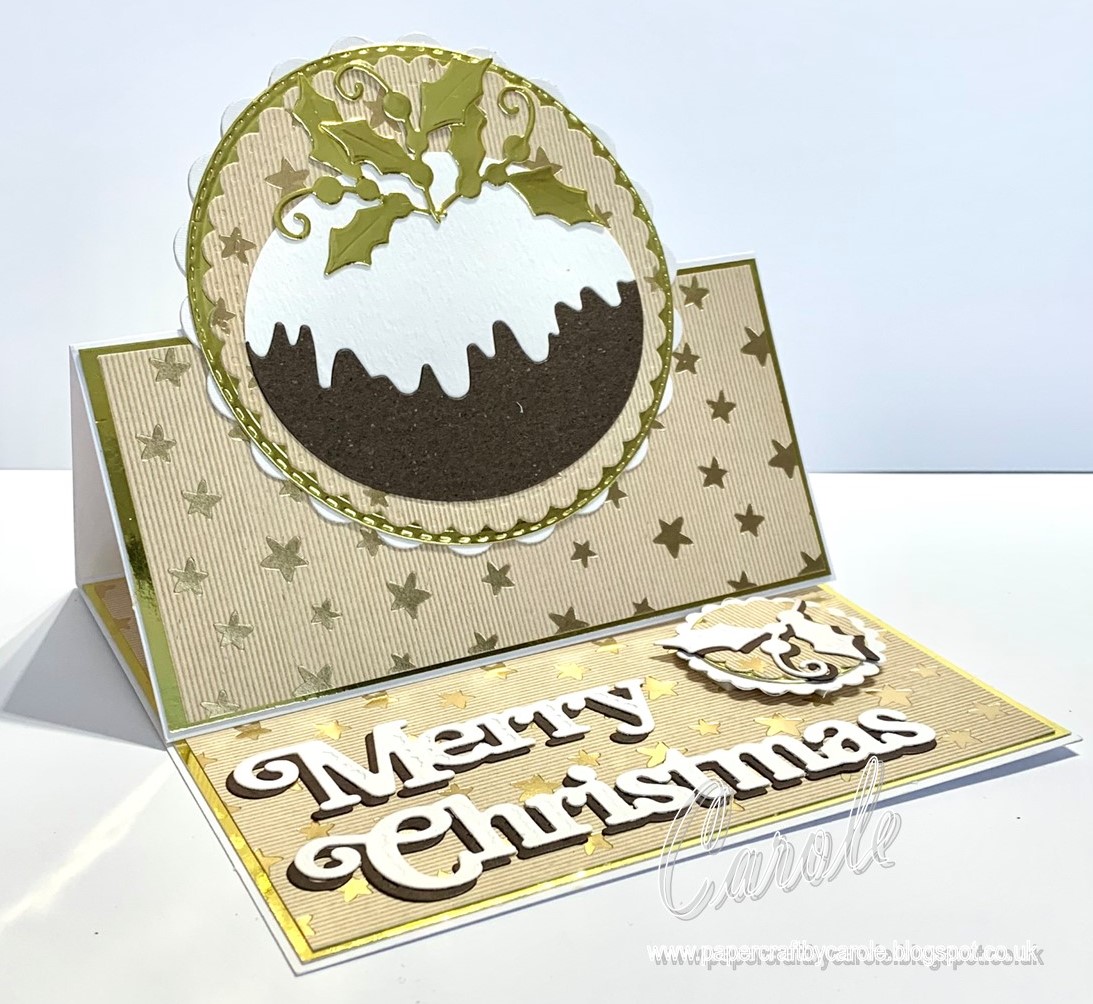
Christmas Pudding Easel Cards

Whilst most of my cards this year are using up Hunkydory topper stash, I did batch make a couple of other designs. When I was looking through what I had, I found a load of pre-cut circle easel topper cards (think they are Hunkydory). I also found these Christmas Pudding die cuts. Now, they have got to have been in my stash for a good 12 years!! Still, I have used them now - and I actually think they look really good. 

For all of them, I used a selection of circle dies for the topper and also for the stopper. These include Spellbinders Scalloped Circles, Crafter's Companion Stitched Edge Circles, Crafter's Companion Essentials Scalloped Circles and Julie Hickey Designs Dinky Circles.

All have gold mirror card as the back mount. And each uses cardstock from my old stash, most is Kanban, but I think the foiled holly one many have been Hunkydory. 

The little holly embellishment and the sentiment are Creative Expressions Festive Collection Deco Sentiments.


Please feel free to follow me here on my blog, or over on my other social media accounts. They are all under Papercraft By Carole (usually @pcbcarole):  InstagramFacebookPinterestTwitter - and my new YouTube channel where I would love it if you would subscribe. 

Thank you for popping by and happy crafting, 

Cxxxx

Thursday, 10 March 2022

Floral Easel Card

Hello! Today I have an easel card to share, using Julie Hickey Designs Floral Fantasy and Floral Foliage stamps. This would make a great card for Mother's Day. Click on the picture for the video link. I must apologise, as this one was a bit rushed on the live, and not totally completed. Hopefully, there is enough information both there and here combined.

The base of the card is made from a piece of purple card, 4 3/4" wide x length of A4. It is scored at 5 7/8" and 2 7/8". Before folding and burnishing, you need to cut a rectangular aperture. I used a 4" x 5" rectangle die - but you could cut it by hand if you need to. This is cut in the end with the score line. 


I also cut three frames - each uses a piece of card 5 7/8" x 4 3/4", and I used the same rectangle die.


For the acetate, I have two pieces - one is stuck onto a double sided adhesive sheet. I used Alcohol Inks to create a background in the bottom and left of each piece. The colours I used are: Purple Twilight, Watermelon and Pool.


For the flowers, I stamped three of each and used Squeezed Lemonade, Ripe Persimmon, Picked Raspberry and Seedless Preserves Distress Oxides to colour them in.


I stamped one of the images from the Floral Foliage set. These are almost impossible to cut out as a whole piece, but I cut it into individual leaves to tuck in amongst the flowers. I coloured these with Twisted Citron and Mowed Lawn Distress Inks. 


The sentiment stamp is from the Fantasy Floral set, and I cut the letters using Julie Hickey's Sweet Pea Alphabet set. You need to cut two sets, so that you can cover up the glue on the back. Do the same for whatever you stick the sentiment on.


The piece of acetate that is on double sided sticky, needs to be attached to a piece of white card. You can do this either before or after you stick the card to the base of the easel. One of the frames then goes over the top of this to hide the edges. The other two frames are used to sandwich the other piece of acetate, which is attached to the top of the easel.

I used glue gel to attach the flowers, and the glue doesn't really stand out against the alcohol ink, so doesn't need covering on the back. The leaves are tucked in amongst the flowers. The little hearts are part of the Alphabet set.


Thanks for popping by, and I hope I have given you a little inspiration. Feel free to follow me here on my blog, or on FaceBookTwitterInstagram or Pinterest. For all the videos, pop over to the Hixxy Studio YouTube channel to subscribe. And FB lives are streamed on both the YouTube channel and the Hixxy Crafts FB page. The main items I use can be found on the Hixxy Crafts website - have a look under the Hixxy Studio tab.

Happy crafting,

Cxxx

Sunday, 6 March 2022

Peacock Easel Card

Another peacock card today, using the Amy Design: Colourful Feathers - Peacock die set. This time, I used the complete die set along with Cosmic Shimmer Watercolour Inks. The angle of the photo makes it look oval, but it is definitely circular! 


To start with , I cut the pieces of the peacock in white stamping card. For the feathers, I used Golden Sunrise, Turqoise Cascade, Ray of Sunshine and Holly Green - which are all pearlescent - and Peacock Teal - which isn't.


I mixed the yellow and green for the central part (and also the separate small part that sits behind the body of the peacock), and mixed the turqoise and teal for other parts of the feathers. The orange I kept the same. The body of the peacock is painted turquoise.

To create the easel, I score a piece of A4 card in half and used a large circle die placed just off the edge of the fold. It opens out like this. Score one of the circles in half to create part of the easel, and stick another circle onto this.


I used several mats and layers - and used an embossing folder for a little texture. The it's all assembled with a blingy stopper! If you want to see the video demonstration, then click on the main photo for the start (last 12 minutes of the clip) - then click here for the finish (first 18 minutes of the clip). Apologies for this - we had a little glitch during the FB live, so, unfortunately, the video is in two parts. 

Thanks for popping by, and I hope I have given you a little inspiration. Feel free to follow me here on my blog, or on FaceBookTwitterInstagram or Pinterest. For all the videos, pop over to the Hixxy Studio YouTube channel to subscribe. And FB lives are streamed on both the YouTube channel and the Hixxy Crafts FB page. The main items I use can be found on the Hixxy Crafts website - have a look under the Hixxy Studio tab.

Happy crafting,

Cxxx

Monday, 3 May 2021

Sugar Buttons

 Have delved deep into my stash for this week's make - a heart easel card with a Sugar Buttons topper. The base card is cut from white stamping card with Crafter's Companion Heart Easel die set, as are the blue Core'dinations mats.

The topper is from a very old Kanban Sugar Fairies topper sheet. For the stopper, I used X Cut scalloped heart dies, and a heart from the topper sheet.
And that's it - no frills or frippery on this one today!

Don't forget to come and join us at Use Your Craft Stash on Facebook - we'd love to see your makes.

Happy crafting,

Cxxx

Tuesday, 20 October 2020

Pretty Hats

I have another hat easel card to share today. Instructions on construction can all be found here, so I will just share the pics. The flowers were handmade way back in April - details here. The papers are from an old Brenda Pinnick paper pad.


I also had a go at making a semi-naked cake to go with it. To me, it was a only a partial success as I felt the top was too flat and had too much on it. That said, my friend absolutely loved it.


That's it for today. Happy crafting!
Cxxxx

Wednesday, 1 July 2020

Hats - Go Large!

There's always fads and fashions and trends in any area - and one of the most recent in the craft world was the hat easel. I resisted for a while, but then decided to have a go myself. I found some instructions on Positively Papercraft - with two different posts sharing instructions and videos for construction and for two different hat boxes.

I decided that I wanted to go much bigger than this, so I have adapted the sizes  - but pretty much followed the assembly. I didn't bother with the fancy boxes - but did make a box to deliver it in - more details later. I really relied heavily on my Spellbinders circle and scalloped circle dies - both the ordinary set and the Grand set - which I have had in my stash for a very long time. The measurements that I mention are in relation to these dies. 


To make this (at this size - which is just over 7"), you will need 2 sheets of A3 card for the easel base. I used Centura Pearl card from the Pastels pack. I used one sheet and cut a long strip off - 15 1/2" x 2 1/2" - you will need this later. The rest of this piece of card was scored and folded at 8 1/4" and then the base was cut with the largest Spellbinder circle die that I have - 7 1/4".  Once cut,  one side of the easel was cored a 3 5/8".

Please note: some of the photos are of another hat easel I made as I didn't take many photos while making this.


The strip that was cut needs to be scored at 1/2" and 2", and then notches cut into it as shown below.


This will form the sides of the hat, and is attached to a circle of 4 3/4" diameter as shown below.


It's then all about assembly. I started by decorating the hat top as I found this easier to do before sticking in onto the large circle. I used strips of patterned paper 1 1/4" wide to go around the hat top, and then went round with ribbon. I added a 4 1/4" circle in a patterned paper to the very top


You need another 7 1/4" circle for the top of the easel card - which serves as the brim of the hat. On this one I added a 7 3/8" scalloped circle in green, a 6 1/4" circle in orange, a 5 3/4" circle in the patterned paper, and a 5 1/8" scalloped circle in the original Centura Pearl. Onto this, you glue the hat top.

For the easel base, I used the same size circles and scallops as above, but added another green 4 5/8" scalloped circle. In other ones I have made, I have added another 3 3/4" circle on the top of that - but didn't do that here.


For the sentiment/stopper, I used a green 2 3/4" circle, an orange 2 5/8" scalloped circle and the sentiment was stamped onto a 2 3/8" circle of the Centura Pearl. For other ones I have made, I started with a 3 1/8" scalloped circle of the original card I made the base from.  The sentiment was stamped in Stazon - Cactus Green and sentiment is from an old Crafter's Companion Sentimentals stamp set.


I then decorated the hat brim with bow in the same ribbon as I used before, and then some flowers I made using Flower Forming foam (see my post here).


I did make a very simple box for this. I used two 12x12 sheets of Core'dinations card and used my Big Score to score at 2 1/4" all the way round. I have made 5 of these in total, and I will share the other designs as and when I give them to the recipients throughout the year - one is not until December - but the next one is only a few weeks away. 

Happy crafting!
Cxxxx

Sunday, 28 June 2020

E is for Extremely Tricky!

So, we're at the start of another 2 week challenge. And of course we are now at E/F. Same as before - you can make anything you want and use anything you want from your stash - providing at least one thing starts with an E or an F.

I like to take each letter individually and see what I can dig out from my stash, but I have to admit that E was a tricky letter for me. That said, I finally found my inspiration and managed to create my project for this week's inspiration - and Easel card with an Envelobox.


One of the things I found most tricky was trying to find colours. Originally, I was against using Emerald, but in the end I dug through my ink pad collection to see if I could find any inspiration for colours starting with E. And this is what I found - Emerald and Elderberry - Green and Purple - and I actually quite liked it. To be fair, I didn't use the ink pads (except for the sentiment) but it gave me a starting point.


I really wanted to use my e-Brush - an airbrush brought out by Craftwell about 5 years ago that works with Spectrum Noir pens. So I then had to colour match with my pens. I used JG3 (Emerald/Green) and LV2 (Elderberry/Purple). While I was looking through, I also picked out a couple of lighter colours to go with them - LG1 (a pale green) and CR2 (a light pink).

I had a piece of Mylar into which I cut a circle (easier to do if you have multimedia type dies). I used scrap paper to mask off the area around. I started with the LG1 and sprayed the bottom part of the circle, and then CR2 to do the top.


I then used a stencil over the top. This one is a mini stencil by Imagination Crafts that was in a Crafter's Inspiration Magazine. It's a double so I wasn't too worried about it being coloured by the ink. And to be fair, it will still work in the same way. So, over the top of the circle and stencil, I sprayed JG3 and LV2.


And the result was really quite lovely. 


I also airbrushed a piece of card using the lighter colours to use as a background.


This topper was then used on an easel card. This was cut using Crafter's Companion Circle Easel card die set. The purple mat was Embossed with an old embossing folder from Crafter's Companion - Embossalcious Everday 6x6 Floral Frenzy. The green fancy mat was cut from Core'dinations using the dies that came with the Easel card set.


For the envelobox, I followed the instructions for a 5.5" x 5.5" card, so started with a 9" square, and scored at G and levels 1 and 2 on each side.


I decorated the top of the box in the same way as the easel card. I also added some extra mats and layers, and (although not a lot shows) I found a piece of card in my old demo stash that was inked in the right colours (quite by accident) - I am presuming it would have been with Spectrum Noir Harmony Water Reactive Ink in Plum Pudding and Holly Leaf. I used an Edge'able (Jardin) to cut in either side. it just peeks out below the circle.


So there it is - my Emerald and Elderberry circle Easel card with Envelobox, with E-Brushed topper,  Embossing and Edge'ables - and a few pearls for Embellishments!!


Happy crafting!
Cxxx