About Me

My photo
I'm a retired primary school teacher, who started paper crafting in 2008, when I had a fancy to make my own Christmas cards. Since then, I have tried all sorts of techniques and styles - and I kind of like them all. I have been lucky enough to be on blog teams and large design teams and to do a bit of freelance demonstrating - and I love the challenge of working with different products. My crafting style is very varied - from junk journaling and art journaling, bookbinding and journal making, to quilting and patchwork - and of course I still make cards. This variety keeps me interested - and my crafty stash growing!! I'm always seeking inspiration for new projects.
Showing posts with label #sparkle. Show all posts

Tuesday, 20 December 2022

Hunkydory - A Sparkling Season

It's Christmas Eve!! And that means, you'll be glad to hear, that I am nearly done with sharing my Christmas cards. This is a 2020 Hunkydory set - from the Christmas Sparkle Collection. The topper set is called A Sparkling Season.  Don't remember ordering this - so possibly was in one of those lucky dip boxes.

That said, I love the colours - the dark purples and teals. They don't come across so well on the pics but they are so lovely.

Both cards use the A4 printed cardstock cut down to 6x6, along with the circular toppers. I do like to split the layers on these.  


Please feel free to follow me here on my blog, or over on my other social media accounts. They are all under Papercraft By Carole (usually @pcbcarole).

InstagramFacebookPinterestTwitter - and my new YouTube channel where I would love it if you would subscribe. 

Thank you for popping by and happy crafting, 

Cxxxx

Monday, 9 August 2021

Love the life you have ....

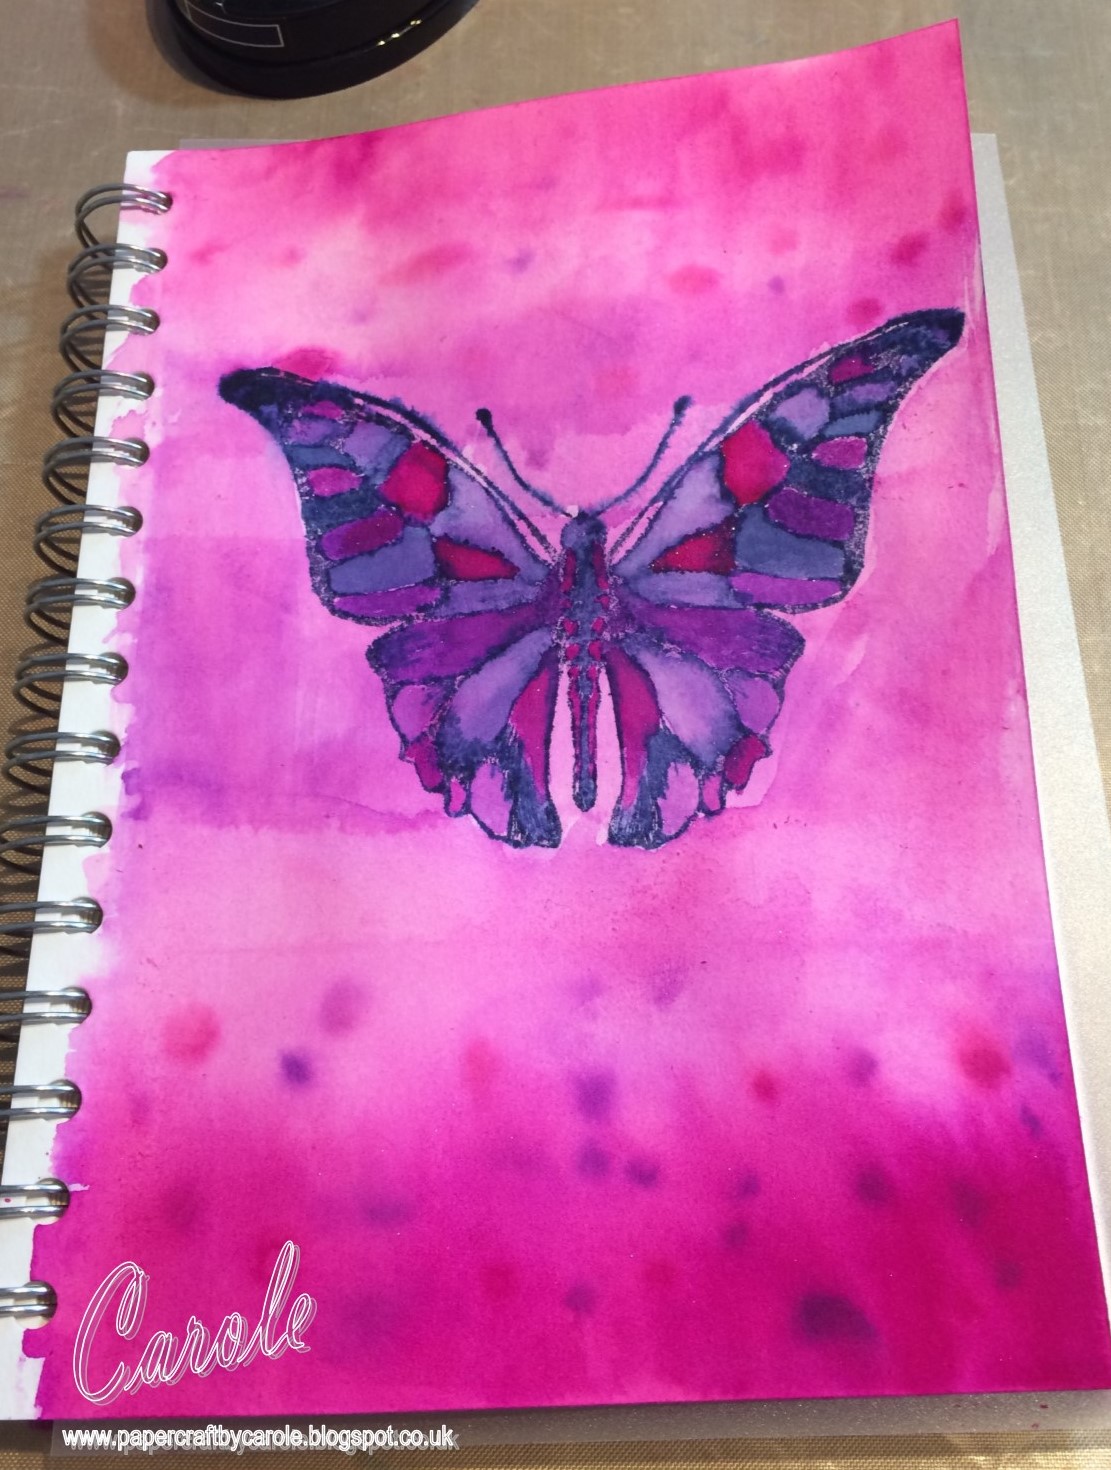
It's taken a few days to put this one together. I did the background a couple of days ago, with Kitsch Flamingo and Broken China Distress Oxides, sprayed with Imagination Crafts Fuchsia Mixed Media and Silver Shake and Gilt.

I then found the text in my box of random things, and had already planned on using the Creative Expressions Stamps to Die For - Butterfly Meadow. However, for the third time, I have not managed to get a good impression in this art journal, leaving me having to try to sharpen it up with a fine-liner. Am going to have a think about this for the next one. Will probably stamp it separately on my stamping platform and glue in. 

To even up the blackness, I used Black Soot Distress Oxide with a few different Imagination Crafts Texture stamps to create a black edging all round.

Happy crafting,

Cxxx

Friday, 9 April 2021

Born to Sparkle

My niece had her second lockdown birthday - 17 this time round. She couldn't take her GCSE's last year because of the pandemic, and missed out on her chance to sparkle at her prom.  She's now studying dance and drama at college, and seems none the worse for wear.

For her card, I used Hunkydory Rose Quartz Dreams - Born to Sparkle topper and card. It was a bit tricky to photograph due to its pearly finish, but looks very pretty in real life. I used a really old DL card blank, and silver glitter card from a CC Luxury cardstock pack. 

Don't forget to join us at Use Your Craft Stash on FB, where we help encourage each other to use up that stash! 

Happy crafting.

Cxxx

Monday, 5 April 2021

Anniversary Bubbles

 A recent card for my brother- and sister-in-law's Anniversary.


These are from a distant past Kanban collection called Love and Marriage. The die cut topper matches beautifully with the Kraft effect paper from the co-ordinating paper pad.  

The purple paper is from a 1212 pad from Crafter's Companion called "Spring is in the Air", and I added a little silver glitter card from a Crafter's Companion Luxury Card pack.

Don't forget to join us at Use Your Craft Stash on Facebook - where we try to encourage each other to do just that - use that stash!! 

Happy Crafting,

Cxxx

Wednesday, 23 December 2020

The last of the Christmas Cards

These are the final two cards to share from my Christmas makes. They were batch made for my groups of friends, using my lovely new Tim Holtz Stamping Platform.

The first is a Crafter's Companion stamp called Floral Festivities. I stamped it with Crafter's Companion Harmony Waterproof Ink in Pebble, and used the Spectrum Noir Crystal Clear Sparkle pen to "colour" it in. The base card is Centura Pearl Hint of Silver, and I used some gunmetal grey pearl card from my stash. 


I also embossed some plain white card with a very old A4 Crafter's Companion Snowflake folder, to create a layer with texture.

The other card uses the same materials, but the stamp is Papermania - Stockings.


I hope that all of you have a peaceful day, however you are spending it.
Happy Christmas,
Cxxx

Sunday, 19 April 2020

Rainbows!

This week's theme at Use Your Craft Stash is Rainbows - quite apt at the moment. This is my finished piece.


Wasn't sure what I was going to do at first, but then I thought about my Brushos that have only ever had one outing in all the time I've had them. 


I did have a rootle around on the Internet, and decided to start with a rainbow across a piece of watercolour card.  I got another piece of card and marked it into 6 sections - one for each of the colours. I sprinkled each colour at a time and sprayed it. 


Once it was dry, I stuck it onto a piece of greyboard to flatten it out. I then stamped around the edge with Imagination Crafts Art Stamps (from various Texture sets) and Smokey Gray Versafine.


I wanted to mount this onto a canvas, so decided to paint that with a rainbow too. I marked out the sections diagonally and used Imagination Crafts Starlight Paints.


I felt it was a bit too bright for what I wanted, so I went over the whole thing with a thin layer of Gesso, and then stamped around the edges as before.


Originally, I was going to stamp a sentiment onto the watercolour card, but felt it was too large for what I wanted, so I created another, smaller piece. This time, I put all the colours on in one go and sprayed over the whole piece.


This was stuck onto more greyboard, and the edges stamped as before. The sentiment is from Visible Image - Stay Strong, stamped with Onyx Black Versafine.


Both of the Brusho pieces were mounted on black card, and all three were edged with Onyx Black Versafine before assembling. The final touch was to add some gems (the suggestion of one of my good crafty friends). These ones have been in my stash for ever!


Come and join us at Use Your Craft Stash on Facebook, and share your rainbows. 

Stay safe everyone!! 
Cxxxx

Tuesday, 31 March 2020

When it goes wrong - put a butterfly on...

That old crafter's adage worked for me today - and saved me from feeling pretty rubbish about what I was attempting. This is what I produced, but it is so far from what I set out to do, that it's really quite laughable.


Let's rewind to just before lunch yesterday. I decided to make a list of all the things on my shelves, in my drawers and in my cupboards (and already I know I missed some things - gel press, mica powders...) that I really should play with, have a go with, experiment with. you get the idea.


And when lockdown had seemed imminent a couple of weeks ago, I ordered myself some journals from Pink Pig. The large one has watercolour card in - for an art journal, The next one is lined for jotting ideas and thoughts down. And the little one is for drawing and sketching - I went small with this one as I didn't want to be intimidated by a larger size.


The art journal was the one I wanted to start with, but I didn't really want to ruin other pages, so I cut a piece of mylar to sit behind the page and protect the rest (or that was the idea).
 

For the afternoon's dabble, I decided to have a play with the Spectrum Noir Sparkle Inks. I bought these with the intention of using them on my Christmas cards, and never did, so they have sat in the cupboard for a while.


I got all excited, googled for something different to try with watercolour based products, and found a lovely video clip which showed techniques using salt water, water with bleach, and clingfilm. Great, I thought. And got myself all set up, remembering to take photos for a step by step. And I used some low tack tape to divide the page into three - one for each of the things shown on the clip. So far, so good.


I started with the salt water. The idea was to put a wash of the salt water on the paper, then dot the ink on. I used Amethyst and Garnet from the Glitz and Glamour set. This was reasonably successful - but not quite as great as in the video.

I pushed on with the water with bleach in it. Same idea - make a wash with the water and then dot the ink on. This was supposed to give a much more feathery effect. This was what I got. Total fail.


At this point I was starting to get frustrated, but ploughed on with number 3 - the clingfilm. Plain water is put on the clingfilm, ink dotted on, and then applied to the paper. 


The result - a puddly mess that leaked onto the other two sides as well. Totally annoyed with myself by this point. Instead of a lovely page showing three techniques, it looked like a small child had been let loose on it (no offence to small children intended). So, I went over the whole lot with the salt water.


At this point, it was a case of what can I do to save this. So I dug out my Sara Signature Flutterby Collection (have pretty much all of this as I demo'd it not long after release), Harmony Water Reactive Inks - Plum Pudding, Winter Rose and Silent Night and Chipped Sapphire Distress Oxide.


At this point, photos kind of went by the wayside. I added more of the Pink Garnet Sparkle Ink at the top and bottom and stamped the Botanical Butterfly with Silent Night inkpad. I used water to spread some of the ink, and then filled in with Amethyst and Pink Garnet Sparkle inks. 


Have to say, it looks better on the above photo than I felt it did yesterday, so I watered down some white gesso and went over it to knock it back. And then I attempted to overstamp the butterfly with Memento - Nautical Blue.


To frame it, I used one of the Scripture stamps with the Winter Rose inkpad and two different stamps from the Textured Elements set with the Plum Pudding and Silent Night.


The sentiment is from the Fly Away set, and I edged the whole thing (tricky when it's spiral bound) with Chipped Sapphire Distress Oxide.


While this is is no way what I had intended when I started, it ended up OK. Oh, and it's almost impossible to keep the next pages clean in a book like this!! 

Lessons learned. Onwards and upwards!!

Take care and stay safe.


Cxxx