I'm a retired primary school teacher, who started paper crafting in 2008, when I had a fancy to make my own Christmas cards. Since then, I have tried all sorts of techniques and styles - and I kind of like them all. I have been lucky enough to be on blog teams and large design teams and to do a bit of freelance demonstrating - and I love the challenge of working with different products. My crafting style is very varied - from junk journaling and art journaling, bookbinding and journal making, to quilting and patchwork - and of course I still make cards. This variety keeps me interested - and my crafty stash growing!! I'm always seeking inspiration for new projects.
Today I have a couple of stamped cards using the same stamp - Nellie's Choice: Idyllic Floral Scenes - Lake with Rowing Boat.
I have gone for two different looks - neither of which need you to be able to paint. Click on the pictures to see the video demonstratations.
The first uses Distress Oxides - Fired Brick, Spiced Marmalade and Squeezed Lemonade to create a sunset effect. The image is then stamped over this with Versafine Clair Nocturne.
The second is a simple sepia effect created by stamping in Ground Espresso Distress Oxide onto cream card, and then using water to move the ink.
Both sentiments are Julie Hickey Designs Everyday Sentiment Stamps.
Thanks for popping by, and I hope I have given you a little inspiration. Feel free to follow me here on my blog, or on FaceBook, Twitter, Instagram or Pinterest. For lots of video demonstrations, pop over to the Hixxy Studio YouTube channel to subscribe. The main items I use can be found on the Hixxy Crafts website - have a look under the Hixxy Studio tab.
Good morning!! This feels very much like groundhog day, where I say something along the lines of how long it has been since I last blogged! Lots of things have happened in the past four months - none of which I shall bore you with. And it's not for lack of projects to blog - I have a whole backlog which I will hopefully share at some point.
One of the big changes for me is that I am now working with online craft shop, Hixxy Crafts, to create a whole host of videos - and Facebook Live shows - showing off different products and techniques. All the videos are on the Hixxy Studio YouTube Channel, so feel free to pop along and take a look.
Let's start with a few projects using something that was new to me - along with a whole host of things that have been in my stash a while.
The new product (to me) is Stamperia's Cream Paste, which I demonstrated in a Facebook Live last Friday.
If you have never used this product before, it is a great addition to your mixed media box of tricks. It's extremely light, and dries to be totally flexible. Stamperia also make a whole raft of texture moulds to use the paste in, but there is so much more you can do, including using it with 3D embossing folders, die cutting it and using it with silicone moulds. There are also many ways to colour it. This video shows everything I played around with.
I then created these three projects. The first is a decorated papier mache heart. I used the Cream Paste with Crafter's Companion Floral Fusion 3D Embossing folder. This was painted with black gesso, and gilded with Pebeo King Gold wax, and Imagination Crafts Sherbet Alchemy wax, before cutting with a simple heart die. I applied gesso and wax to the papier mache heart, before applying the die cut heart.
This time, the paste was used with Stamperia Wings To Fly mould, from which I cut the butterfly, and a strip to decorate around the jar. I also used Imagination Crafts Icy White Paste, and some acrylic paint.
The final one was a bit of an experiment when I was prepping for the live show. This one uses the Oriental Garden mould from Stamperia. The background is a piece of rice paper - I generally use blank rice paper to mop up ink from my mat, so have a collection for creating quick backgrounds. I have used a little bit of Distress Oxide around the edges, but the main part of the image is coloured with alcohol ink - and a pipette!! Watch the video to see exactly how it was created.
Now, I know this post is quite video heavy - and it won't usually be like that. I will try to share projects one at a time. These three just went together quite well, so was easier to share altogether.
Thanks for looking, and feel free to subscribe to Hixxy Studio YouTube channel for more videos.
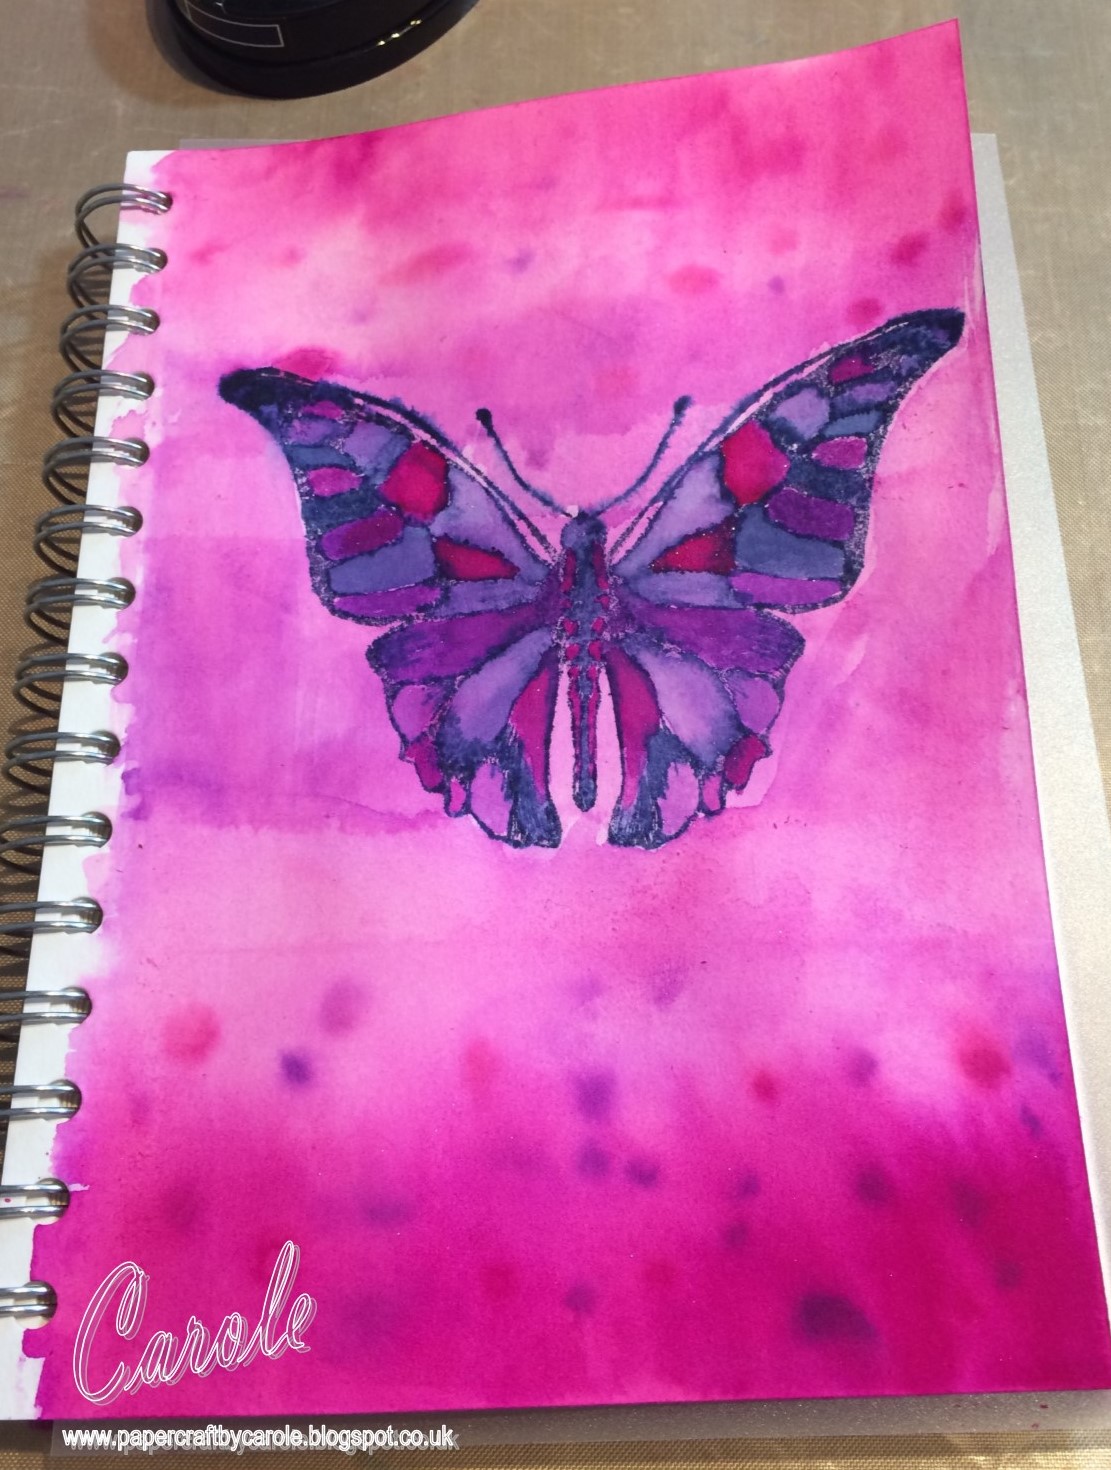
That old crafter's adage worked for me today - and saved me from feeling pretty rubbish about what I was attempting. This is what I produced, but it is so far from what I set out to do, that it's really quite laughable.
Let's rewind to just before lunch yesterday. I decided to make a list of all the things on my shelves, in my drawers and in my cupboards (and already I know I missed some things - gel press, mica powders...) that I really should play with, have a go with, experiment with. you get the idea.
And when lockdown had seemed imminent a couple of weeks ago, I ordered myself some journals from Pink Pig. The large one has watercolour card in - for an art journal, The next one is lined for jotting ideas and thoughts down. And the little one is for drawing and sketching - I went small with this one as I didn't want to be intimidated by a larger size.
The art journal was the one I wanted to start with, but I didn't really want to ruin other pages, so I cut a piece of mylar to sit behind the page and protect the rest (or that was the idea).
For the afternoon's dabble, I decided to have a play with the Spectrum Noir Sparkle Inks. I bought these with the intention of using them on my Christmas cards, and never did, so they have sat in the cupboard for a while.
I got all excited, googled for something different to try with watercolour based products, and found a lovely video clip which showed techniques using salt water, water with bleach, and clingfilm. Great, I thought. And got myself all set up, remembering to take photos for a step by step. And I used some low tack tape to divide the page into three - one for each of the things shown on the clip. So far, so good.
I started with the salt water. The idea was to put a wash of the salt water on the paper, then dot the ink on. I used Amethyst and Garnet from the Glitz and Glamour set. This was reasonably successful - but not quite as great as in the video.
I pushed on with the water with bleach in it. Same idea - make a wash with the water and then dot the ink on. This was supposed to give a much more feathery effect. This was what I got. Total fail.
At this point I was starting to get frustrated, but ploughed on with number 3 - the clingfilm. Plain water is put on the clingfilm, ink dotted on, and then applied to the paper.
The result - a puddly mess that leaked onto the other two sides as well. Totally annoyed with myself by this point. Instead of a lovely page showing three techniques, it looked like a small child had been let loose on it (no offence to small children intended). So, I went over the whole lot with the salt water.
At this point, it was a case of what can I do to save this. So I dug out my Sara Signature Flutterby Collection (have pretty much all of this as I demo'd it not long after release), Harmony Water Reactive Inks - Plum Pudding, Winter Rose and Silent Night and Chipped Sapphire Distress Oxide.
At this point, photos kind of went by the wayside. I added more of the Pink Garnet Sparkle Ink at the top and bottom and stamped the Botanical Butterfly with Silent Night inkpad. I used water to spread some of the ink, and then filled in with Amethyst and Pink Garnet Sparkle inks.
Have to say, it looks better on the above photo than I felt it did yesterday, so I watered down some white gesso and went over it to knock it back. And then I attempted to overstamp the butterfly with Memento - Nautical Blue.
To frame it, I used one of the Scripture stamps with the Winter Rose inkpad and two different stamps from the Textured Elements set with the Plum Pudding and Silent Night.
The sentiment is from the Fly Away set, and I edged the whole thing (tricky when it's spiral bound) with Chipped Sapphire Distress Oxide.
While this is is no way what I had intended when I started, it ended up OK. Oh, and it's almost impossible to keep the next pages clean in a book like this!! Lessons learned. Onwards and upwards!!