
About Me

My photo
I'm a retired primary school teacher, who started paper crafting in 2008, when I had a fancy to make my own Christmas cards. Since then, I have tried all sorts of techniques and styles - and I kind of like them all. I have been lucky enough to be on blog teams and large design teams and to do a bit of freelance demonstrating - and I love the challenge of working with different products. My crafting style is very varied - from junk journaling and art journaling, bookbinding and journal making, to quilting and patchwork - and of course I still make cards. This variety keeps me interested - and my crafty stash growing!! I'm always seeking inspiration for new projects.
Showing posts with label #irisfolding. Show all posts

Monday, 10 August 2020

Kimono!!

It's a new challenge over at Use Your Craft Stash, and for the next 2 weeks we are looking for projects that use up your stash, and contain an item/ technique/ colour/ product that starts with K and/or L.

For me it was a no brainer. When the Crafter's Companion Kimono range came out in 2015, I absolutely loved it. I was on the DT at the time, and made samples for TV, and also for the Crafter's Inspiration magazine.

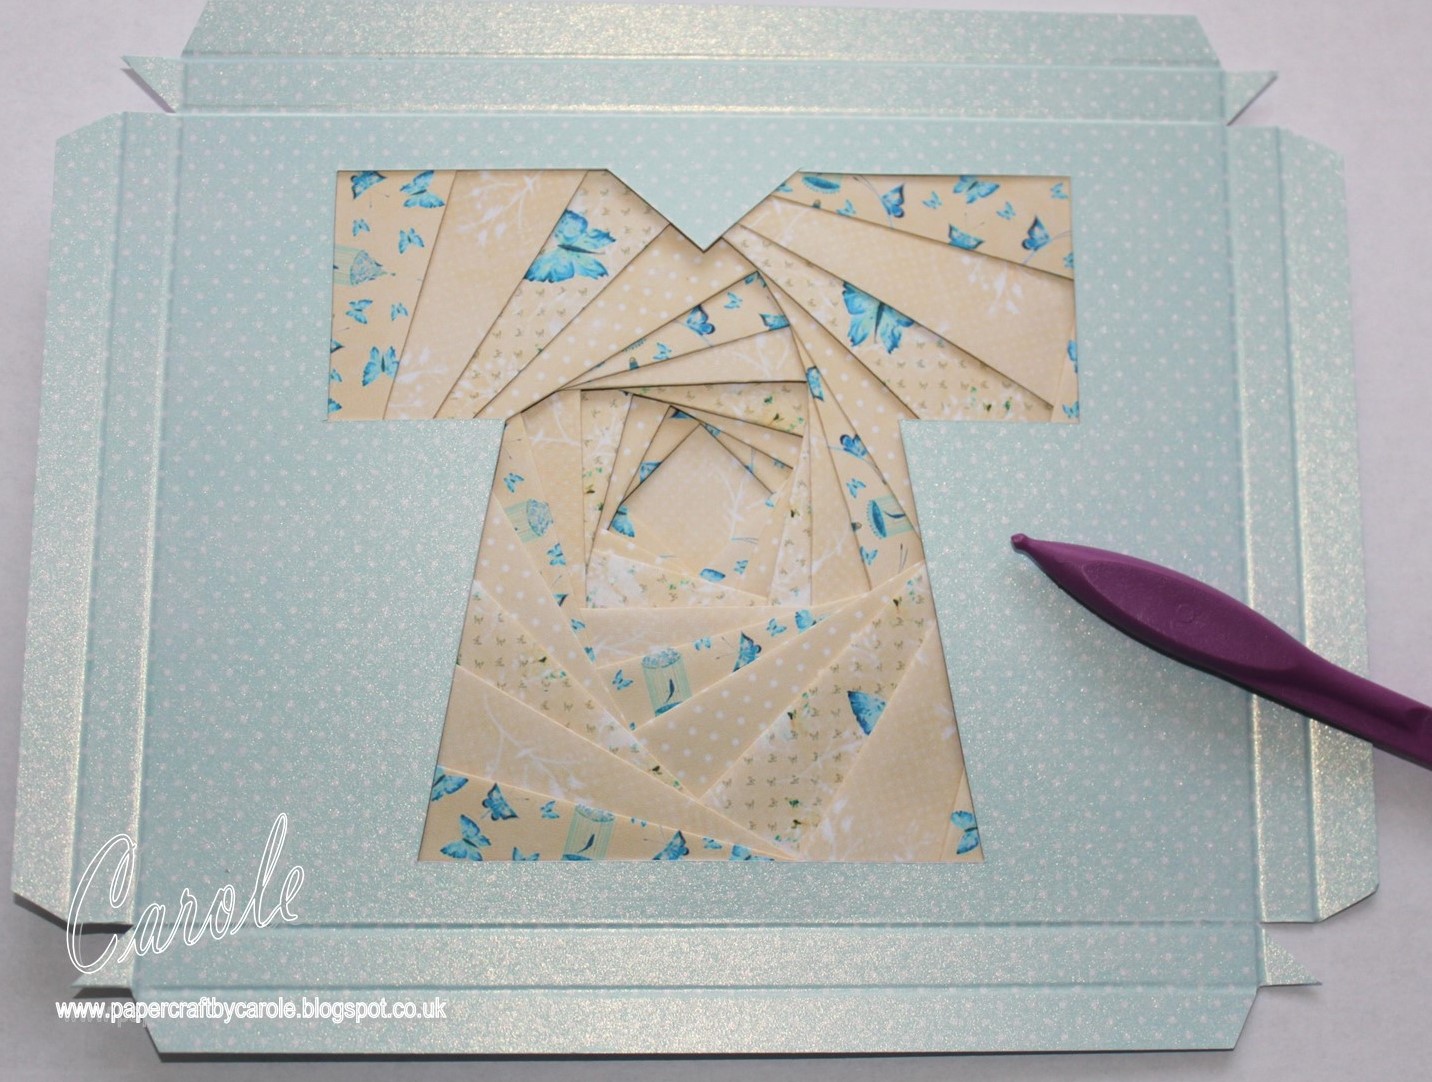
One of the cards I made for the CI7, was an iris folding Kimono card. So, I have recreated it here in different colours. Back then, I used yellow and turquoise, and this time I have used green and pink. But as I am a bit lazy, I have used the step by step photos from way back then.

This came out when CD crafting was really the in thing, and printing onto different surfaces was one of the things I loved. I used the Kimono CD, and printed the spotty co-ordinating paper onto Centura Pearl Snow White Hint of Silver (back then I used turquoise - this time pink). On the back of this, I printed the template I created, and cut out along the bold lines, keeping the end of the piece of card.

 
The iris folding template was printed onto copier paper and the frame secured over the top with low tack tape. I chose four papers from the CD (this time I used these papers but in green rather than yellow).
Using 3cm wide strips, I followed the pattern, ending with covering the hole in the middle.
I then scored the dotted lines, and folded and stuck to create the "box".  On the back of this, I stuck a piece of scrap card.
  
Strips of card and paper were added to create the  kimono sash - using the excess saved right at the beginning. I printed another piece of Centura Pearl with the dotty paper from the CD - last time in yellow, this time in green - mounted another strip like the sash, and then stuck the box on top.
To finish, I used some paper roses, flat back pearls, a fan cut with the Kimono Butterfly Fan die, and a butterfly fussy cut from one of the sheets from the CD.
Remember, you only need to use one thing with the letters K or L, along with something from your stash, and you're ready to enter the challenge. 

Looking forward to seeing what you make. Happy crafting!

Cxxxxx

Tuesday, 28 July 2020

Iris Folding

We're starting a new challenge this week - and of course it has to be I and J. As ever, all you have to do to join in at Use Your Craft Stash (on FB), is to use your old stash, and make something with a link to I or J. It could be a technique, a colour, a product, a card fold, an embellishment - or whatever you can think of. 

I have to admit that "I" was a little tricky for me. But I eventually decided to do some Iris folding (something I have only done once or twice before, many years ago), and when searching for a pattern, I came across one for an Ice-cream and one for an Ice-lolly (or they call it a popsicle). Both patterns are from Pinterest, and have the watermark of Circle of Crafters, but unfortunately the website seems to no longer exist, and I couldn't find a Pinterest account linked to them. I did, however, find a private FB group called Circle of Crafters Iris Folding, so have joined so I can share my makes on there. Their iris folding patterns seem to be all over Pinterest, despite not having their own webpage anymore.

Here are my cards.


I have some step-by-step photos - but I have to admit to having made a bit of a mess up with my first attempt. So, some of the photos are from that attempt, and you will notice the papers for the ice-lolly are different. The mistake I made was to complete the iris folding, then try to cut the piece to size to go on a card. Cutting it with a knife didn't give me the edge I wanted, so I made the mistake of passing them through my Gemini. Of course, it compressed everything, leaving an imprint of all the layers from the back showing through on the front. So, my top tip is to have the topper cut to size BEFORE you cut the aperture.

So, to that end, I sized the patterns to what I wanted, then printed two copies of each - one for the actual folding, and the other I cut out. I used the aperture on the paper to draw onto the back of the card (be careful to get it the right way round), and then cut it out. I used Ivory pearlescent card.


I then used low tack tape to stick them over the pattern - still with the back side upwards. Each pattern comes with a list of which numbers go with which paper - A, B, C etc - you just choose what you want to use for each one.


You need strips of each paper, and you fold them over. I don't fold them completely in half, although you can do. I fix each piece with a small piece of double sided tape.


You end up with the "iris" left in the middle. You can leave this blank to see the card underneath, or cover it up (which is what I do).


I put a piece of copy paper on the back to stick to all the exposed bits of double sided tape. I then made them up into cards.


We look forward to seeing what you come up with.

Happy crafting,
Cxxxx

Thursday, 25 February 2016

Day 56 - and Day 3 of favourite makes!

Evening! Today I have another make from 2015 to share with you - and just a very quick post. 
This one is an Iris Folding project I made for Crafter's Inspiration 7 using the Kimono papers. I really love the colours of this - and was so pleased with how it turned out.
Cxxxx