About Me

My photo
I'm a retired primary school teacher, who started paper crafting in 2008, when I had a fancy to make my own Christmas cards. Since then, I have tried all sorts of techniques and styles - and I kind of like them all. I have been lucky enough to be on blog teams and large design teams and to do a bit of freelance demonstrating - and I love the challenge of working with different products. My crafting style is very varied - from junk journaling and art journaling, bookbinding and journal making, to quilting and patchwork - and of course I still make cards. This variety keeps me interested - and my crafty stash growing!! I'm always seeking inspiration for new projects.

Sunday, 12 June 2011

Busy, busy, busy!!!!

Hello all out there in blog land!!!


Ok - so it's been nearly a month since I last blogged. Yet again, I have been working long hours recently!! In a completely wierd way, I'm looking forward to being made redundant because I will suddenly have all this time on my hands. I will obviously have to get some supply teaching to bring in the pennies, but I will be able to decide when I want to work, and when I don't. And this will give me more time to focus on all my crafting.

I've also been working on a load of new cards to add onto the website!! Sorry they're not on there yet. Held a "Card Party" on Friday, and was waiting to see what sold before adding them all to the website. There will be new sections for Male Themed cards and Children's cards, along with cards being added to many of the other sections. I'm still intending to add a Clearance section - it went down very well at the party - and I managed to move a lot of old stock to make room for lots more new stuff.

Here are a few tasters of the kind of cards that will be on there soon!!


Nitwits - In The Meadow and Kanban Playmates
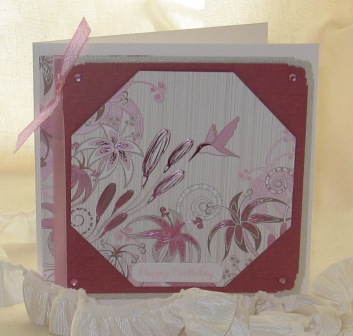


Kanban - Free as a Bird, Fizzy Moon and Hunkydory - Butterfly Dreams


I've also been busy Fusioneering!! Am loving Sheena Douglass' Paint Fusion style - and have seemingly been painting anything that doesn't move and has a suitable surface.

After the success of the Poppy and Wild Rose sets with their respective recipients, I created a Bramble set for my husband's recent birthday, with a card, recycled box (it contained the perfume he gave me for Christmas!! - I did fill it with lots of toffees!!) and bookmark!!


I've also painted some other bookmarks, wooden boxes and canvases. The bookmarks are pre-cut mountboard that I bought when I was at the workshop with Sheena Douglass in April (ooh and have now booked onto the next one in September - can't wait!!!). The wooden boxes have magnetic closures - picked up at a very reasonable price!! And the 8x8 canvases were also picked up in a sale.


I have so much more I want to do - more candles, mirror frames and coasters. And a few other ideas besides - you'll just have to wait and see!! At the moment I just don't have the time!! So roll on August!!!


Cxxx


PS - Earlier today, I emailed photos of my Paint Fusion items into Create and Craft, as Sheena has been doing shows today!! I was chuffed to bits that they showed all the photos on the 3pm show - two of the sets I haven't put on here as they are presents for friends, there was also the daisy anniversary card for my parents, and the rest was the berry stuff for my other half - as shown above!!

Sunday, 15 May 2011

Something Different!!


What a busy time I've had since my last blog - unfortunately not all crafting. Have been extremely busy at work so haven't had a lot of time to do anything much else. The garden has been a bit neglected, as has the housework - but I'm catching up on all that now. This is the first weekend in a while where I've not had to work - and the first time I've had two consecutive days off in over three weeks.

And of course amongst all that I was working on some items for birthday presents for friends. As both these friends have now received said presents, I can reveal them to the rest of you. I have used the Paint Fusion that I mentioned in the last blog - and created a range of items. One set is Wild Rose, the other is Poppies.

I feel I am improving with the painting - it certainly is straightforward in principle - but does need a bit of practice!! Am getting the hand of double loading the brush now - don't end up with a murky mess of colour - and also of tipping the brush with a third colour (like with the poppies) which gives a brilliant effect. I am finding it easier to start with foliage each time - still struggling to make the stalks look right - I think painting them first would perhaps be easier - and then put the leaves and flowers over them - it would look less disjointed.

So, these are mirrors with lovely large frames (from a certain Swedish shop). I rubbed the surface down to begin with then painted them with acrylic paints (a combination of Pebeo paints and Eco Green paints). Once dried, I sprayed with Spray and Shine (a couple of light coats) to add a varnish finish. Have to say, of all the items, the mirrors were the easiest to paint - the surface allowed the paint to move nicely, and didn't soak it all up and leave you with a dry brush half way through the stroke.


The candles were much more problematic - painting a slippery paint on a curved slippery surface, whilst trying not to smudge anything - was a bit of a feat for me!! It also needed several coasts of paint in order to get the density of colour I wanted.

The coasters and the images for the card were all created in a similar way. I used watercolour card which is great because it doesn't buckle under the paint, but I did find that it soaked it up - so I really needed to load the brush for some of the larger strokes. To finish them off, I used distress ink on the edges (Forest Moss and Victorian Velvet on the Wild Roses, and Forest Moss and Fired Brick on the Poppies), then edged with gold embossing powder. And the final touch was a waft of gold Spray and Sparkle.


I am really pleased with the results. I have plans to make a few of these to sell, hopefully alongside boxes and wall hangings - just need to find the time!! So watch this space.


Meanwhile am also working on my usual card stock in preparation for the next Card Party - looking forward to seeing some of you there!! I may have a few paint fusioned items ready for sale by then - but don't hold me to that as I am still really busy at work.


Well that's all for this post. Don't forget to check out the website.
Cxxx

Monday, 18 April 2011

Computer says No!!!

Have been out of touch for a little while for several reasons. The biggest of all was a series of computer problems. Firstly my PC had virtually ground to a halt. It was so slow that it would have been quicker to write things up by hand rather than print them. So it went off for a holiday to my cousin, and has come back slightly improved, but with a poor prognosis. It's just getting old and needs to be replaced. Sorry to all those who were looking forward to the card party - I will be making a new date soon so watch this space.

On top of that, my laptop went into meltdown (with me not far behind) and wouldn't let me log on!! Computer definately was saying no at this point - told me it couldn't find the user profile. Have managed to get it sorted now, but all this has put me behind on sorting stuff on the website, and on getting the new stock sorted.

And to cap it all off, last week was a write off for me physically- felt very run down, exhausted, had a cold and almost constant indigestion pains. Started feeling better on Saturday, which was just as well, as I was due to attend a Sheen Douglass "Paint Fusion" workshop on Sunday.

With all these technical problems, it meant I missed the first birthday of the Blog!! So belated happy 1st birthday to my blog!! In a way, it was a good job I missed the actual date. I was very maudlin at that point due to not feeling well, and I was on a right downer with regards to the website. So it would have all been very negative.

But, due to a great day on Sunday, I am now fully inspired yet again!! Problem is, being inspired usually costs me money as I just have to have everything to do the new techniques NOW- and this weekend was no exception. And, as ever, I have to buy in bulk because I always have such grand plans. That's why I have drawers full of stuff just waiting to be made!! If I crafted non-stop for the next 5 years I'd be lucky to use up all the stash I have!!!

Have to say, I had the BEST day at the workshop. Sheena, as ever, was totally inspiring. We completed three projects - two of which I have posted photos of . The other one has to remain under wraps for a while!! Say no more!!!


Paint Fusion is a style of painting based on folk art. The fusion bit is because it's about combining it with all the other crafting things we usually do, like heat embossing and distressing to name just a few!!

I haven't done any serious painting for over 15 years - I used to love watercolours and still have all my stuff. This is using acrylics, so am getting used to using a completely different medium. There is so much scope of what can be fusioned - literally any surface that will take the paint - and I have a lot of things already lined up and waiting!!

The first of the projects was the lavender bookmark. This is using pre-cut mountboard. The background was crackled first, then the lavender painted on top. Walnut Stain and Black Soot Distress Inks were used to give it a more aged look, then the edges were embossed with Sheena's Gold Sparkle WOW Embossing Powder.

The second was the bouquet on watercolour card (300gsm). Of the two projects, this is the image I prefer, although I love the bookmark shape - have bought a few blanks to play with so hopefully will come up with something I like for them.

I will leave you with the though that I am working hard on lots of new stuff - so check out the website for new updates coming soon!! Happy Easter to you all. Cxx

Friday, 11 March 2011

Why is everything so difficult?

I've been looking at the website and feel it needs a bit more character. There are these big, white, empty spaces down each side of the page. I would love to be able to use the same side borders on the website as I have here on my blog. But I don't have a clue how to do that - and not sure I'd be allowed to use them if I did!

I've even tried to design my own and save as a jpeg, which I know how to import onto the website. But it was not wide enough, so repeated the design making the right hand side look very strange. As I can't seem to work out how wide it should be, then I can't make it work.

It's something I'm going to have to work on, as it is beginning to frustrate me. If any of you out there can give me a heads up on what to do, it would be much appreciated.

I've now managed to put some Mother's Day cards onto the site - I intend to make a few more, so watch this space. I've also been working on a page with information on commissioning cards, so that should be up and running soon. I'm also going to start a clearance section. I make loads of cards - it's sort of obsessional!! And need to clear some space for all the new stuff I've got planned. I'm going to start work on it this weekend - will keep you up to date with how I'm getting on.

Aside from all of that, I've included a few pictures of cards I've recently made. The first one was a difficult one to make. Not because it has advanced techniques, but because it was a sympathy card for a close friend who recently lost her Mum. She was a wonderful lady that I knew for nearly 30 years - all through my teens and into adulthood - and she will be sadly missed.
The Kanban Floral Garden collection lends itself to this difficult area of card making - this topper is from the Roses sheet. I used a tall white card, and matted and layered Papermania Luxury Velvet Paper in Black, with Gold Mirror Card. The sentiment is from the Orchid and Calla Lily sheet. It is finished off with black organza ribbon down the left side, with black, flat-backed pearls.


The second is a birthday card for another close friend. The background paper was actually an insert from a Deckle Edge Card Kit - I used the cards but not the inserts at the time!! I have to confess that I have no idea where the lighter pink paper came from - it was in my box and just seemed appropriate. The shapes are cut using Spellbinders Nestabilities. I printed the message onto the paper first before I cut it. A couple of pink skeleton leaves lie under the message, whilst the fabric flowers (WHSmith clearout sale yonks ago - I bought loads and am still working throught them) are held together with Papermania brads.


I decided to make a matching gift. One of my favourite shops is Past Times, and I picked up this beautiful set of pink butterfly and dragonfly frames. I printed the same message to sit in one frame, and placed a piece of the insert paper inside the other, attaching another fabric flower to the outside of the frame with a glue dot.
I was really pleased with the finished project. I do rather like things that match!!
And now I think I'm going to have to sign off, as Gardener's World has just started, and my favourite - Monty Don - is back this series!! Need to find out what he thinks I should be doing in the garden this weekend!!
Speak to you soon.
Cxxxx

Tuesday, 8 March 2011

What's in a Word??

Well, one word can be extremely expressive!! It can explain a feeling, an occasion, provide a description or just say what something is.

The first word that springs into mind right now, is totally unusable – because this is the second attempt at this blog entry!! The first attempt was lost right at the end when my laptop decided to crash my Internet connection!!! So, as I say, the first word that comes to my mind is not usable!!

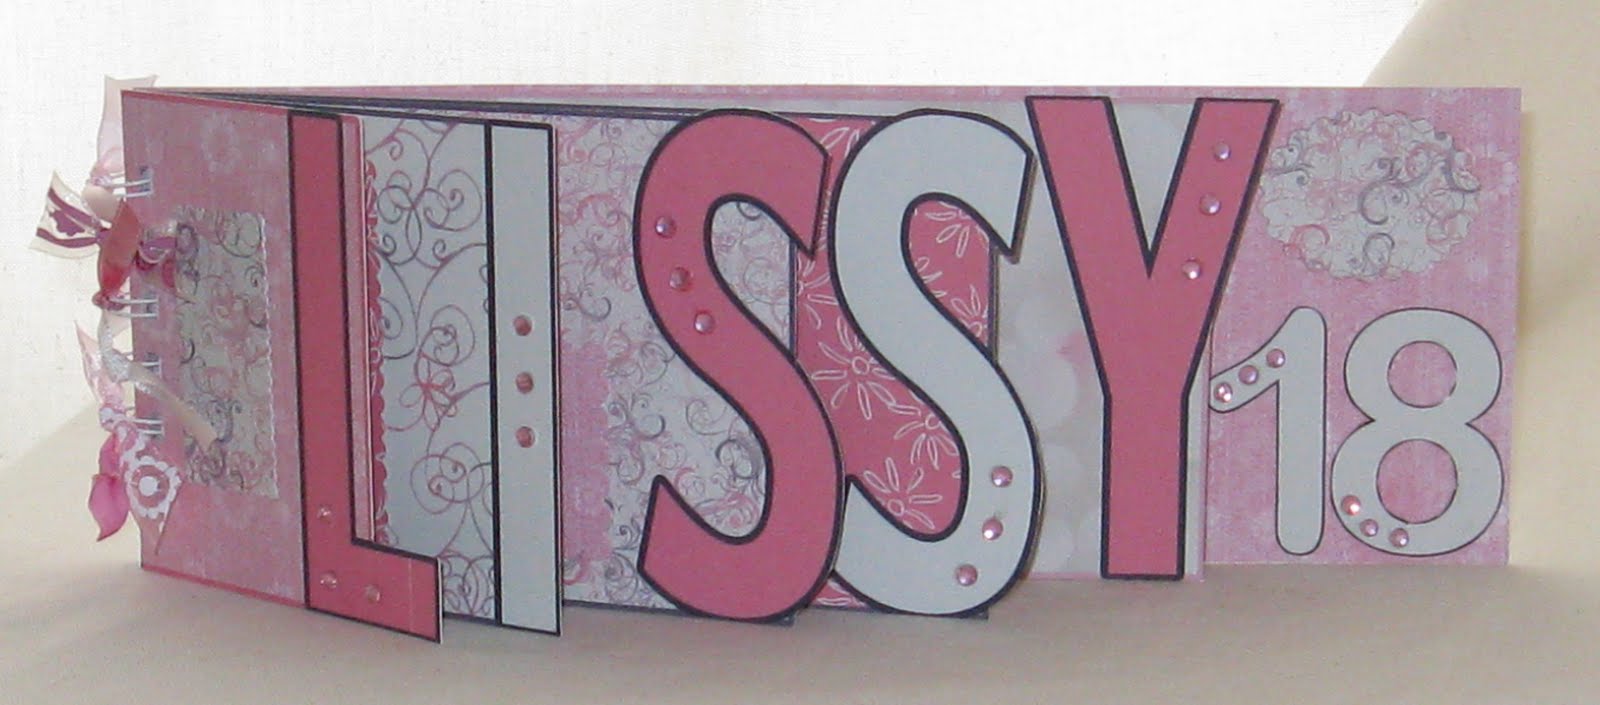
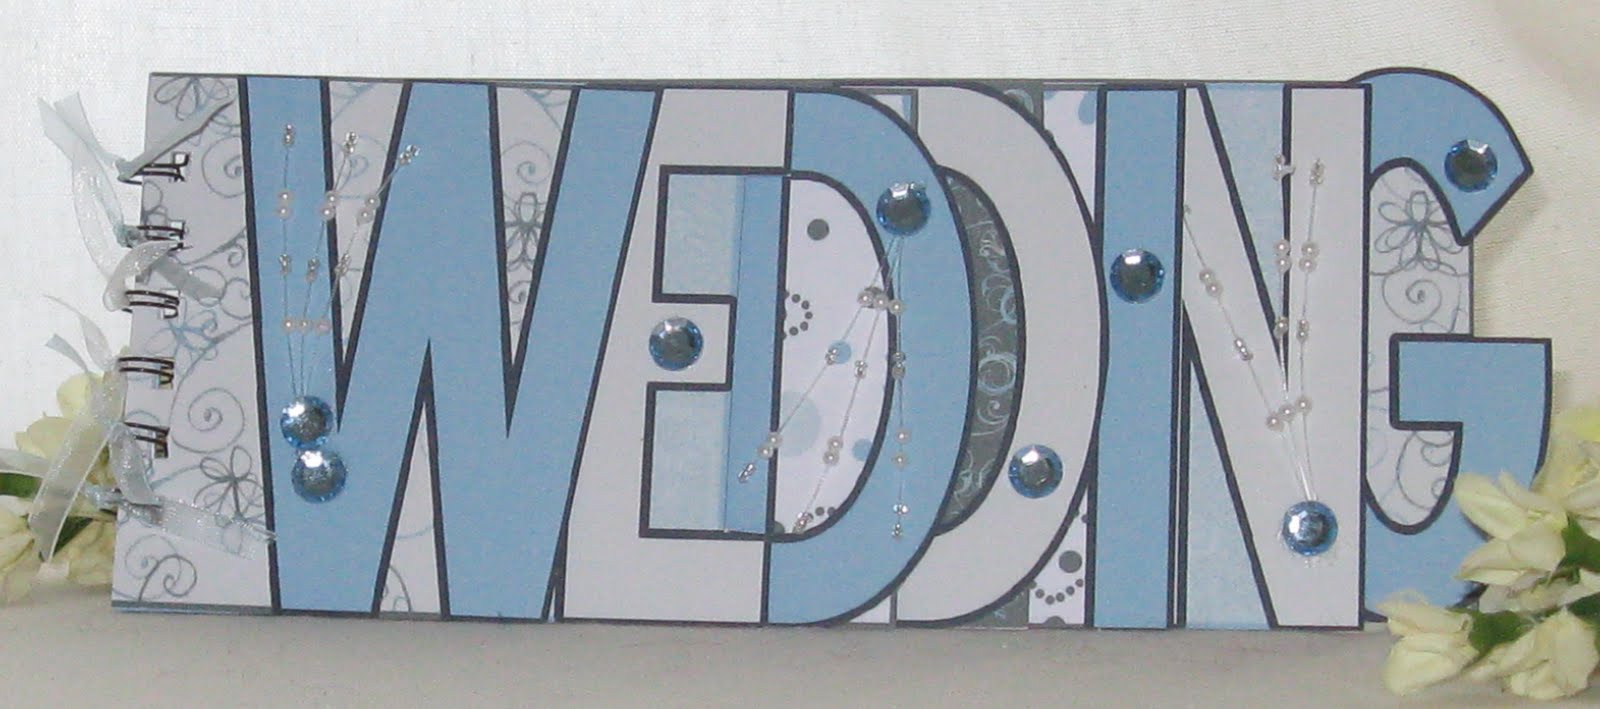
So, what IS in a word? In this context, maybe the question should be “What’s in a Wordbook?” Or perhaps the place to start is “What IS a Wordbook?” Well, it sort of does what it says on the tin. It’s a book that it made from one word.
And that word is chosen to describe the person, event or occasion that it will be used for.

Each page of the book has a letter (or number) at the end, with the first page being the shortest, and subsequent pages increasingly longer.

Wordbooks can spell out a name or any special occasion.

And don’t forget those landmark ages – the 18th’s, 21st’s, 40th’s etc etc. In fact, you can use any combination of letters and numbers.


I print the pages onto 300gsm card, using the various, gorgeous Funky Hand CD’s, which have a great range of colours and styles.

Because I use A4 card, the maximum number of pages I would work with is 6, although 7 can be used at a push.
I decorate the pages using flowers, sequins and gems. And with my trusty Cuttlebug, I cut a variety of mats using matching card, which are used inside the book – for writing messages on – or for attaching photos. The book is bound using a Zutter Bind it All, and small sections of ribbon tied around the binding wire provide the finishing touches.

OK, so that’s what they are. But what are they for? Well, they make great alternatives to cards for those special birthdays and occasions – they will certainly stand out from the crowd. But they can also be used as mini scrapbooks for photos and other memorabilia. And there’s no limit to the occasions – I’ve used them for a Secret Santa, with little gifts attached to the pages!!

So what’s in a word – well, whatever you want to put into it.

And my final word for the day is PANCAKES!! Because of course, it's Shrove Tuesday - Pancake day. The day when people (much more noble than me) traditionally decide to give up something for Lent. I'm afraid I don't have the willpower (she says as she munches on a chocolate digestive!!) but always admire those that can!! But back to pancakes!! Unfortunately, we were a bit slow off the mark, and there were no lemons left in a two mile radius. I always have sugar and lemon on my pancakes, so was a little disappointed. Has golden syrup instead, which was OK - but will have to make sure I'm better prepared next year!!

And on that note... until next time!!

Cxx

PS Many thanks to my lovely husband who finally helped me get this blog done, after my second attempt also very nearly failed!!! Then there would have been a whole other load of words that would have sprung to mind!!

Sunday, 6 March 2011

Great minds think alike!!

So, am watching one of my favourite crafters on TV, and one of the creations she was showing was a large cupcake card!!
Great card I thought - just like the one I've just made for a commission!! Actually, what I really thought was "Damn - now when I blog this card, people are going to think I copied hers!! " Well, I didn't copy - but would like to think that great minds think alike!! So, here are the pictures....

And here's the science (well crafty) bit!! Firstly, the card itself. With most of my 8" boxed cards, I start with a large sheet of Centura Pearl Card - in this case mauve!! The icing on the cake is cut from purple Vivelle, with the cake case made from one of my ever present stock cupboard items - Bazzil Bling card!!

The lilac and purple background papers are from a really old stash of Papermania 12x12 paper pads, while the cream is (again) Centura Pearl.

I made my own template for the cupcake - have used it before, although this time I decided to concertina fold the cupcake case. All I did was enlarge the templates.
The large scalloped square is made using a "Colour My World" template. I really would like a larger die cutting machine, that will take the Grand Nesties, then I wouldn't have to cut these larger mats by hand. But until then, I will continue using these templates.

The front of the box is similar to the card itself - another thing I like to do with my 8" boxed cards. But this time, I stuck with a flat cupcake, and embossed Happy Birthday onto the cupcake case using Papermania Universal Embossing Folder - Greetings 2.

All the ribbon is from a range called Celebrate (Ribbon by the Spool). One of the cheapest ways I've found to feed my ribbon cravings!!!

The inside of the box is something else I always try to decorate - I think if you're paying for a large handmade card, there should be something special about it. And I've been told by several people that they are more of a gift than a card!! I'm happy with that!!
So, the next couple of weeks will see me having to get a wriggle on with another commission, but hopefully will have time for thinking about Mother's Day and Easter.
And on top of that, I've just bought some great new stamps to try out an exciting painting technique. Am hopefully going to be able to use it on my boxes and fridge magnets - and maybe my bookmarks too!! So watch this space!!
Aside from all this, my greenhouse is now ready, and my lovely husband has dug over the veggie patch we've created. So there will be a lot to do in the garden in the next few weeks. Have loads of plans of what I want to grow - whether they come to anything or not , we'll have to wait and see. Mmmm. Just had a thought of some crafty things I could do that might appeal to gardeners!! Anyway, I digress.
Just need to catch up on some sleep before all of this - it's very busy at work and I'm feeling exhausted!! It's hard to focus when I'm feeling like this - and to find some inspiration. But often just sitting in the midst of all my stash makes me feel like doing something - whether it's for a specific project - or just playing with materials and techniques.
So, will sign off now - and hopefully will blog a bit sooner next time!!

Cxx


Tuesday, 22 February 2011

His Valentine Card!!


So, I did relent and make a Valentine Card for my other half. And here it is. I'm quite proud of it - not cutesy or even a predictable Valentine type card. I based it on a layout I saw in a Docrafts magazine a couple of years ago - one of those images I cut out and stuck in one of my many ideas books.

For any crafty types reading the blog, it's an 8x8 base card, covered in a sheet of paper from Papermania's V&A Quilts 8x8 pack. It's been distressed around the edges by sanding, and edged with Brushed Corduroy Distress Ink.

The hearts are cut from Bazzil cardstock (not sure of the colour names - they were off cuts in my odds & sods box) using my Craft Robo, and the letters are also Bazzil cardstock cut using XCut Die-Licious Alphabet Dies (Smoothie) and my trusty Cuttlebug.

The bottom mat is from DCWV's Luxury Cardstock Stack, and the other is Bazzil card. Ribbon from my stash, along with a flourish stamp and sequins finished it off nicely.

Have a few more recently made cards to post - will do so one at a time so as not to bore you non-crafting friends who I know read my blog out of a sense of duty and friendship!! God bless you all!!!

Things have been a bit quiet since Christmas, I have tonnes of cards waiting to be made - loads of new stash that I think people will love when I've had a chance to work my crafty (although hopefully not too inky) fingers on, and transformed into cards.

Problem is (and believe me this is a problem in the most good and positive sense of the word), I keep getting commissions to make. Shouldn't complain, as I do love making special cards. But all my good intentions of having time to play and create seem to just pass by. And now with Spring just around the corner, my garden is screaming for some attention.

My lovely husband is in the process of putting up a greenhouse for me, and over the winter he dug up a (small)section of the lawn to extend my veggie patch. So, am torn between planning the months ahead for my garden, and making cards and playing with messy, inky stuff.

Plus, I've just remembered I've got tags to make for a swap that need doing this week. Oh dear - my work is never done!!

So, better sign off here, and make a plan of what to do when. (You may notice that I am a bit of a planner - rather compulsive one I suppose).

Bye for now
Cxxxx