
Today I am sharing a foldback gatefold card, with a belly band. I have used some brown and cream card, with a beautiful copper toned Centura Pearl from the Metallics pack. The video demonstration can be accessed by clicking the picture below (it's the first 45 minutes from the FB live).

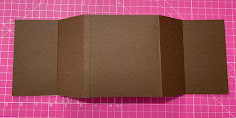
To make the card, I have used a piece of card 4 3/4" wide by 5 1/4" for the back, and two pieces 5 7/8" wide by 5 1/4" for the gatefold sides. These two pieces need to be scored at 3" from one end, and 3/8" from the other. This small end sticks around behind the back piece of the card.

The decorative pieces on the front are cut with Precious Marieke: Cuddling on the Farm - Wheat Border. You get one die for the flowers in the set, and I cut this out multiple times in the cream and coppper. I used a small circle punch to cut the centres out of the copper to put on the cream. It's a bit time-consuming - but well worth the effort.

For the inside, I have used the Chicken Wire Frame die set from the same collection. The main die cuts out the frame, and leaves you with a decorative piece which I have cut in half and used on the inner panels. I cut it in copper too, and just used that central piece for layering. The other die that comes with the set was used to cut the cream pieces for the inner panels and the centre - a place for your sentiment.

For the belly band, I used a piece of card that was the length of an A4 sheet, and 1" wide. This was scored at 2 3/4" from each end. When folded, the ends don't quite meet so you need to fix a small piece of card behind this. I put this at the front of the belly band as it would be concealed by the bow. Use red liner tape to fix your ribbon to the card.


Slide this over your card to keep it shut.
Thanks for popping by, and I hope I have given you a little inspiration. Feel free to follow me here on my blog, or on FaceBook, Twitter, Instagram or Pinterest. For all the videos, pop over to the Hixxy Studio YouTube channel to subscribe. And FB lives are streamed on both the YouTube channel and the Hixxy Crafts FB page. The main items I use can be found on the Hixxy Crafts website - have a look under the Hixxy Studio tab.
Happy crafting!!
Cxxx
No comments:
Post a Comment
Thank you so much for visiting my blog and leaving a comment!! I really appreciate it!! Cxx