About Me

My photo
I'm a retired primary school teacher, who started paper crafting in 2008, when I had a fancy to make my own Christmas cards. Since then, I have tried all sorts of techniques and styles - and I kind of like them all. I have been lucky enough to be on blog teams and large design teams and to do a bit of freelance demonstrating - and I love the challenge of working with different products. My crafting style is very varied - from junk journaling and art journaling, bookbinding and journal making, to quilting and patchwork - and of course I still make cards. This variety keeps me interested - and my crafty stash growing!! I'm always seeking inspiration for new projects.
Showing posts with label #vintage. Show all posts

Monday, 26 October 2020

Vintage Verity Rose

It's the second week of our U and V challenge at Use Your Craft Stash. Here's my V card. I have used two old Crafter's Companion CDs - Verity Rose, from which I took the topper and coloured papers, and Vintage Floral from which I took the darker paper and postcards.


The paper from the Vintage Floral CD was printed onto Kraft card, to give it a more vintage look.

We look forward to seeing your creations with your old stash.
Happy crafting,
Cxxx

Monday, 12 October 2020

Times Gone By Tag

It's the second week of our S & T challenge over at Use Your Craft Stash. My "T" project is a Triple Tag with a "To You" sentiment, using Crafter's Companion Times Gone By CD for the papers, with a bit of Teabag folding and some Twine. There are trains, timepieces and top hats on the papers but you can't really see them - so I won't count those ones.


There's a real vintage theme to the CD, so I printed the papers onto Kraft card, and cut the tags using Sheena's Contemporary Tag dies (the 3 largest).  The sentiment was cut using Diamond Press Block Alpha, and the Twine is from Sara Signature Rustic Wedding collection. The wooden corners have been in my stash for so long I have no recollection of where I got them, and the embellishments are beads from broken bracelet.

Remember to share your makes with us!!
Happy crafting,
Cxxxx

Tuesday, 27 November 2018

Vintage Cheeseboard

I had great fun with these lovely little MDF cheeseboards, making samples for the launch of the Imagination Crafts One Day Special on Hochanda on Thursday.
For this one, I used Clotted Cream and Antique Pink Starlights to paint the cheeseboard, then added rice paper over the top (design 448).  Over the top of the paper, I added some crackle effects with Crackled Feather stencil and Antique Pink Starlight. The large keys are Magi Cutz, and I coloured them with a mixture of Rustique Rusty Patina mixed with Black Gesso. On top of this I added a little Verdigris and Cafe Creme Rusty Patinas. I did the same with the edge of the cheeseboard. To finish, I added a little ribbon. 

Will hopefully be back later to share another sample.
Cxxx

Monday, 26 November 2018

Feather Bag

Here's another of my samples for the Imagination Crafts Vintage One Day Special, launching on Thursday at 6pm.

This is another one using the Feather stencil - this time to decorate a canvas bag.
I used ordinary masking tape to create the borders, and painted the background with Clotted Cream and Sand Starlights. I then used the Feather stencil to create all the detail with Zinober Gold, Topaz and Passion Flower.  There really isn't anything else too it, other than edging along the masking tape with Topaz to create an outline. Then I just removed the tape!!

Don't forget to tune in to Hochanda on Thursday at 6pm and 8pm.
Cxx


Vintage Charm

So, this week sees another great One Day Special from Imagination Crafts. The theme this time is Vintage!! As ever, there are gorgeous Rice Paper and Stencils, alongside Starlights, Rusty Patinas and Shabby Chic Relief Pastes.
This is one of the 10x12 Canvases cut in half and painted first with White Gesso and Green Starlight paints, then sprayed with Blue, Green and Orange Mix Media Sprays. Have to say that the Orange Spray got a little lost in the strong blue and green pigments. I then added a piece of rice paper (design 407) over the top, which adds more interest to the background. 

I used Zinober Gold Starlight paint through the new Feather stencil that MJ shared on her FB live last night, and then Ruby Gold Sparkle Medium, slightly offset to create a drop shadow. The postmark was added in the same way. The script is from the same stencil,with Linen Shabby Chic Relief Paste. And finally, the "Dream" word is one of the Magi-Cutz with Zinober Gold Starlight and Ruby Gold Sparkle Medium.

The ODS launches on Hochanda at 6pm Thursday - make sure you tune in!!
Cxxx 

Wednesday, 31 October 2018

Pack your case!!

... although you really won't get much in this little one!  I've got a thing for little boxes and cases - and have had this (and a few more like it) in my stash for a while. Friday is the day when Sue is back on your screens for the One Day Special on Hochanda at 6pm. 


The case itself needed a couple of layers of gesso before I could start, so the pattern didn't show through the paint and rice paper. Once that was dry, I covered the whole thing with Clotted Cream Starlight paints. Then most of it was covered with rice paper. 


I added a bit of texture with Malahit Relief Paste and Sage Shabby Chic Relief Paste through a stencil. Inca Gold and Peridot (Green) Alchemy wax were used sparingly to add more colour around the edges.

The tag is made from rice paper stuck onto card, and the little "buttons" are from the same piece of card, sprayed with red and cut with a punch.

I will be back tomorrow with another sample to share with you.

Cxxxx

Tuesday, 30 October 2018

Oooo la la!!

A little Parisian charm is coming to your screens on Friday in the form of some great Imagination Crafts goodies. There are Parisian themed rice papers, stencils and Magi-Cutz alongside all the greats like Starlights, Texture Paste, Relief Paste and Alchemy Waxes.


For this, I cut a 10x12 canvas in half, and painted the background with white gesso and Banana Yellow, Silver Gold and Mediterranean Sky Starlights.  The texture on the left is some ric-rac and Artsy Stones that I stuck on before painting.

The "Paris" word is from one of the rice papers, and I used several of the stencils to create the script and other texture using black gesso and Platinum Relief Paste. The Eiffel Tower and the stamp are Magi Cutz.

Sue will be on your screens on Friday at 6pm for the launch of the One Day Special, and again at 8pm. She will then be back at 9am, 1pm and 5pm on Saturday.

I have more samples to share with you over the next few days - so I will be back!!
Take Care
Cxxxx

Wednesday, 10 October 2018

Vintage Mirror

Mandy-Jane is back on your screens in under an hour with more of the Imagination Crafts goodies. I spotted my mirror on display in the earlier show, so thought I should share it.

Back in the days of Sheena's Paint Fusion, I bought enough of those black Ikea mirrors to last me a lifetime! I still have a good half dozen in my box. So, I thought I would use one for another of my samples.
I didn't take many photos of this one - so no real step by step to show, but I can explain what I did.

I painted the whole mirror first with White Gesso, then again with Mediterranean Sky Starlight mixed with the gesso.

I then dry brushed some Silver Gold and Dark Orchid Starlights over the top to add a distressed, aged look. The little girl is from one of the A3 Rice Papers on the show, with Champagne Sparkle Medium stenciled over and some Versafine Vintage Sepia stamped around. I also added Magi-Cutz Flourishes and Artsy Stones.
Make sure you tune in at 4pm to see the show.
Cxxx

Journal Cover

Am back with another sample made for Mandy-Jane's shows today at 12pm and 4pm. This time I have taken one of the Journals and altered the back and front covers.
I forgot to take the step by step photos for this - but I can hopefully remember what I did. So, firstly, I remove the front and back cover by gently prying apart the binder. I did take photos of this so I would have a guide as to how to put them back on - but you don't need to see them.
The next step I did was to decide on the rice papers for the covers - these are the insides of both the front and back.
And these were for the front and back - although at the last minute I swapped them over! 

I mixed Bright Maroon Starlight paint with White Gesso, and painted both the inside and outside of both covers. I added the rice papers to each part.

For the inside, I used the Swirls stencils firstly with Black Starlight, and then with Platinum Texture Paste. 


For the outside, I used the Inky Script stencil with the Linen Shabby Chic Relief Paste. 

I finished by adding some Diamond Starlight Wax around the edges before returning the covers to the pages.
Cxxx

Wednesday, 19 September 2018

Wooden Heart

Here's something that's really quick to make - and looks so effective. I picked up the wooden heart for a couple of pounds in The Range, and the letter tag in Hobbycraft for a quid.
I used Rice Paper 418 as it provided a nice background with no focal image.
I turned the paper over, drew around the heart and then used water to outline it, so I could tear the heart shape out. This was then stuck onto the heart. 
I covered the wooden letter tag with Rich Gold Starlight, using a stencil brush.
I applied Chocolate Shabby Chic Texture Paste through the Inky Script stencil.
And also added it to a paper rose.
Flat backed pearls were added to the tag.... 

... and the heart.
And finally the tag and the flower were attached to the heart. As I said, not overly complicated - but very effective. 

Cxxxx

Thursday, 31 May 2018

Happy Birthday!

This card was for my husband's birthday. I used Hunkydory's Flight of the Butterflies - Rustic Charm. 
I used Kraft card for matting and layering, and a bit of twine with a button for decoration. The lettering is cut using Crafter's Companion Essentials alphabet dies.
Cxxx

Wednesday, 17 May 2017

A bit of Shabby Chic

Morning! Thought it was time I gave a bit more attention to my blog!! So, today I have a card made using Sara Signature Shabby Chic collection.


The base of this one is Kraft card, and I used the Antique Edge die from the collection to create the front. I also used Filigree Flourish and Aged Rose (edged with a little Vintage Photo Distress Ink) - and the little backing for the flower is from the Weathered Window die set.

The papers are from the Shabby Chic 6x6 paper pad, and I added some flat backed pearls and pearl trim for embellishment.

Cxxxx


Thursday, 2 March 2017

It's nearly gone!!

Not much left of the Weekday Wonder - so just popped on to share another card with you. This one is a centre stepper card, made using Centura Pearl Fresh Whtie double sided card. The papers are from the 6x6 pad, and I embossed more of the Centura Pearl with the Delicate Lace folder.


I also used lots of the lovely dies - Filigree Flourish, Classic Lily, Chic Butterfly and Weathered Window. The sentiment and banner are from the Cherished Moments stamp and die set. I finished it off with some pearl embellishments and Baker's Twine.

Cxxx

Monday, 27 February 2017

Exciting!!!

Just a couple pf hours to go before the launch of Sara's Shabby Chic Collection. This one is a little clutch bag, that could be used for a gift card or money! It's from the Ult Cards CD - I just didn't add the handle.

The base is embossed with the Rose Garden folder from the collection and inked with Vintage Photo Distress Ink. The papers are from the 6x6 pack, and I used the Antique Edge, Filigree Flourish and Aged Rose dies - with lots of distressed edges and Vintage Photo Distress Ink.


I also used the papers on the inside - and added a Velcro fastener to keep the bag closed. 

Cxxx

Sunday, 26 February 2017

Shabby Chic Picture


Morning!! Just a quick post as I'm off shortly for a day's Mixed Media workshops with the amazing Finnabair!! Super excited!!


Anyway, this is a picture frame I made using the Shabby Chic collection from Sara Davies.


The frame is just as I bought it (from the Range) - as I thought the distressed colour was perfect. I used paper from the 6x6 paper pad for the background, including fussy cutting the flowers used in the top right corner!

I used a combination of Kraft and papers to cut with the Chic Butterflies, Classic Lily, Antique Edge and Aged Rose dies- with lots of Gathered Twigs Distress Ink. The little corner pieces are from the Weathered Wood die. I also used the Cherished Memories Stamp and Die set for the sentiment. A little bit of garden twine and co-ordinating Baker's Twine - along with Linen Script Ribbon from the collection - finished it all off.

Enjoy your day!! 

Cxxx

Saturday, 25 February 2017

Shabby Chic Tag Card

Morning!! Have another Shabby Chic sample to share today!! This one is a tag shaped Kraft card cut with Die'sire Create a Card Base Die - Stacey, which I embossed with the Rose Garden folder, and inked with Gathered Twigs Distress Ink.


The pink papers (all inked with Tattered Rose Distress Ink) are from the 6x6 paper pad, as are the black flourish and pieces behind the window. The window is the Weathered Window die from the collection, and I also used the Chic Butterflies dies and the Filigree flourish. 

The sentiment and the banner it is on are both from the Cherished Memories stamp and die set. I've also used a bit of lace from the Lace Ribbon pack, with some little pearl embellishments.

Keep an eye out for more Shabby Chic samples. 

Cxxxx

Friday, 24 February 2017

Shabby Chic is on its way!!!

Afternoon, I'm a bit late to the party, but here's my first sneak peek!! Next Monday - 27th February - sees the long awaited launch of Sara Davies' new Shabby Chic Signature collection!! It's a fabulous range of papers, dies, embossing folders and accessories!


This side stepper is made from Cream Linen card, and uses papers from the 6x6 pad along with the Antique Edge, Aged Rose and Filigree Flourish dies. The little image is cut using Die'sire Essentials Circles dies from one of the papers - as is the wording on the tag. I distressed the edges of the papers with my Tim Holtz Distress tool, and inked with Bundled Sage and Victorian Velvet Distress Inks.

Cxxxx

Tuesday, 23 August 2016

Getting Organised!!

Hardly seems like the Summer has begun - and yet it's only a week and a bit until term starts again. Am beginning to think of what I need to make sure I have for school - a trip to Staples is on the cards. And I need to get organised with other things in my life - like receipts and the like. And all the inspiration I've collected for art journalling. So I think I might need to make myself a couple of these organisers from Crafter's Companion Big Score.
I made this one a while ago with card from the Below Stairs Downton Abbey A3 pack. They look so complicated - but it's actually really easy to make. All the instructions are on the Big Score DVD.


Cxxx 

Wednesday, 6 July 2016

Wine Time!!

Evening!! Just popped on to share this wine box I made using the gorgeous Downton Abbey Below Stairs A3 Printed Card.
All the instructions for constructing the box are on the Big Score CD. I embossed the card for matting with the Downton Abbey Thistle folder, and embellished with Downton Abbey Icons and Opulent Corners. 

Back soon,
Cxxx

Wednesday, 16 March 2016

Day 76 - True Blue!!

Evening all!! Well, after setting up the AquaTints yesterday, I created a few different backgrounds. And I used one of them to create the card that is today's image.
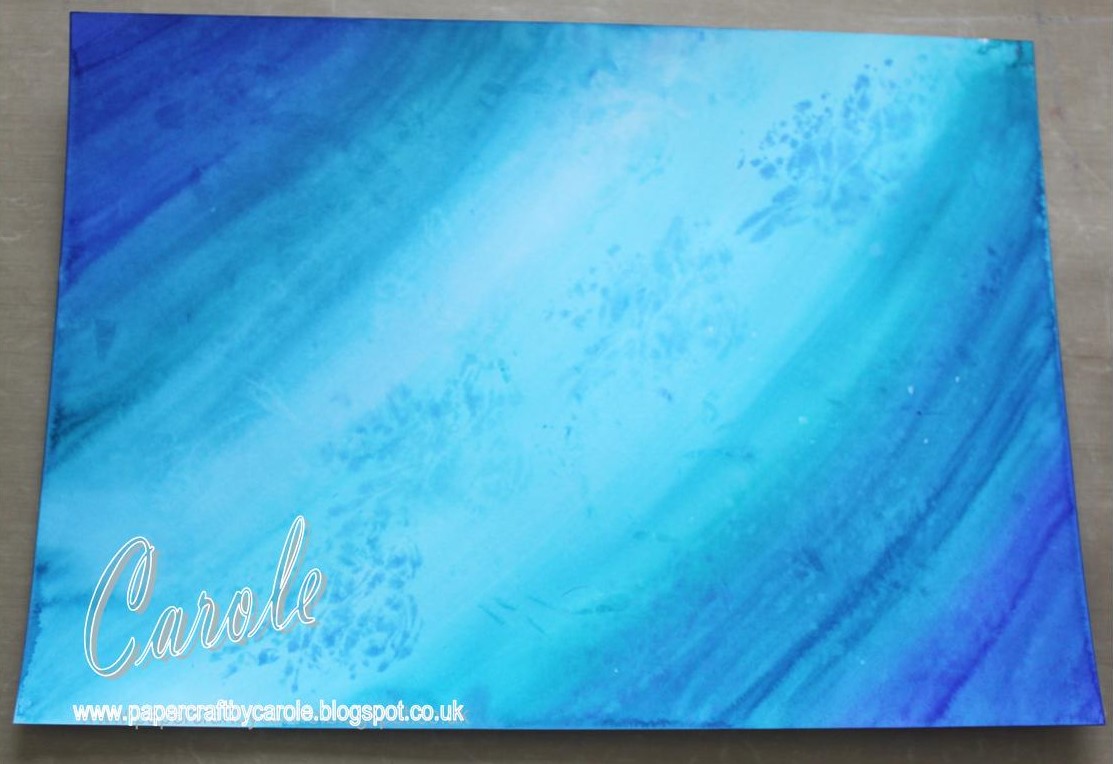
This started life as this:
I used Sheena White Stamping card and three AquaTints: 02 from Perfectly Primary, 03 from Landscape, and 05 from Pretty Pastels, and attempted the clingfilm technique. Have to say it wasn't overly successful - but you can sort of see it in the middle.

This colour made me think of using the Textures Elements Waves folder, so I ran it through my machine.
I then randombly dabbed a little glycerin into the debossed areas with a paintbrush - just enough to hold some Stampendous Shabby Blue Frantage while I embossed it from underneath.
I then cut it down to 8x8 size to fit on a card front .....
... and inked the edges with Salty Ocean and Blueprint Sketch Distress Inks.
It needed something more so I inked the edges with Black Soot Distress Ink, and also went over the embossing with it too.
And (it doesn't really show in the photo) I then went over with Pebeo Empire Gold Gilding Wax.
To create the card, I took some cheap brown paper flowers (think they were Poundland), and used Gesso and Aquatints to colour them, before adding some gilding wax.
The words are from Textures Elements stamps - Words to Inspire 1. I did not mount the stamps on a block but inked them with Blueprint Sketch on my craft mat, leaving on any ink that hit the sides. This helped to provide an edging to the word when I pressed them onto the card.
I cut a square out of the centre of the embossed background, mounted it, and slightly offset it to create a bit of height in the middle.

The colours in the final photo look a little different - I think it's because I photographed it against a white background, while the rest were taken with my craft mat as the background.

Hopefully in the coming days, I will make up some of the other backgrounds into cards and share them.
Cxxx