A break from the Christmas makes!! Today's share is an A5 art journal page created on Daler Rowney Mixed Media Paper. Click on the pictures to see the YouTube video of my process.
My place to share my makes, thoughts and general musings!! Mostly on crafting things - but occasionally on others!!
About Me
- Papercraft By Carole
- I'm a retired primary school teacher, who started paper crafting in 2008, when I had a fancy to make my own Christmas cards. Since then, I have tried all sorts of techniques and styles - and I kind of like them all. I have been lucky enough to be on blog teams and large design teams and to do a bit of freelance demonstrating - and I love the challenge of working with different products. My crafting style is very varied - from junk journaling and art journaling, bookbinding and journal making, to quilting and patchwork - and of course I still make cards. This variety keeps me interested - and my crafty stash growing!! I'm always seeking inspiration for new projects.
Friday, 16 December 2022
Create Art - Inspire - Art Journal Page
Friday, 13 May 2022
Aperture Card
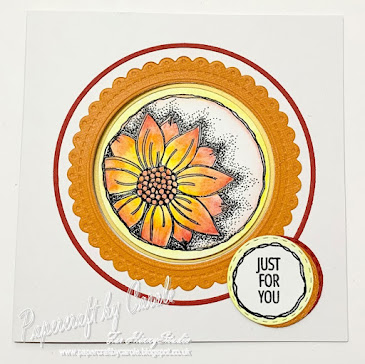
This is a little aperture card created using Julie Hickey Designs Floral Buttons Stamp set and Dinky Circles die set. I coloured the image with Faber Castell Goldfaber Aqua pencils.
Click on the picture to see the video demonstration.
Tuesday, 26 April 2022
Earth Laughs In Flowers
Today I am sharing a Journal page, created using Julie Hickey Designs Dinky Circles die set, Sweet Pea die set, and stamps from Daisy Blooms and Garden Blooms. I made it to fit my TN, which I created a while ago. Click on the picture below to go to the video demonstration.
I used watercolour card with Salvaged Patina, Cracked Pistachio, Kitsch Flamingo and Squeezed Lemonade Distress Oxides.
I used the flower from the Dinky Circles die set to create a stencil, which I inked through, and I also used the little stamp from Daisy Blooms too. To create the feeling of the flowers having foliage, I stamped the focal stamp from both the Daisy Blooms and the Garden Blooms sets onto the card, with Cracked Pistachio. It doesn't stamp particularly well as the card is textured, but it gives enough of an impression that I was able to then paint the leaves with the ink.
I used more watercolour card to mop up the ink from when I made the background, and then die cut this for the flowers and for the letters.
Thanks for popping by, and I hope I have given you a little inspiration. Feel free to follow me here on my blog, or on FaceBook, Twitter, Instagram or Pinterest. For lots of video demonstrations, pop over to the Hixxy Studio YouTube channel to subscribe. The main items I use can be found on the Hixxy Crafts website - have a look under the Hixxy Studio tab.
Tuesday, 12 April 2022
Kraft and White
Today's share is a simple Kraft card and white embossed creation, using Julie Hickey Designs Daisy Blooms stamp set. The background card is using the small stamps from the set, and I used a gel pen to draw the corner lines. I painted the daisies with Frozen Pearl Pixie Sparkle Highlights, mixed with water. Click on the picture to see the video demonstration.
Thanks for popping by, and I hope I have given you a little inspiration. Feel free to follow me here on my blog, or on FaceBook, Twitter, Instagram or Pinterest. For lots of video demonstrations, pop over to the Hixxy Studio YouTube channel to subscribe. The main items I use can be found on the Hixxy Crafts website - have a look under the Hixxy Studio tab.
Friday, 8 April 2022
Dinky Circles
Today's share uses the Dinky Circle dies from Julie Hickey Designs. The flower is from the set, and I used Craft Artist - Flower Forming Foam - Pink and Purple. The sentiment is from the Floral Buttons set, and I used Crafter's Companion Stitched Circles to cut it out. Click on the picture to take you to the video demonstration.
Thanks for popping by, and I hope I have given you a little inspiration. Feel free to follow me here on my blog, or on FaceBook, Twitter, Instagram or Pinterest. For lots of video demonstrations, pop over to the Hixxy Studio YouTube channel to subscribe. The main items I use can be found on the Hixxy Crafts website - have a look under the Hixxy Studio tab.
Wednesday, 6 April 2022
Circles Everywhere!!
Today's share is a card made using some lovely Julie Hickey Designs products. The stamps are Floral Buttons, and I have also used the Dinky Circles die set.
The button stamps themselves are cut by hand and not with dies, as this follows the free-hand way in which they are drawn. The mats and layers are using one of the Dinky Circles.
For the background, I used Scattered Straw, Bundled Sage and Weathered Wood Distress Oxides and Oxide Sprays, along with the the tiny stamps from the set, and a stencil I made using the flower from the Dinky Circles.
Thanks for popping by, and I hope I have given you a little inspiration. Feel free to follow me here on my blog, or on FaceBook, Twitter, Instagram or Pinterest. For lots of video demonstrations, pop over to the Hixxy Studio YouTube channel to subscribe. The main items I use can be found on the Hixxy Crafts website - have a look under the Hixxy Studio tab.
Sunday, 3 April 2022
Happy Easter!!
The penultimate of my Easter offerings today. This one uses the Sweet Pea Alphabet sets from Julie Hickey Designs, and Karen Burniston's Easter Charms. I haven't used the dies as charms, but instead added them to my take on a floating card.
I have used the colours that I love in Spring - yellows and greens!! One of the beds in my garden right now is just that - all yellows and greens!! Click on the picture to see the video demonstration.
Sunday, 27 March 2022
Petal Fold Card
Good morning! I have a lovely little petal fold card to share today. I got the idea from Beccy's Place, and have followed the same sizes as she used. Pop on over to see how to make the base.
Friday, 25 March 2022
Spring Foliage Card
Hello. Have a quick share today. This is an 8x8 card made using a combination of Creative Expressions Forget-Me-Not frame 3D Embossing Folder, and Julie Hickey Designs Floral Foliage Stamps.
I used white embossing powder with the stamp, as I didn't want a "hard line".
I used Faber-Castell Goldfaber watercolour pencils (tin of 12) to colour the foliage, and Lucky Clover and Twisted Citron Distress Oxides to ink the edges of the frame.
The lettering is Julie Hickey Designs Sweet Pea Alphabet.
Friday, 18 March 2022
Fern Card
Sunday, 13 March 2022
Flower Pot Card
Today I have a flower pot card to share. I have used the Floral Fantasy and Floral Foliage stamp sets from Julie Hickey Designs.
The card base is Kraft - 5" x the length of A4, scored in half (5 7/8"). And another piece for the top of the flower pot - 5" x 2 1/2".
On the base card, mark 1/2" from each edge, at the bottom. Cut from the top (the fold) to these marks to create the shape of the pot.
I cut decorative paper to fit over both pieces of card, and stamped the foliage onto the paper, so that it would show beneath the flowers. I coloured the foliage with Peeled Paint and Forest Moss Distress Oxides. The flowers were stamped three times onto stamping card, and coloured with Scattered Straw, Fossilized Amber and Mustard Seed.
Happy crafting,
Cxxx
Saturday, 12 March 2022
Sparkly Pocket Card
Score at 2 3/8" from one end, and 3/4" and 5" from the other end. Also, score along the 1/2" line in the place where the flap will be - as shown below.
Cut off the bottom, along the 1/2" line, leaving the tab, then fold and burnish all the scored lines.
I stamped the main image from the Floral Fantasy set onto stamping card with Versafine Clair - Nocturne, and embossing with clear powder. I used Cosmic Shimmer Pearlescent Watercolour inks to colour: Ray of Sunshine, Golden Sunrise, Flamingo Pink, Fiery Sunset, Holly Green and Turquoise. I also used Juicy Orange and Peacock Teal - both of which are not pearlescent.
The stamp on the front is from the Floral Fantasy set - designed to fit in that little aperture. The Happy Mother's Day comes from Julie Hickey's Everyday Sentiment stamps and the lettering is Julie Hickey's Sweet Pea Alphabet set.
Happy crafting,
Cxxx
Thursday, 10 March 2022
Floral Easel Card
Hello! Today I have an easel card to share, using Julie Hickey Designs Floral Fantasy and Floral Foliage stamps. This would make a great card for Mother's Day. Click on the picture for the video link. I must apologise, as this one was a bit rushed on the live, and not totally completed. Hopefully, there is enough information both there and here combined.
The base of the card is made from a piece of purple card, 4 3/4" wide x length of A4. It is scored at 5 7/8" and 2 7/8". Before folding and burnishing, you need to cut a rectangular aperture. I used a 4" x 5" rectangle die - but you could cut it by hand if you need to. This is cut in the end with the score line.
I also cut three frames - each uses a piece of card 5 7/8" x 4 3/4", and I used the same rectangle die.
For the flowers, I stamped three of each and used Squeezed Lemonade, Ripe Persimmon, Picked Raspberry and Seedless Preserves Distress Oxides to colour them in.
I stamped one of the images from the Floral Foliage set. These are almost impossible to cut out as a whole piece, but I cut it into individual leaves to tuck in amongst the flowers. I coloured these with Twisted Citron and Mowed Lawn Distress Inks.
The sentiment stamp is from the Fantasy Floral set, and I cut the letters using Julie Hickey's Sweet Pea Alphabet set. You need to cut two sets, so that you can cover up the glue on the back. Do the same for whatever you stick the sentiment on.
The piece of acetate that is on double sided sticky, needs to be attached to a piece of white card. You can do this either before or after you stick the card to the base of the easel. One of the frames then goes over the top of this to hide the edges. The other two frames are used to sandwich the other piece of acetate, which is attached to the top of the easel.
Happy crafting,
Cxxx
Wednesday, 9 March 2022
Dial Card
Hello! Today's make is a Dial Card - well, that's what I am calling it as an not sure it has a name. Anyway, this is from my Hixxy Studio FB live from last Friday, and you can see the video demo by clicking on the largest of the photos. I had a little brain fog during the demos, so will hopefully clear up any confusion that may result!
So, I have called it a Dial Card, as you can turn the circle, like a dial, revealing the different parts of the sentiment.
Happy crafting,
Cxxx