About Me

My photo
I'm a retired primary school teacher, who started paper crafting in 2008, when I had a fancy to make my own Christmas cards. Since then, I have tried all sorts of techniques and styles - and I kind of like them all. I have been lucky enough to be on blog teams and large design teams and to do a bit of freelance demonstrating - and I love the challenge of working with different products. My crafting style is very varied - from junk journaling and art journaling, bookbinding and journal making, to quilting and patchwork - and of course I still make cards. This variety keeps me interested - and my crafty stash growing!! I'm always seeking inspiration for new projects.
Showing posts with label #spectrumnoir. Show all posts

Tuesday, 29 March 2022

Happy Dog!

Today I have a couple of projects using Crafty Individual's Happy Dog stamp. Click on the photos of the finished samples to take you to the Hixxy Studio YouTube Channel, and the video demos of each.


For the card, I used Spectrum Noir Harmony Water Reactive Inks - the Cool Neutrals and Dusky Shades 3-packs, and Smoked Pearl to create a background. I used elements from AALL & Create's "Deep Focus" for the stamping.


The image is stamped with Spectrum Noir Finesse Waterproof Ink in Flagstone. I coloured it with the same inks as above, mixed with a little Frosted Pearl Pixie Sparkle Highlights.


For the plaque, I painted the image with Speckled Egg, Broken China, Pumice Stone and Ground Espresso Distress Oxides. The paper is from a Crafter's Companion Nature's Garden Forest Friends 12x12 pad. 


Thanks for popping by, and I hope I have given you a little inspiration. Feel free to follow me here on my blog, or on FaceBookTwitterInstagram or Pinterest. For lots of video demonstrations, pop over to the Hixxy Studio YouTube channel to subscribe. The main items I use can be found on the Hixxy Crafts website - have a look under the Hixxy Studio tab.

Happy crafting,

Cxx

Wednesday, 23 December 2020

The last of the Christmas Cards

These are the final two cards to share from my Christmas makes. They were batch made for my groups of friends, using my lovely new Tim Holtz Stamping Platform.

The first is a Crafter's Companion stamp called Floral Festivities. I stamped it with Crafter's Companion Harmony Waterproof Ink in Pebble, and used the Spectrum Noir Crystal Clear Sparkle pen to "colour" it in. The base card is Centura Pearl Hint of Silver, and I used some gunmetal grey pearl card from my stash. 


I also embossed some plain white card with a very old A4 Crafter's Companion Snowflake folder, to create a layer with texture.

The other card uses the same materials, but the stamp is Papermania - Stockings.


I hope that all of you have a peaceful day, however you are spending it.
Happy Christmas,
Cxxx

Monday, 19 October 2020

Umbrellas ready!

We are starting a new fortnightly challenge at Use Your Craft Stash, and we are onto U and V. These letters at the end of the alphabet are getting a bit tricky. The only thing I could think of was Umbrella - and it reminded me of a card I made in June 2015 for the Scruffy Little Kitten launch. There was a image of a little girl with an umbrella, and a great sentiment from one of the stamp sets - called Rosie. I tried to follow my own instructions from that blog post but I seem to have omitted a few things. I am pretty sure that I didn't make it at A4 size - and when scoring the top of the card for sticking I must have done the back piece - and not the front. I realised both mistakes when I made them with this card!! Am still pretty happy with it - although it is rather large!


I used the same sentiment as before, from the Scruffy Little Kitten stamp set called Rosie, but this time used a Hobby House Topper from a Daisy Mae Draws Ready to Colour Art Book called Days of Summer. I coloured it with Spectrum Noir markers - BT4, 5, 9 for the umbrella, CT1, 2, 3, 4 for the wellies, OR1, 2, 3, for the flowers and LG1, 2, 3 for the leaves and grass. The base card is from Papermill, and the spotty card I bought from my local market.

Hopefully brollies won't be needed this week - although that might be optimistic!
Happy crafting,

Cxxxx

Monday, 3 August 2020

J is for Jasmine

So, we're half way through our I and J challenge over at Use Your Craft Stash on FB. I did "I" last week, so here's my J. A "Just for You" Jar of Jasmine, with Jewels - and a bit of Jade green thrown in for good measure.


I started with the jasmine flowers. I used Crafter's Companion White Flower Forming foam, with dies from Crafter's Companion Classiques Forget Me Knot, Pretty Petal (Crafter's Inspiration 6) and Flowers For All Occasions 2.


I used my Spectrum Aqua Jasmine pen to colour the centre of the flowers, and to colour the white stamens to match.


I embossed a piece of white stamping card with CC 3D Rose Bouquet folder - for the jar! I coloured the leaves with Spectrum Noir pens - LG5, JG1 and JG6 (JG= Jade green).  You can see my little swatch at the bottom of the card. I then mixed Imagination Crafts Alchemy Wax in Peridot, with a bit of water, and painted the stems and swirls.


I used the Jasmine Aqua pen to put a wash over all the flowers and the ribbon, and the Charcoal Aqua pen on the jar.


I painted over the jar with glossy accents to give it a more glassy appearance.


I then stuck the jasmine flowers over the roses on the folder, with leaves cut from a small die that came with the CC Advent calendar a few years ago. I finished it with a big bow and some green jewels!! 


We look forward to seeing all your makes!

Happy crafting.
Cxxx

Monday, 6 April 2020

Easter at Use Your Craft Stash

As many crafters know, we all build up a huge stash of things as we race to get the newest dies, paints, stamps, inks etc etc And we're all bad at using up our stash.  So, over at Use Your Craft Stash, our aim is to get people to do just that - use your craft stash. We have no prizes on offer, but will be setting a weekly theme. And this week is Easter.

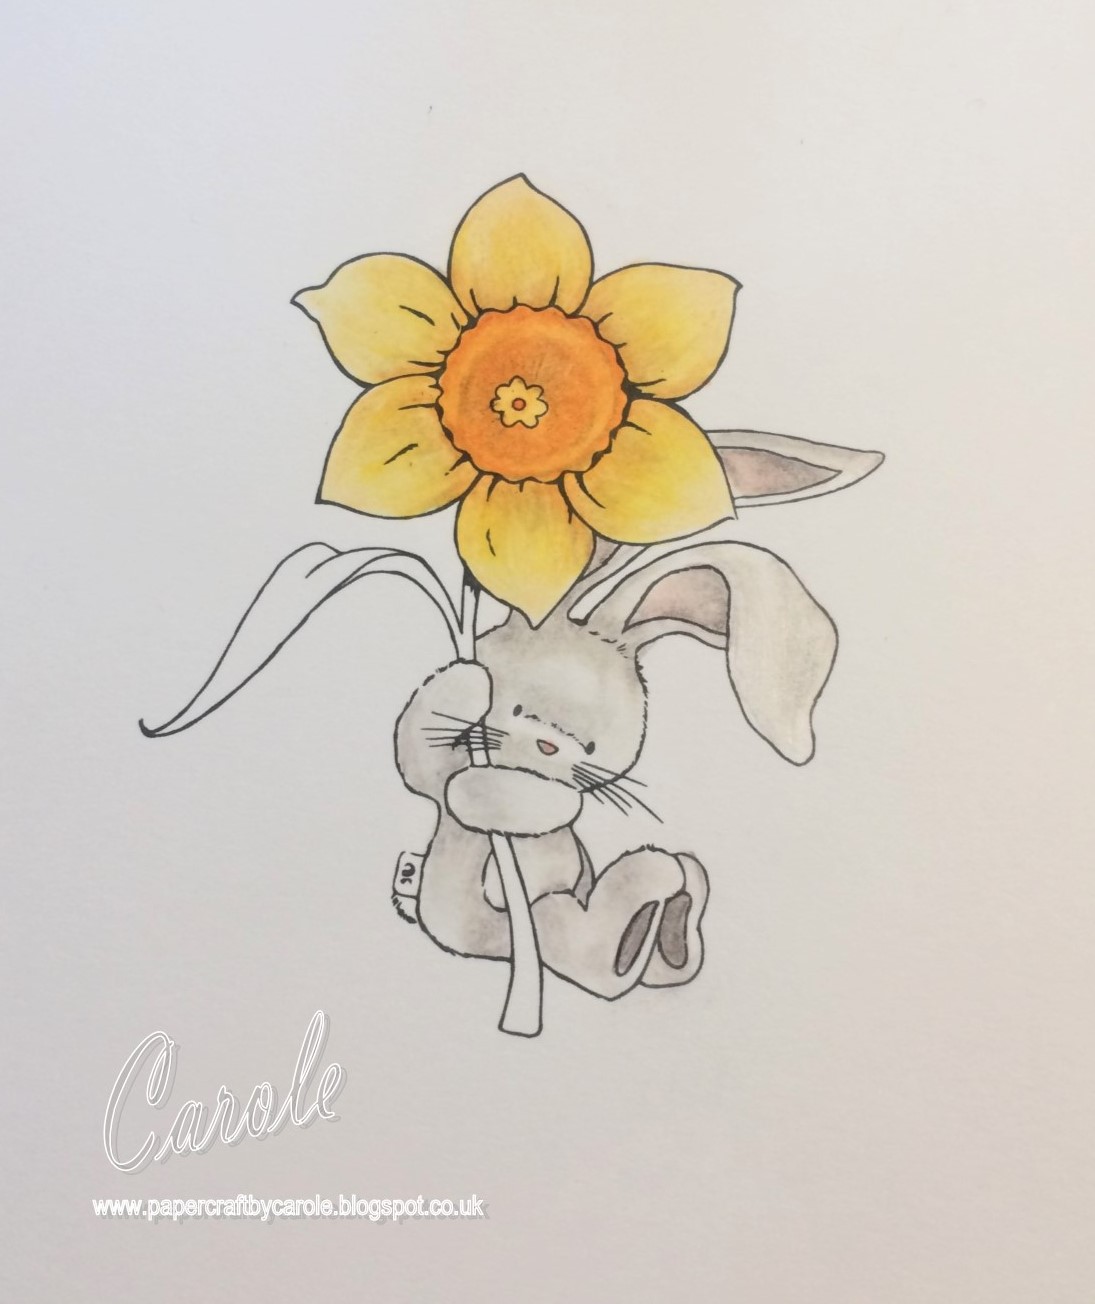
Now, I don't make Easter cards, so had to rack my brains to think what I had in my stash that would be suitable. And then it came to me - Bebunni!!  So, I had a look through and decided that Brighten My Day from Bebunni Floral would be a perfect choice. 

If you have seen my post from a few days ago, you will know I have a list of things in my stash that I want to get out and play with, and this seemed like the perfect time. So, instead of reaching for my watercolours, or my alcohol pens, I went for my Spectrum Noir ColourBlend Pencils.


As you can see, I have all the sets of pencils, along with the blending solution and paper stumps. I decided to restrict myself to just one set - the Essentials.

I started by colouring Bebunni, with White, Smoke, Taupe, Pewter, Black and Peach. 


And the Daffodil was coloured with Linen, Eggshell, Canary, Pumpkin, Nectarine and Pewter.


For the leaf I used Pistachio, Sage, Jade, Taupe and Black. I really like the blending solution to help get rid of the hard lines.


I decided that I needed to ground Bebunni, and used Smoke, Taupe, Pewter and Black. I then gathered all the papers - Core-dinations Brights Yellow and Green card, Papermania Yellow patterned paper (this has to be well over 10 years old), and I think the green stripe is also DoCrafts/Papermania. The Easter "words" card is another old one - and I really cannot remember where this came from.  I then dug out my XCut Egg des - these are the two smallest sizes, along with the paper strips that were for the Crafter's Companion Quilling dies.  


I also dug out some old embossing folders to add texture to the eggs. These are from Crafter's Companion - Verity Rose collection - Flutterby, Cupcake and Destiny.


And then I inked them with Mustard Seed and Lucky clover Distress Oxides.


The mats and layers were cut using another very old workhorse from my stash - Spellbinders Grand Scalloped Squares and Grand Squares, and also the Rectangles.


Even the ribbon has been around a while. You used to get packs with (I think) 4 ribbons wrapped around a piece of card. Not sure what make they were - but both of these were from packs like that. And of course, I used my trusty bow maker from Tattered Lace!! 

If you have craft stash to use, come and join us on FB at Use Your Craft Stash. You don't have to take part in the weekly themes if you don't want to, but get some inspiration and share your makes using your stash.  We look forward to seeing you.

In the meantime, take care and stay safe. 
Cxxx


Tuesday, 31 March 2020

When it goes wrong - put a butterfly on...

That old crafter's adage worked for me today - and saved me from feeling pretty rubbish about what I was attempting. This is what I produced, but it is so far from what I set out to do, that it's really quite laughable.


Let's rewind to just before lunch yesterday. I decided to make a list of all the things on my shelves, in my drawers and in my cupboards (and already I know I missed some things - gel press, mica powders...) that I really should play with, have a go with, experiment with. you get the idea.


And when lockdown had seemed imminent a couple of weeks ago, I ordered myself some journals from Pink Pig. The large one has watercolour card in - for an art journal, The next one is lined for jotting ideas and thoughts down. And the little one is for drawing and sketching - I went small with this one as I didn't want to be intimidated by a larger size.


The art journal was the one I wanted to start with, but I didn't really want to ruin other pages, so I cut a piece of mylar to sit behind the page and protect the rest (or that was the idea).
 

For the afternoon's dabble, I decided to have a play with the Spectrum Noir Sparkle Inks. I bought these with the intention of using them on my Christmas cards, and never did, so they have sat in the cupboard for a while.


I got all excited, googled for something different to try with watercolour based products, and found a lovely video clip which showed techniques using salt water, water with bleach, and clingfilm. Great, I thought. And got myself all set up, remembering to take photos for a step by step. And I used some low tack tape to divide the page into three - one for each of the things shown on the clip. So far, so good.


I started with the salt water. The idea was to put a wash of the salt water on the paper, then dot the ink on. I used Amethyst and Garnet from the Glitz and Glamour set. This was reasonably successful - but not quite as great as in the video.

I pushed on with the water with bleach in it. Same idea - make a wash with the water and then dot the ink on. This was supposed to give a much more feathery effect. This was what I got. Total fail.


At this point I was starting to get frustrated, but ploughed on with number 3 - the clingfilm. Plain water is put on the clingfilm, ink dotted on, and then applied to the paper. 


The result - a puddly mess that leaked onto the other two sides as well. Totally annoyed with myself by this point. Instead of a lovely page showing three techniques, it looked like a small child had been let loose on it (no offence to small children intended). So, I went over the whole lot with the salt water.


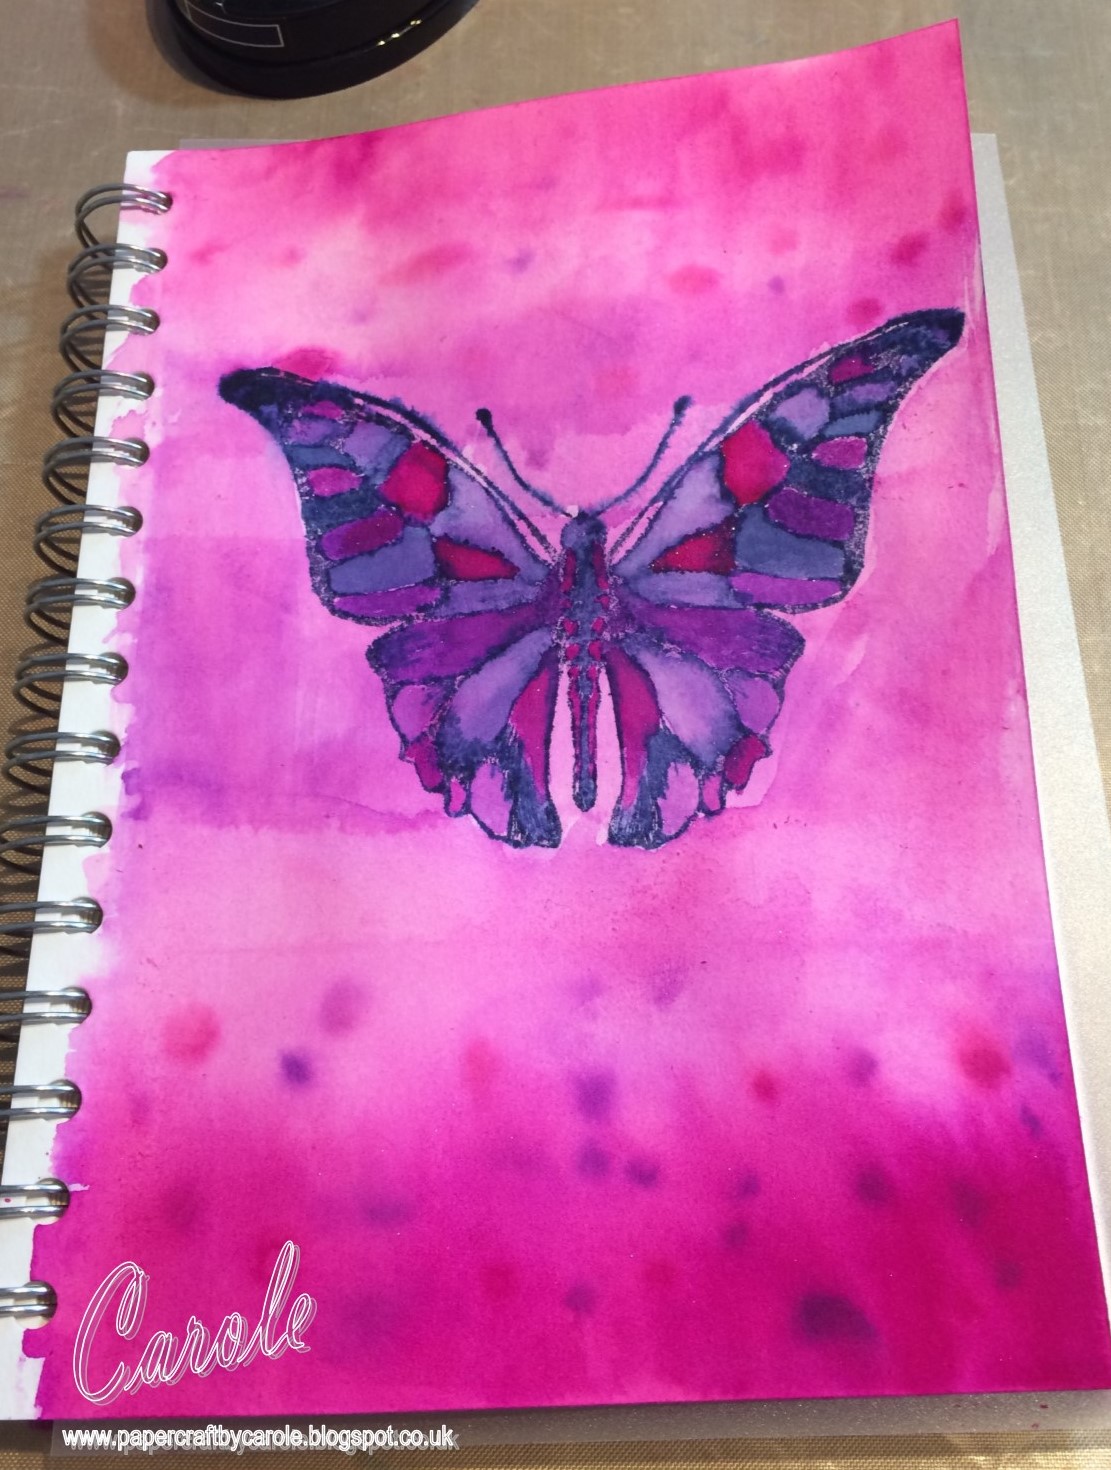
At this point, it was a case of what can I do to save this. So I dug out my Sara Signature Flutterby Collection (have pretty much all of this as I demo'd it not long after release), Harmony Water Reactive Inks - Plum Pudding, Winter Rose and Silent Night and Chipped Sapphire Distress Oxide.


At this point, photos kind of went by the wayside. I added more of the Pink Garnet Sparkle Ink at the top and bottom and stamped the Botanical Butterfly with Silent Night inkpad. I used water to spread some of the ink, and then filled in with Amethyst and Pink Garnet Sparkle inks. 


Have to say, it looks better on the above photo than I felt it did yesterday, so I watered down some white gesso and went over it to knock it back. And then I attempted to overstamp the butterfly with Memento - Nautical Blue.


To frame it, I used one of the Scripture stamps with the Winter Rose inkpad and two different stamps from the Textured Elements set with the Plum Pudding and Silent Night.


The sentiment is from the Fly Away set, and I edged the whole thing (tricky when it's spiral bound) with Chipped Sapphire Distress Oxide.


While this is is no way what I had intended when I started, it ended up OK. Oh, and it's almost impossible to keep the next pages clean in a book like this!! 

Lessons learned. Onwards and upwards!!

Take care and stay safe.


Cxxx